How do I connect to my workstation?
You will need to install some software to access your workstation.
Installing the Teradici Software Client
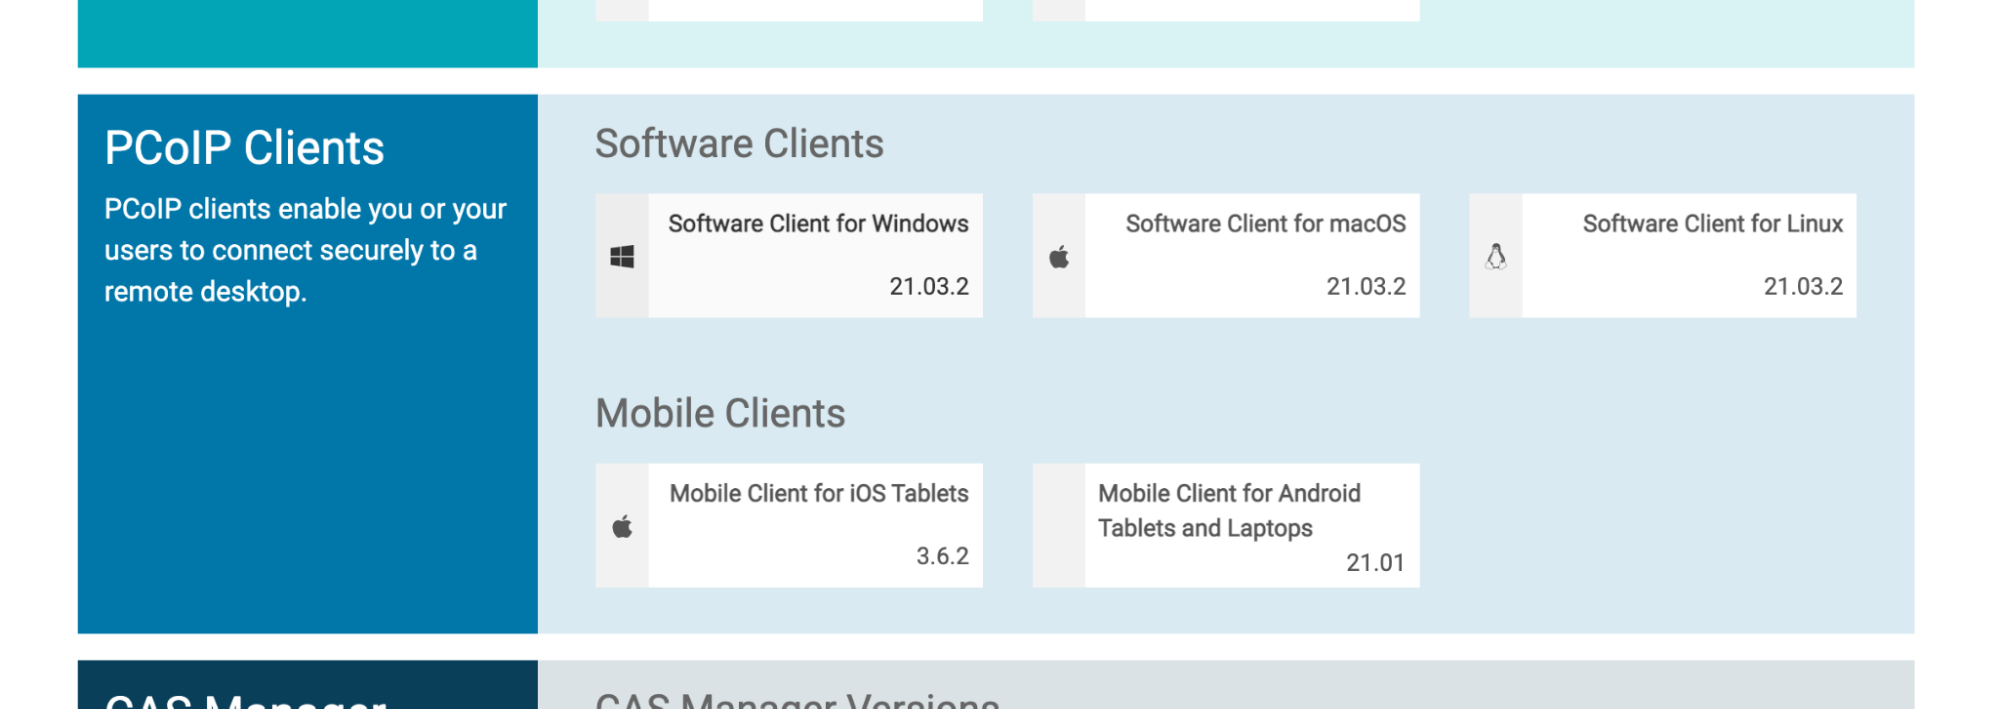
Click on the link below to download the PCoIP Software Client that is compatible with your operating system (available for Windows, macOS and Linux).
https://docs.teradici.com/find/product/cloud-access-software
IMPORTANT: Be sure to download the PCoIP Software Client as illustrated below and not the host or management software.
 <!–
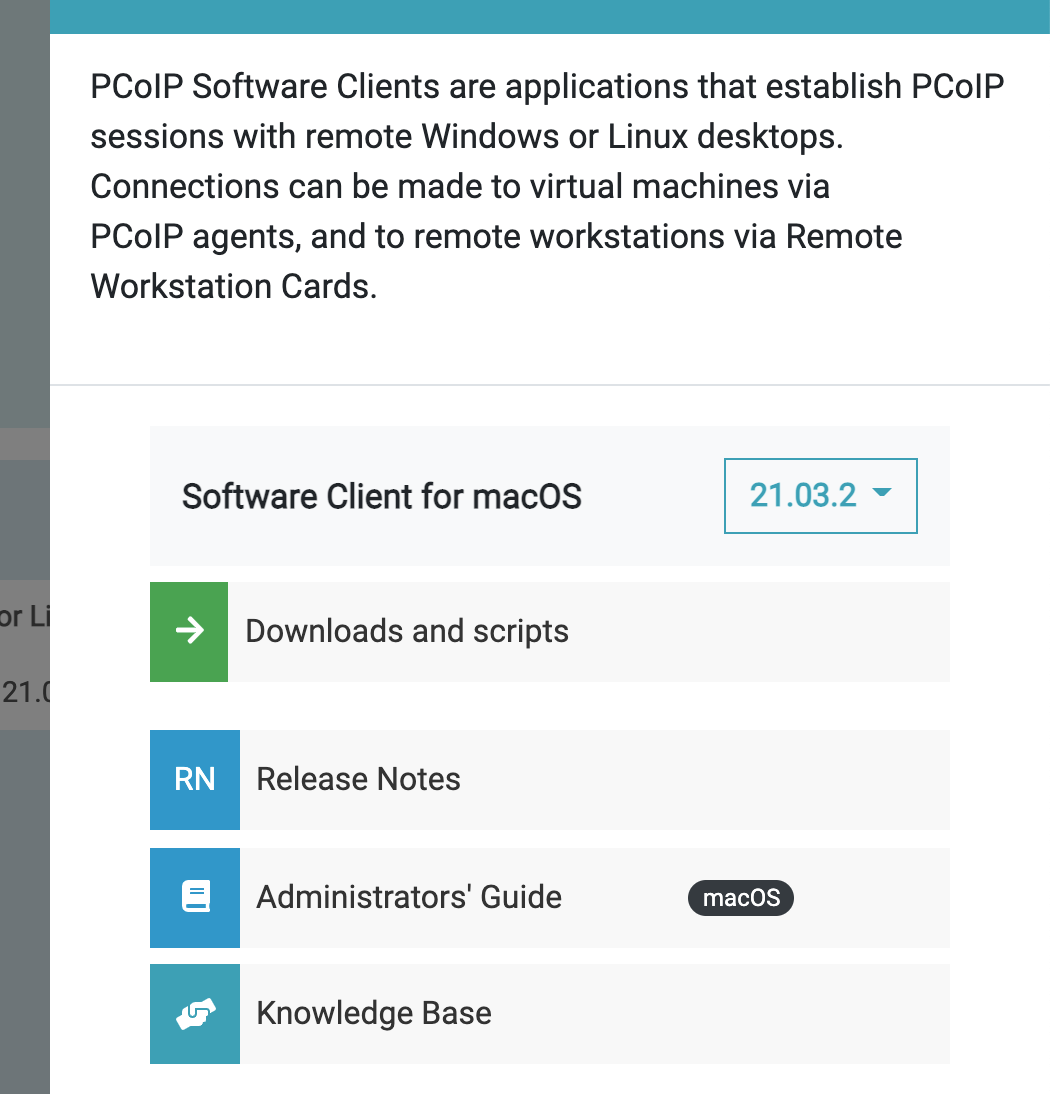
Once you have clicked on the Software Client for your operating system, You will be given the option to download different versions of the software. Please download the default Recommended for production version. Click the Downloads and scripts button.
<!–
Once you have clicked on the Software Client for your operating system, You will be given the option to download different versions of the software. Please download the default Recommended for production version. Click the Downloads and scripts button.
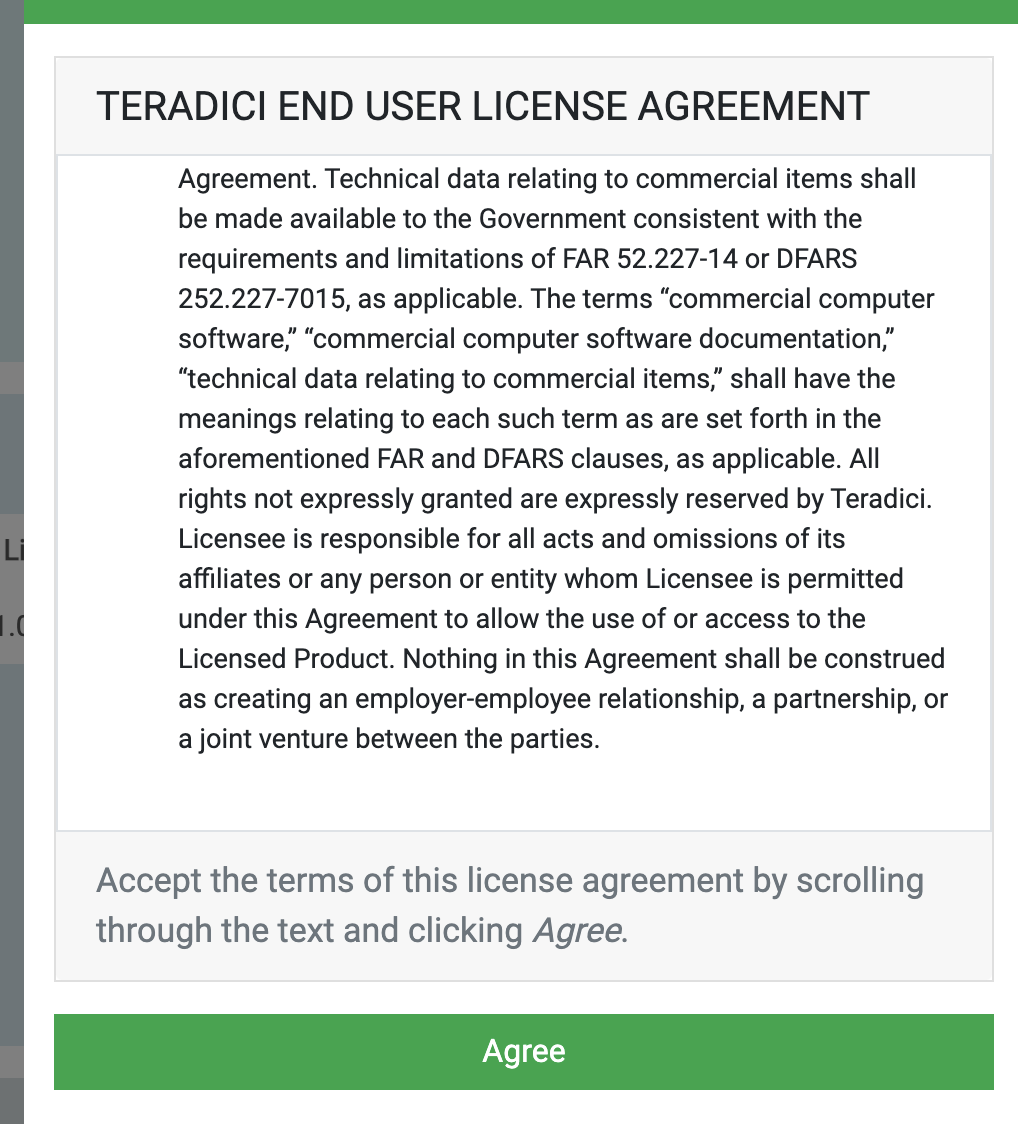
Accept the terms and conditions by scrolling to the bottom of the EULA and then clicking the Agree button.
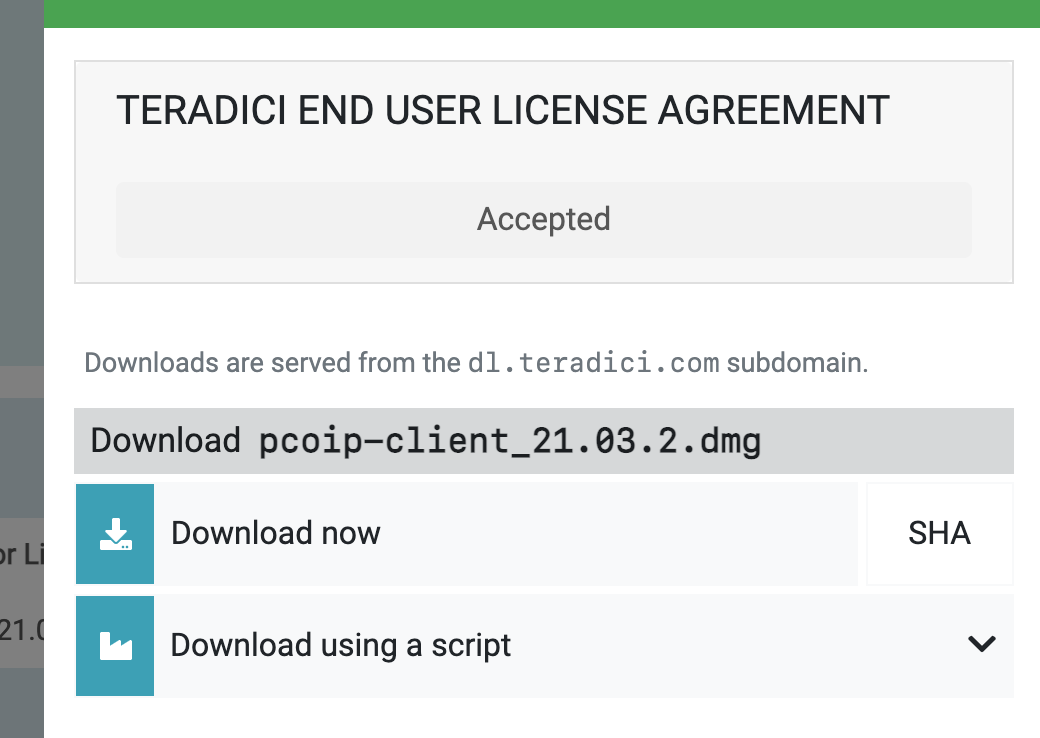
Click on the Download now button to download the application installer to your usual download folder.
 –>
Open the downloaded installer and follow the instructions to install the software client on your system.
–>
Open the downloaded installer and follow the instructions to install the software client on your system.
Additional documentation for the Teradici PCoIP Software Client is available from the Teradici site here: https://www.teradici.com/web-help/cas_quickstart_guide/Getting_Started/documentation/#pcoip-clients
Connecting to your workstation for the first time
Open the Teradici PCoIP Software Client, if this is the first time you have opened it you may be required to give the software permission to access your file system and microphone.
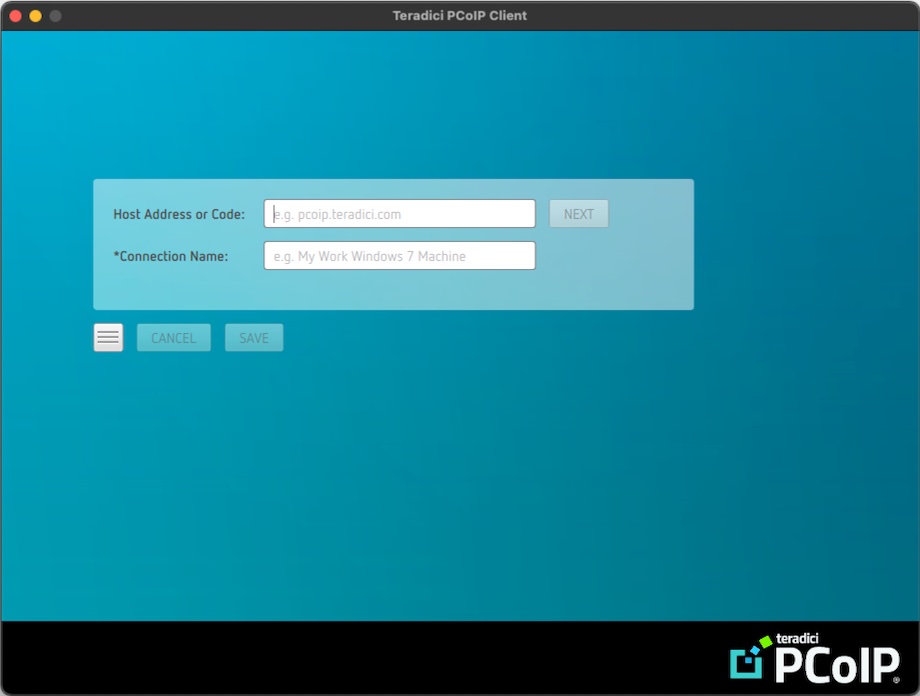
On first launch you will be presented with a screen asking for a Host Address or Code and a Connection Name.
In your web browser navigate to the details of the remote workstation you want to connect to and locate the Connect to IP address. This is the address that will be used by the Teradici PCoIP Software Client to connect to your remote workstation.
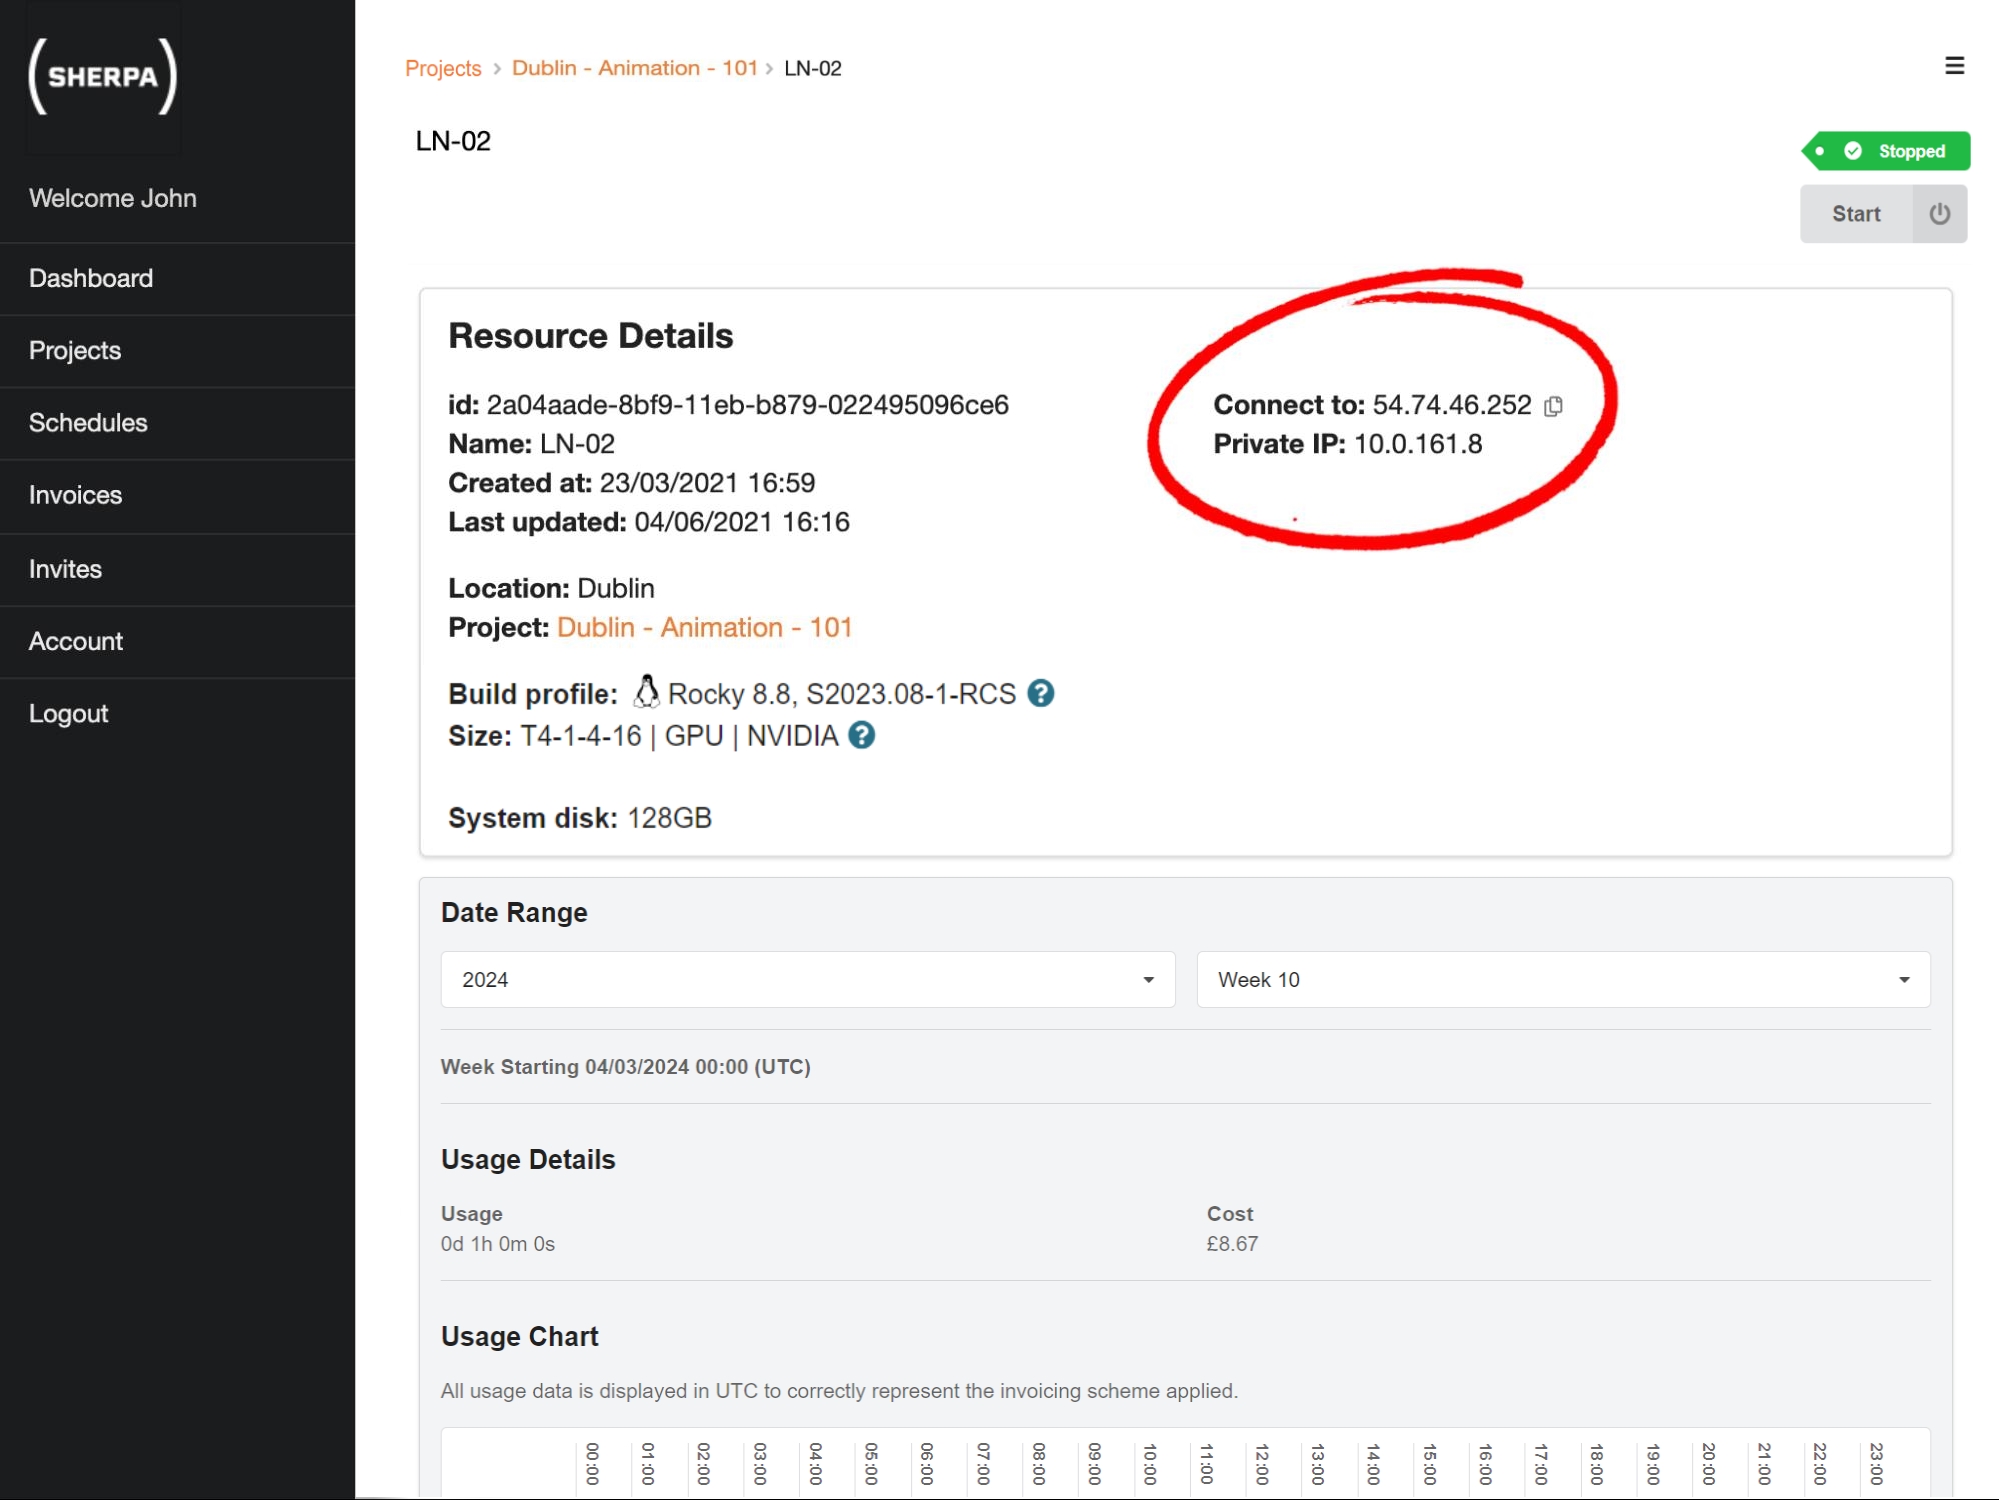
You can copy the Connect to IP address using the copy icon that appears next to the address on roll over.
This Connect to address should then be pasted into the Host Address or Code field on the Teradici PCoIP Software Client. Give this connection a name you will recognise in the Connection Name field (we recommend using the Sherpa project name or something similar).
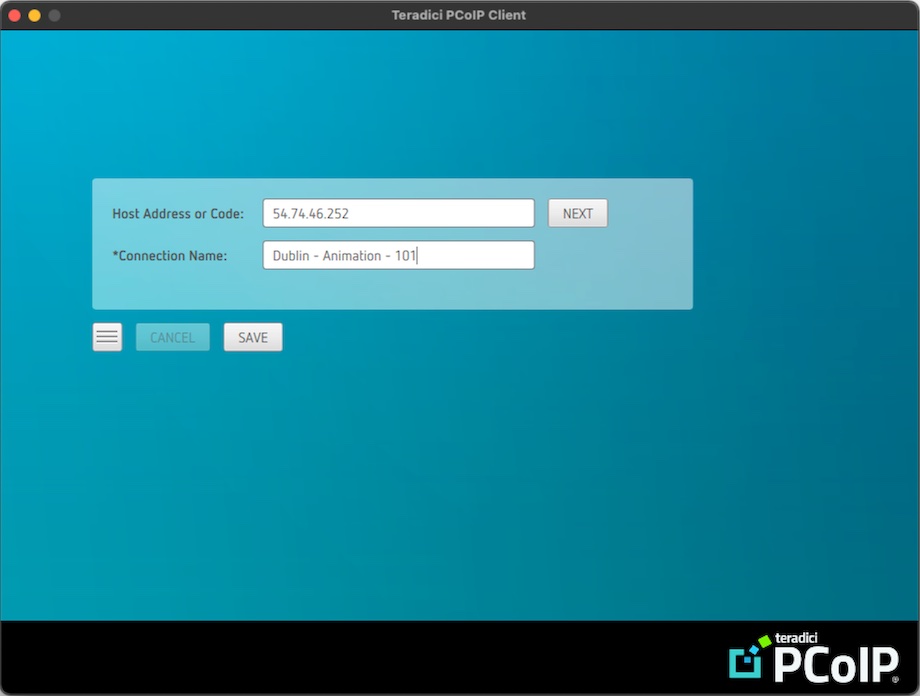
Click the SAVE button and then the NEXT button.
All being well, you will be prompted for your Sherpa username and password.
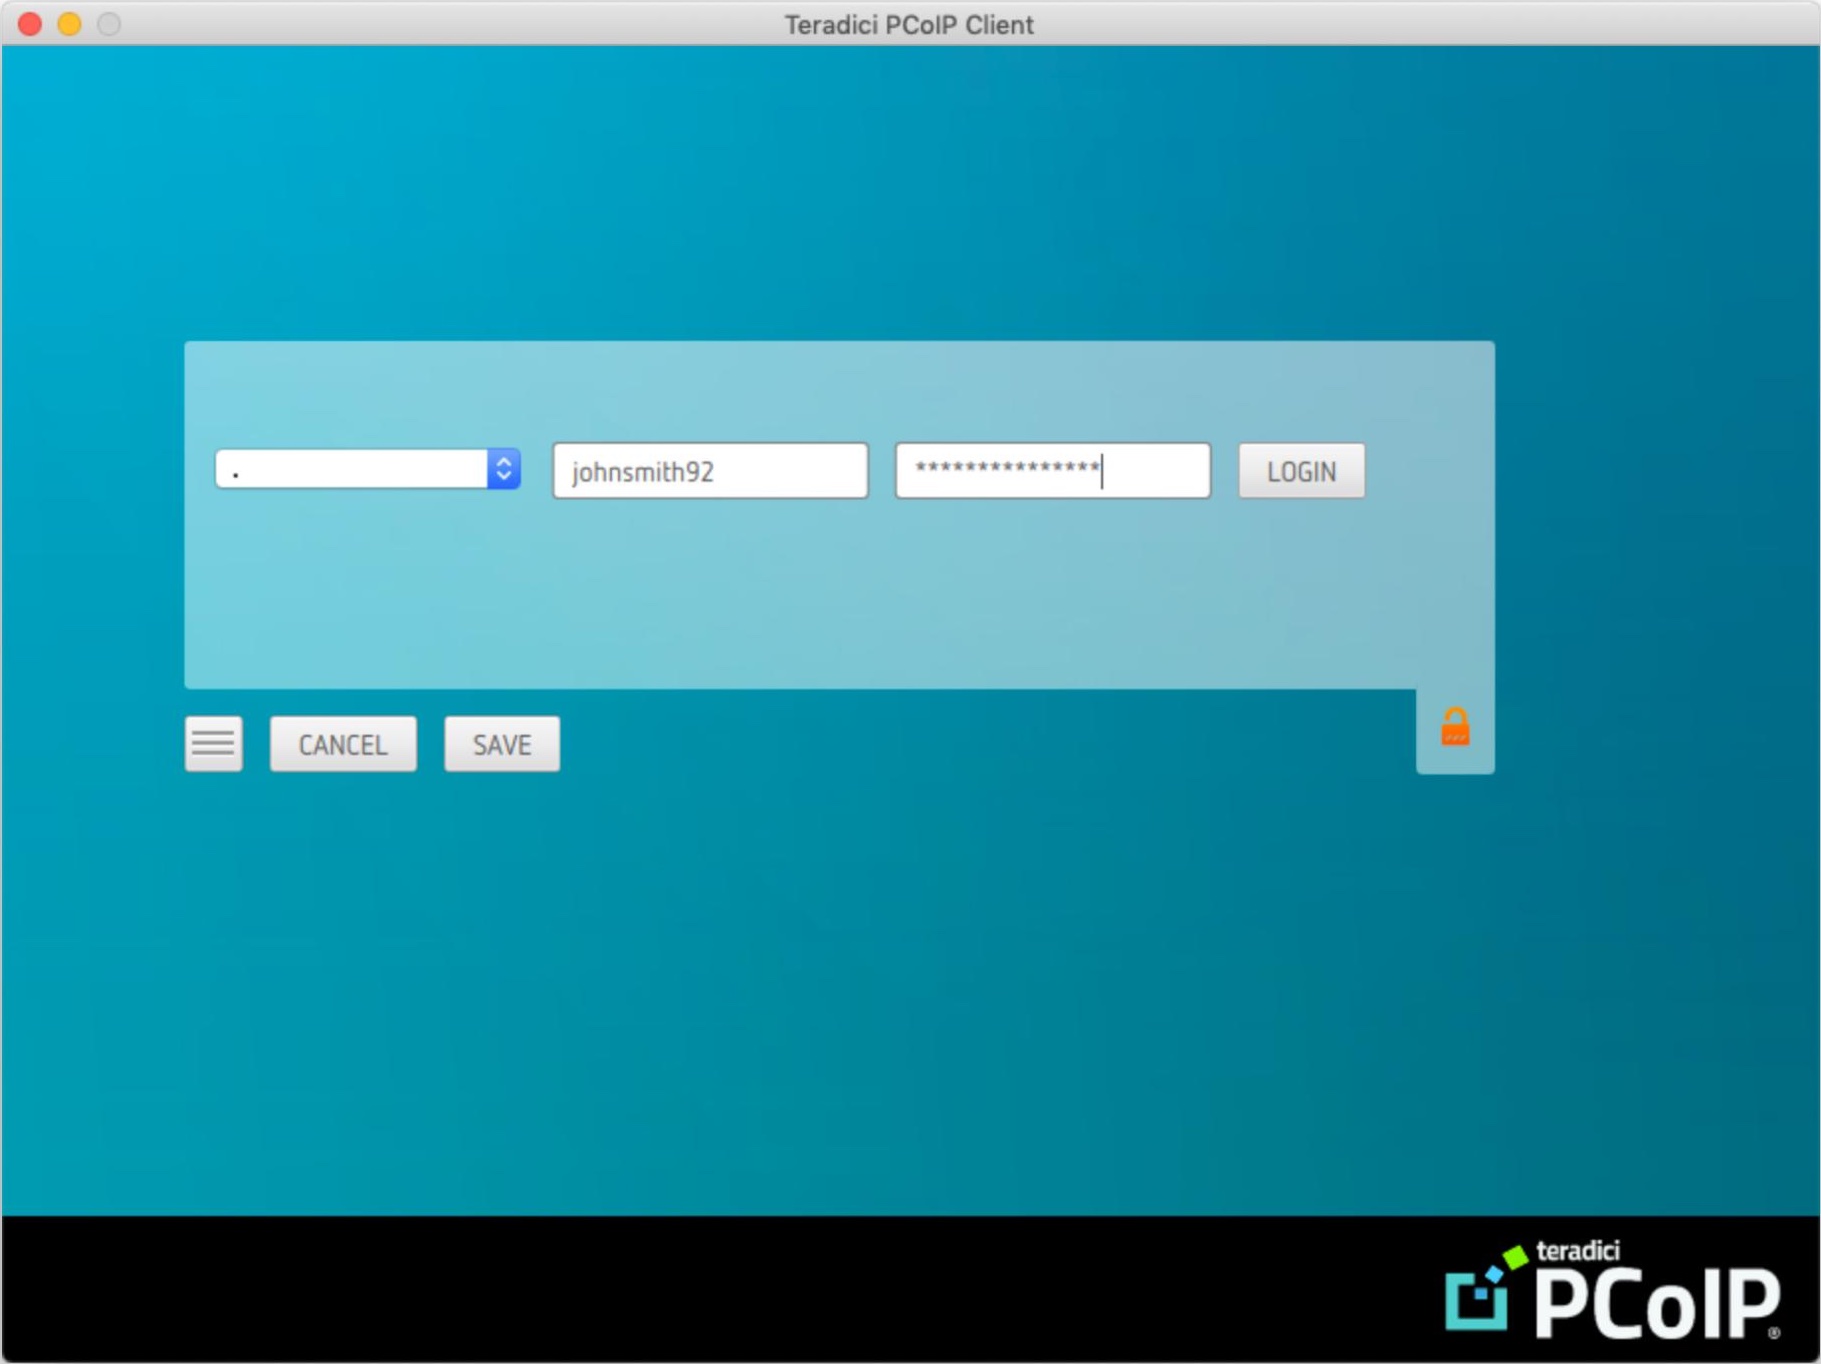
Your username and password are the ones you supplied when signing up on the Sherpa website. Note that your username is not your email. If you have forgotten your username or password you can recover them using the Sherpa website.
Click LOGIN and The Teradici PCoIP Software Client will connect to your remote workstation. If you have been invited to multiple workstations you will be presented with a list. If you have only been invited to one workstation it will log you straight in.
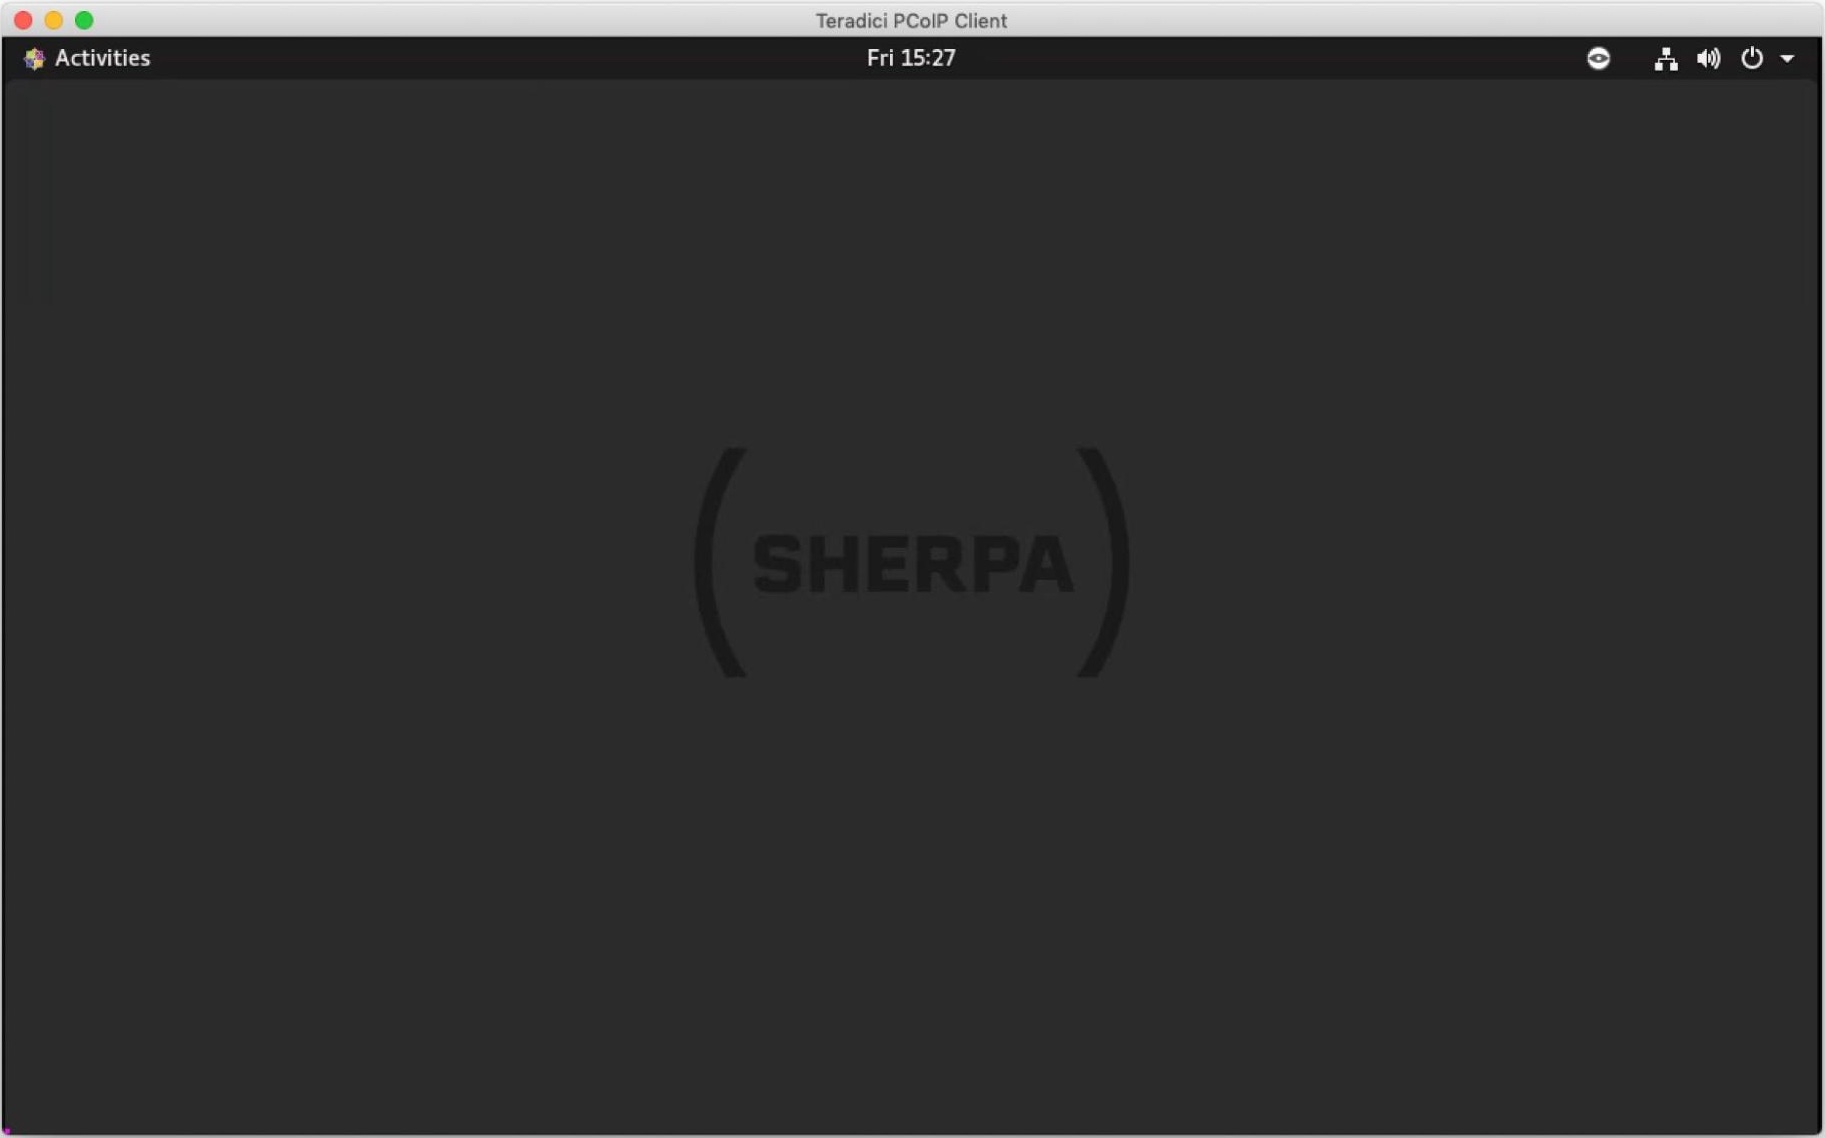
The above shows a successful connection to a Linux Sherpa workstation.
Subsequent connections to your workstation
Because you saved your connection, it will be available to you the next time you launch the Teradici software.
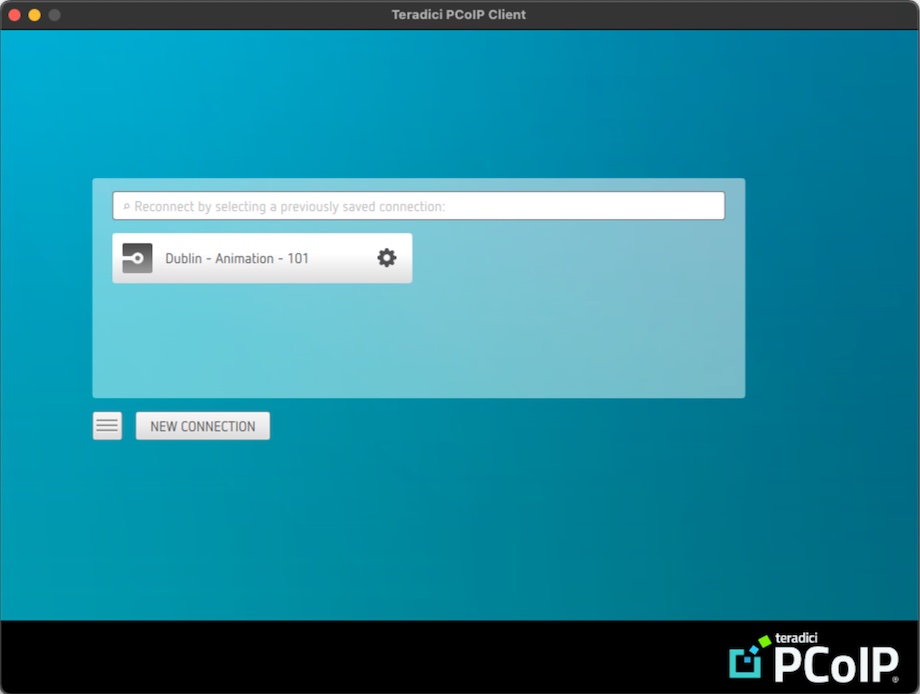
Simply click on the Connection Name you chose for your project/workstation and enter your username and password when prompted. If you have been invited to multiple workstations you will be presented with a list. If you have only been invited to one workstation it will log you straight in.
Logging out of your workstation
Do not use the disconnect option in the Teradici software. If you do, you will remain logged into your workstation, your workstation will be on and you will be charged.
When you have finished using your workstation make sure to log out or better still shut down your workstation.