VPN servers in a Sherpa project
There are two possible types of VPN in Sherpa, Remote Access VPN and Site-To-Site VPN. Both have specific use cases. See below.
Remote Access VPN
A remote access VPN is useful if you need to gain temporary access to the resources inside your Sherpa project. You may wish to do this to give Escape Technology Support Engineers access to your project in order for them to perform maintenance or fault-finding. You may need to quickly copy some material from your storage server or check on renders without turning on one of your workstations in your Sherpa project.
In order for people to connect to the Remote Access VPN it needs to be on. This gives good separation from a security perspective. If you don’t want people to access your project through the Remote Access VPN just turn it off. Additionally in order to connect you need to have a Peer Connection Profile and the Remote Access VPN client software.
Creating a Remote Access VPN
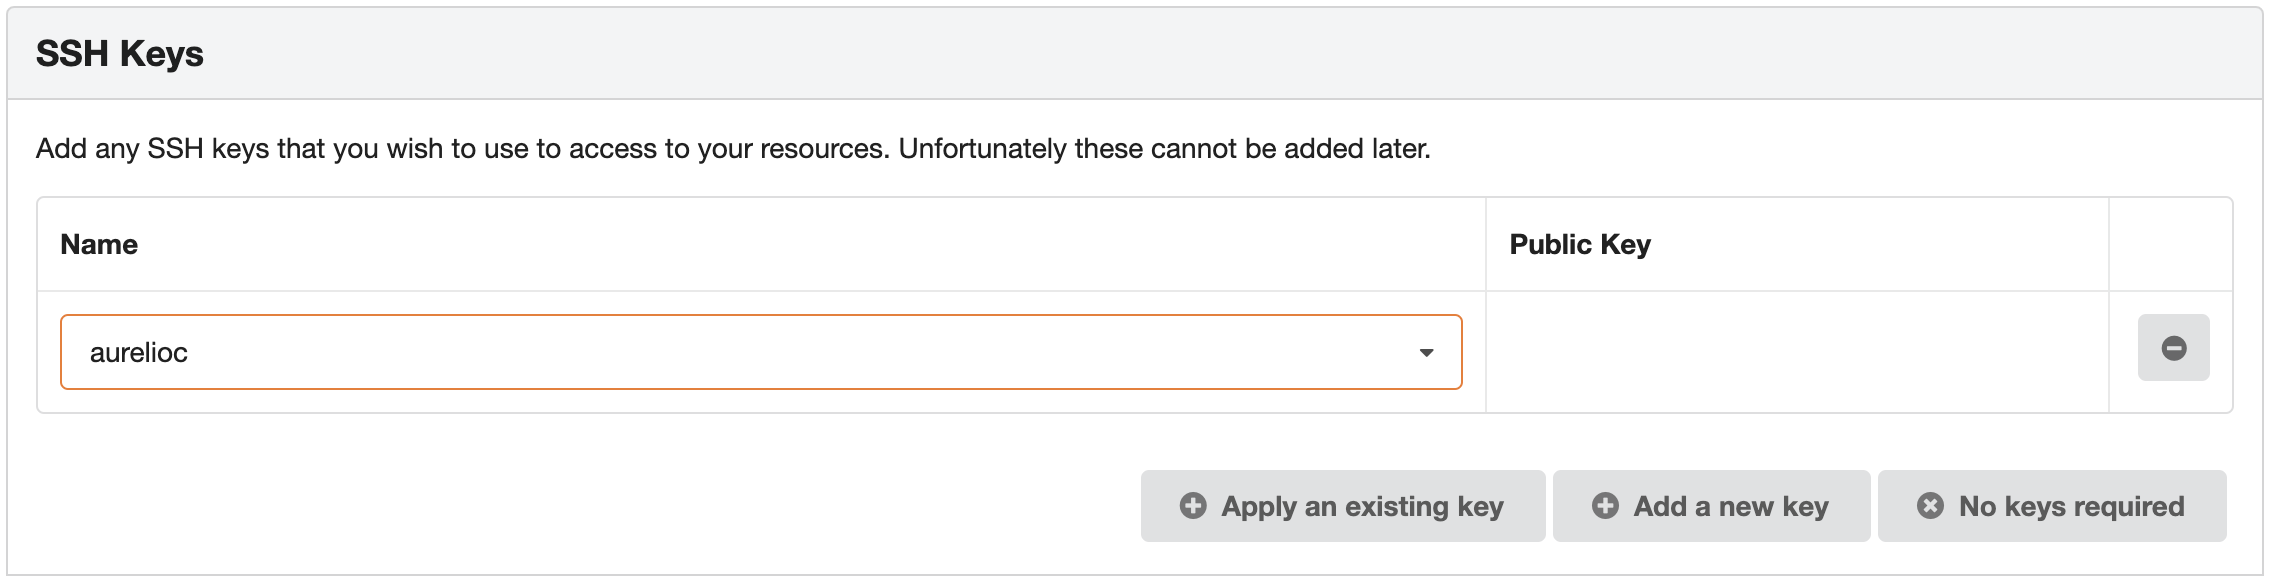
Hopefully when you created your Sherpa Project you remembered to use an SSH key. You will need this SSH key in order to SSH into the Remote Access VPN server.
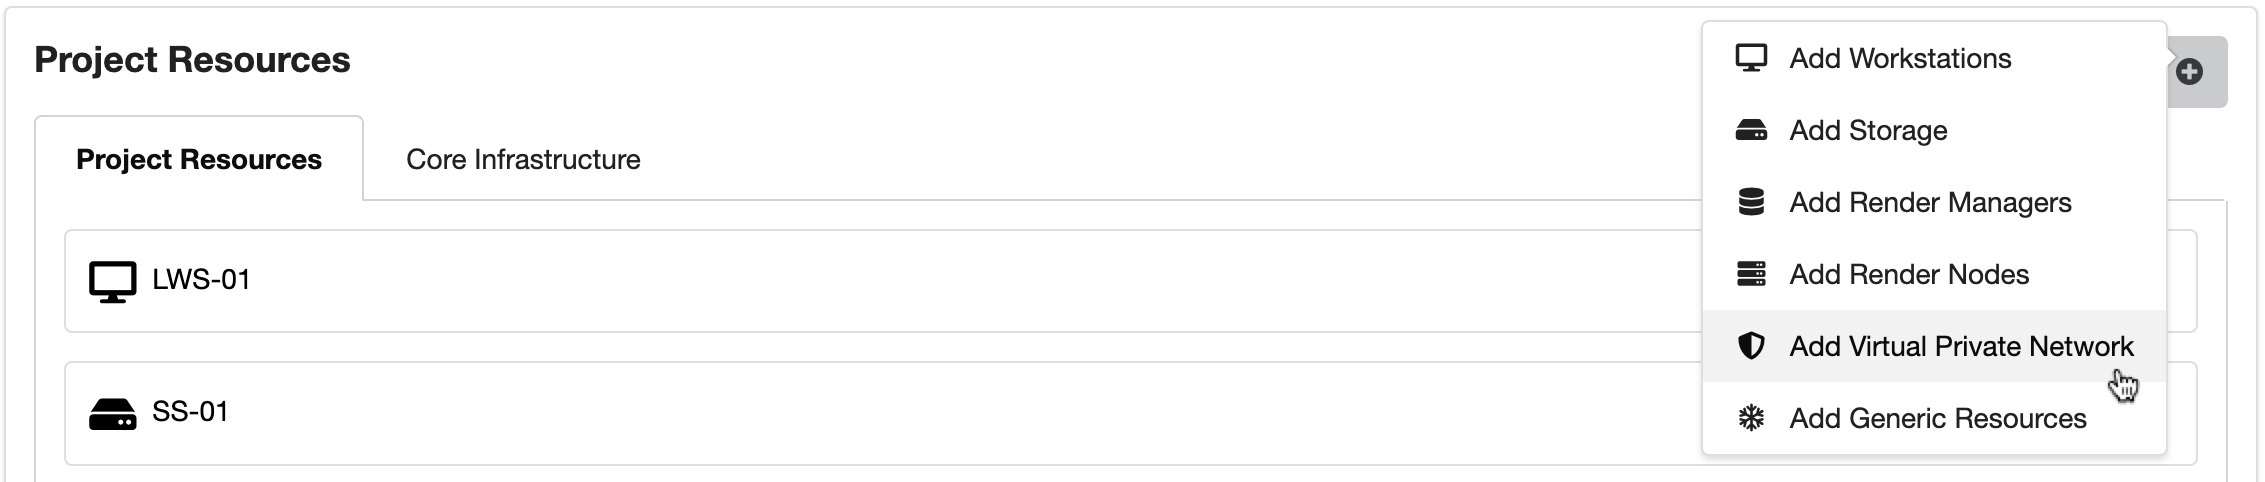
You can add a Remote Access VPN server to an existing Sherpa Project by clicking on the + button and selecting Add Virtual Private Network.
Give it a suitable name, select the Remote Access VPN build profile and select an appropriate size.
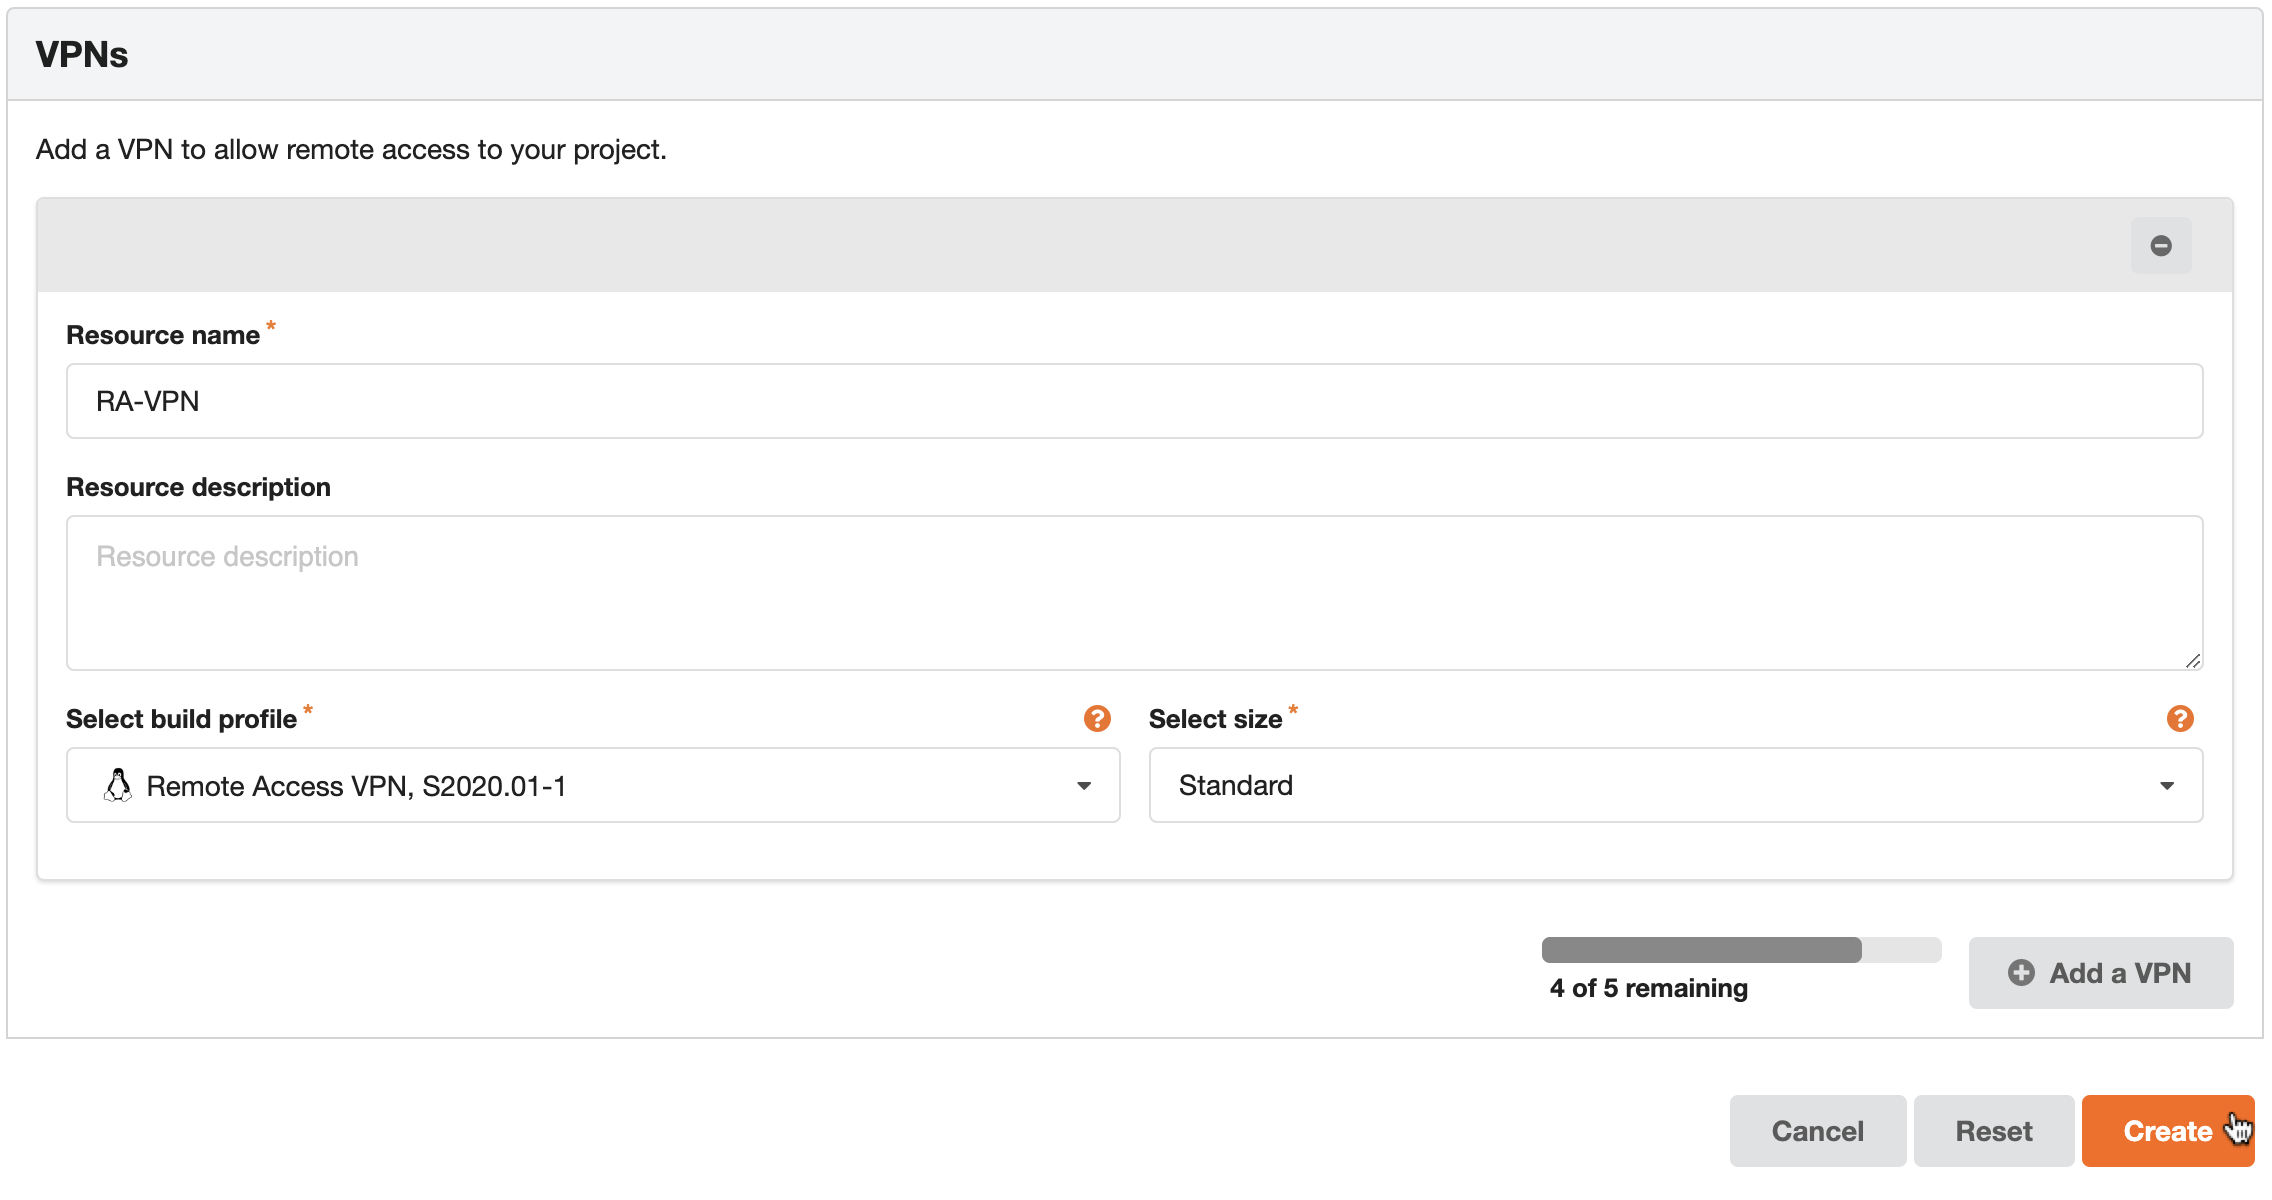
Then press on Create.
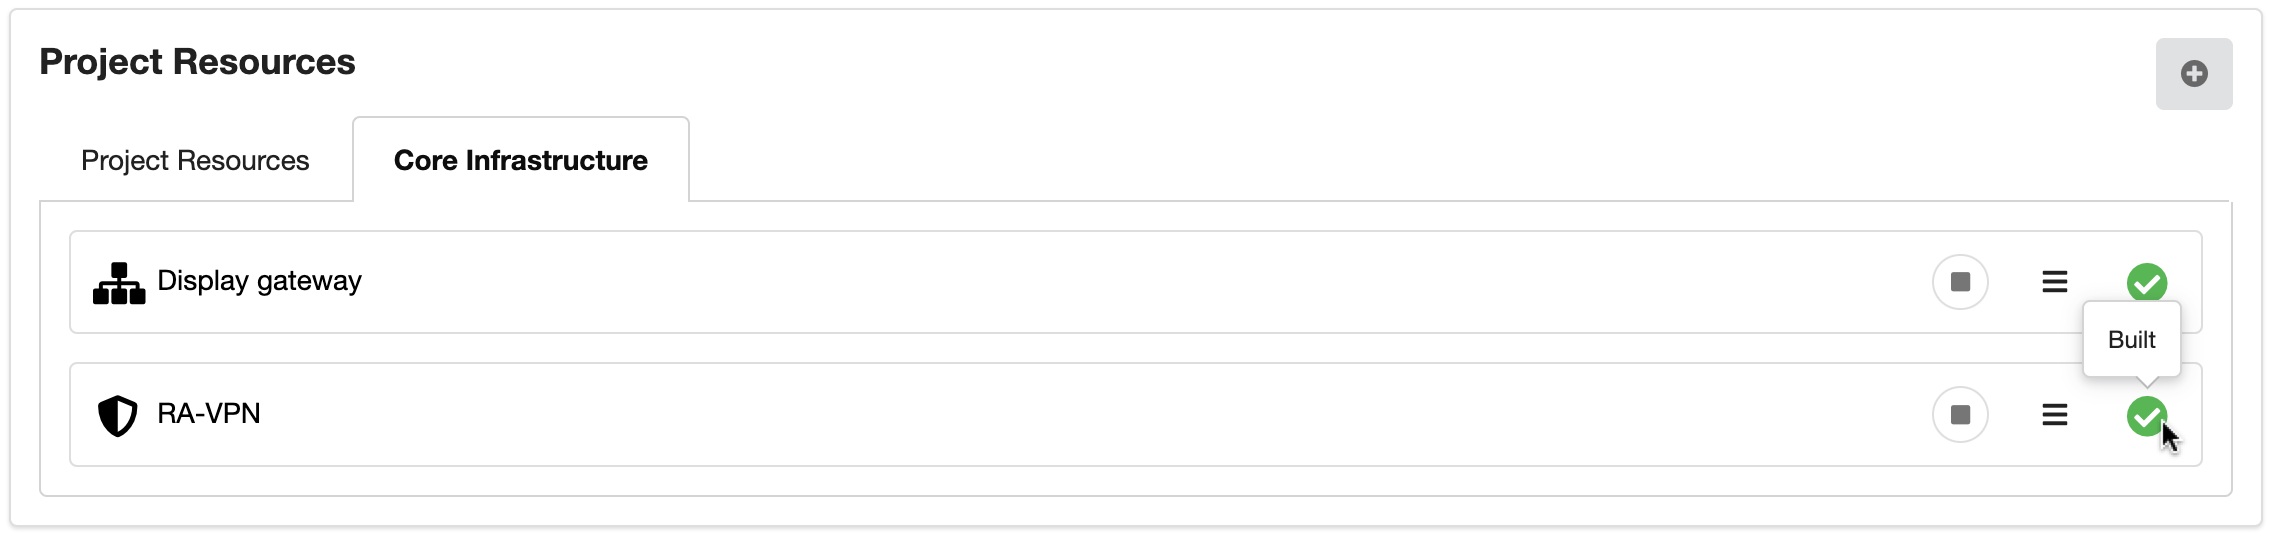
You will find the newly created Remote Access VPN under the Core Infrastructure tab on the Project Resources page. The green tick indicates that the server has been built.
Adding a User’s Public IP Address to the Allowlist
In order for a user to connect to the Remote Access VPN their public IP address needs to be added to the allowlist for the project. They should be able to supply their public IP address by opening up a web browser on their local machine and typing in https://www.whatsmyip.org/. Let’s imagine that this returns 86.4.111.214.
In the projects menu, select Allowed IP addresses.
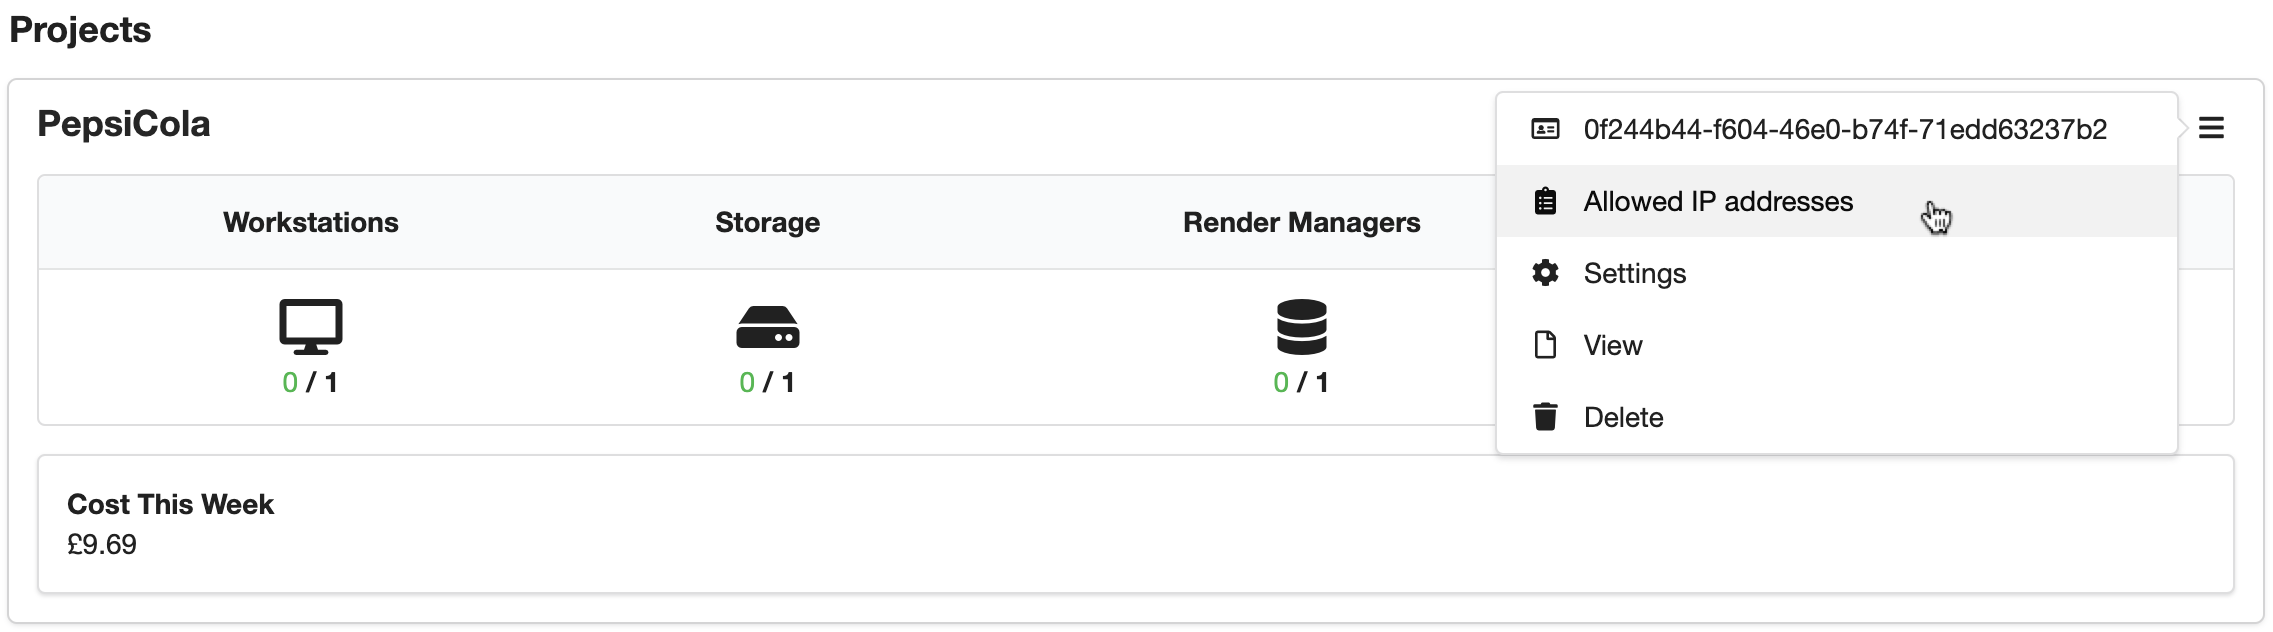
Add the IP address, remembering to add /32, give it a suitable description and select Virtual Private Networks for the Scope.

The green tick in the above screen-grab means that the required change has been made.
Creating a Peer Connection Profile
The Sherpa Remote Access VPN is based on WireGuard (https://www.wireguard.com/). In order to connect to the WireGuard server in the Sherpa project you will need to create a Peer Connection Profile for each user. To create a profile, ssh into the Remote Access VPN/WireGuard server. You will need the private IP of the WireGuard server which can be found on the Resource Details page as shown below.
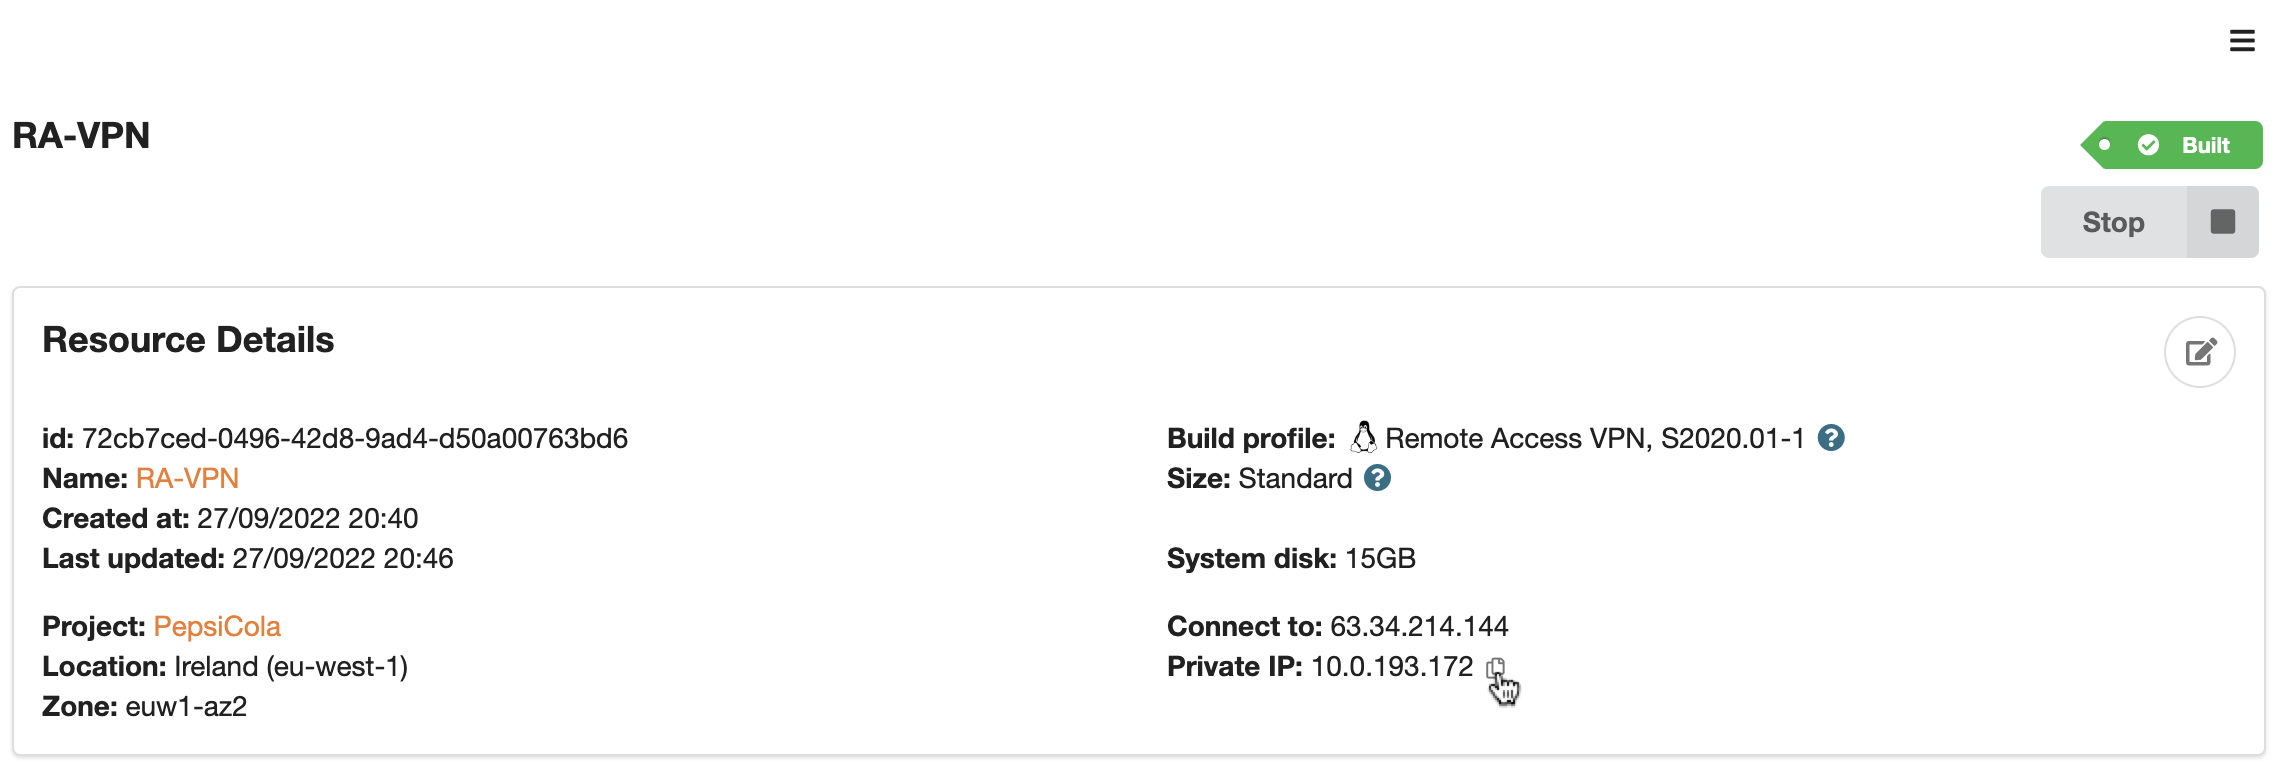
From a Sherpa workstation in the same project, you can ssh into the WireGuard server using its private IP address and the private part of the SSH key that was used when creating the project. Using the details from the example above the command would look something like this.
# ssh -i .ssh/aurelioc aurelioc@10.0.193.172
To add a peer connection profile use the following command.
# sudo /etc/wireguard/wg-peer
/etc/wireguard/wg-peer [-a|-add|a|add|-r|-revoke|r|revoke] PROFILENAME
Hence to add a profile for the user aurelioc you could use the following command.
# sudo /etc/wireguard/wg-peer -a aurelioc
This will return something like the following.
Creating profile aurelioc...
Allocated IP address: 10.7.0.20
Private key is <redacted>
Public key is AmAFOA77q+1PFhfCKLEIynks754NVwfU3uzoNaev1Sc=
Peer keys added to wg server.
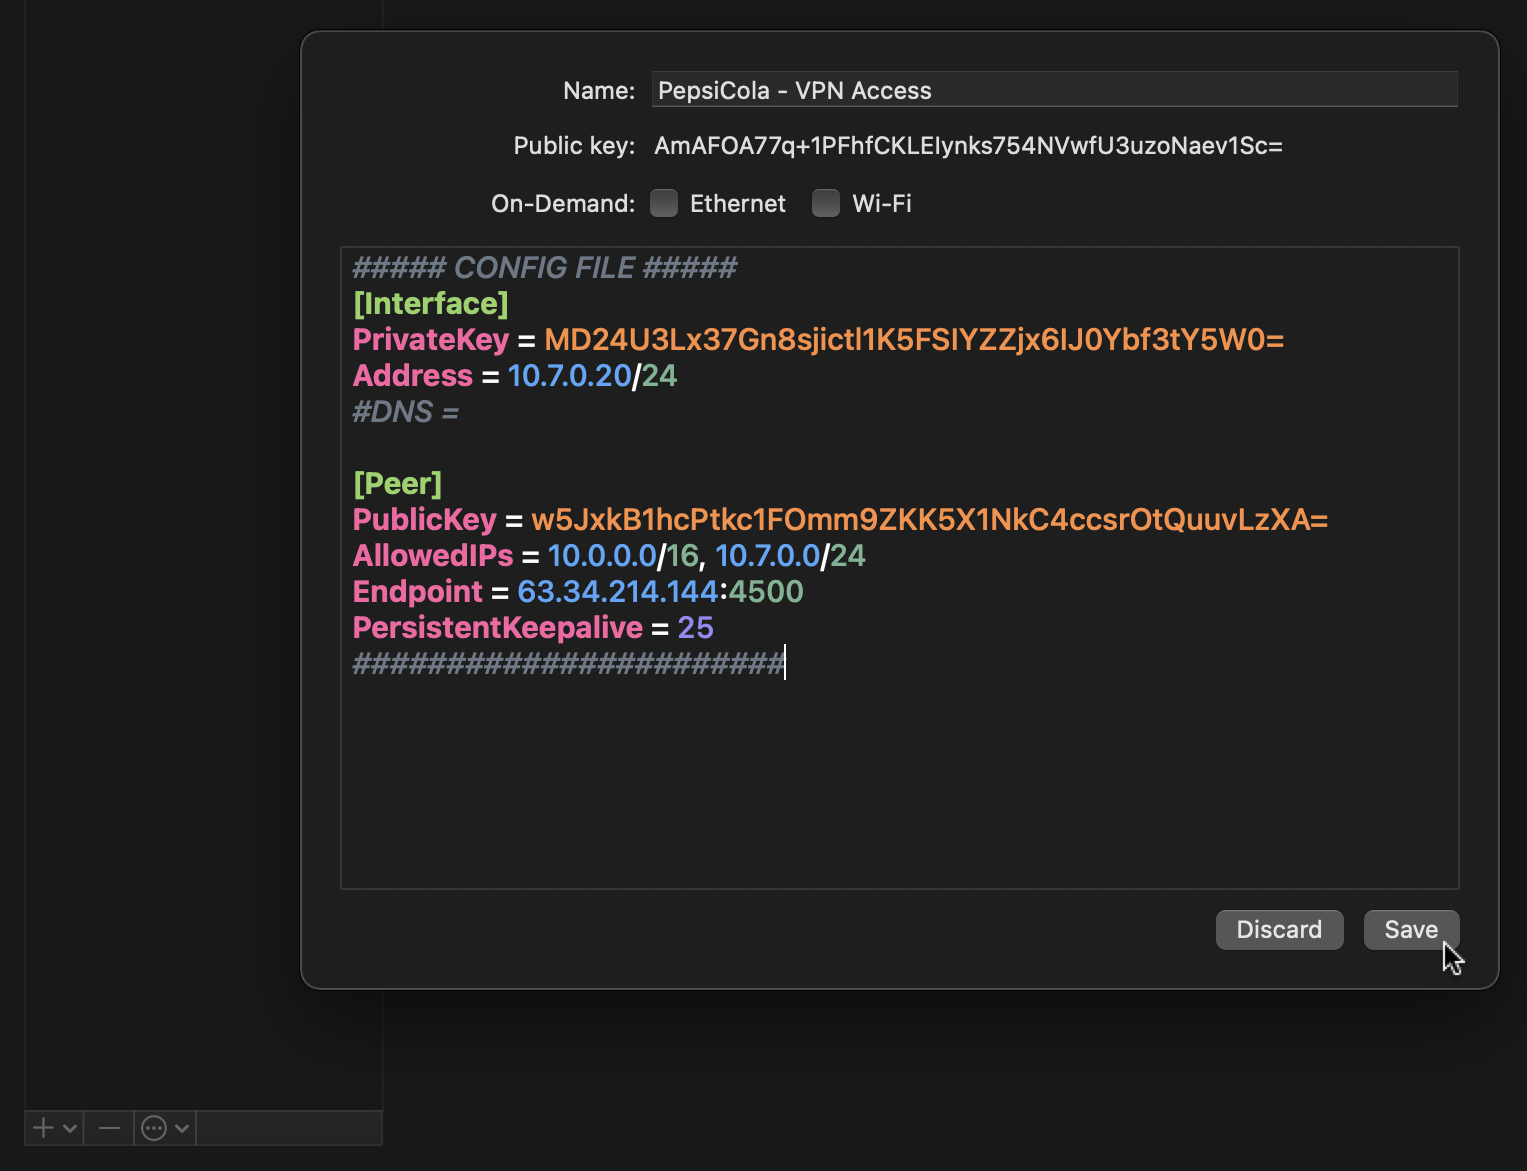
Done. Configuration file aurelioc.conf generated.
##### CONFIG FILE #####
[Interface]
PrivateKey = MD24U3Lx37Gn8sjictl1K5FSIYZZjx6IJ0Ybf3tY5W0=
Address = 10.7.0.20/24
#DNS =
[Peer]
PublicKey = w5JxkB1hcPtkc1FOmm9ZKK5X1NkC4ccsrOtQuuvLzXA=
AllowedIPs = 10.0.0.0/16, 10.7.0.0/24
Endpoint = 63.34.214.144:4500
PersistentKeepalive = 25
#######################
Copy the bit between the # characters. You will need that for later.
Connecting using the Remote Access VPN client software
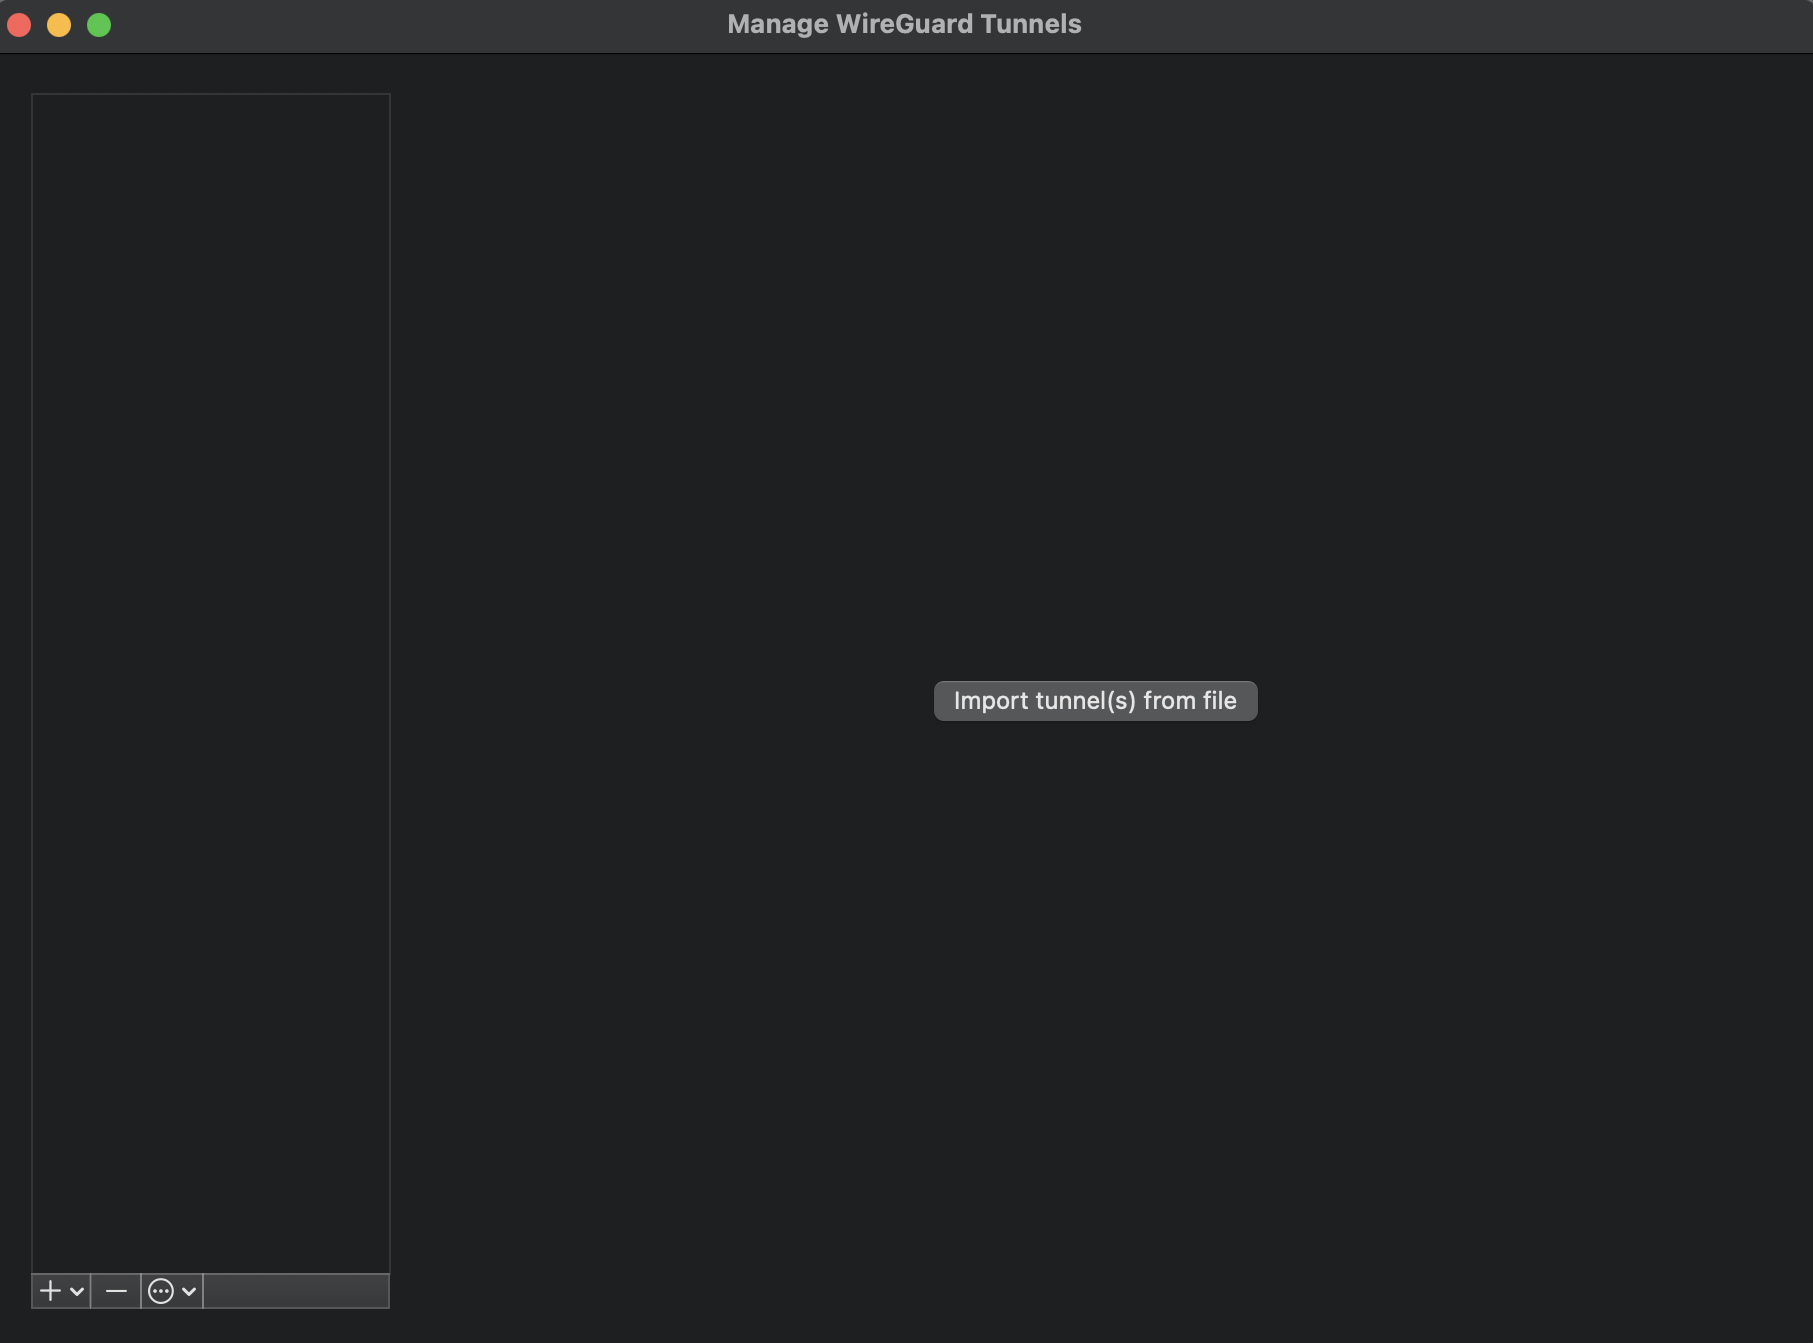
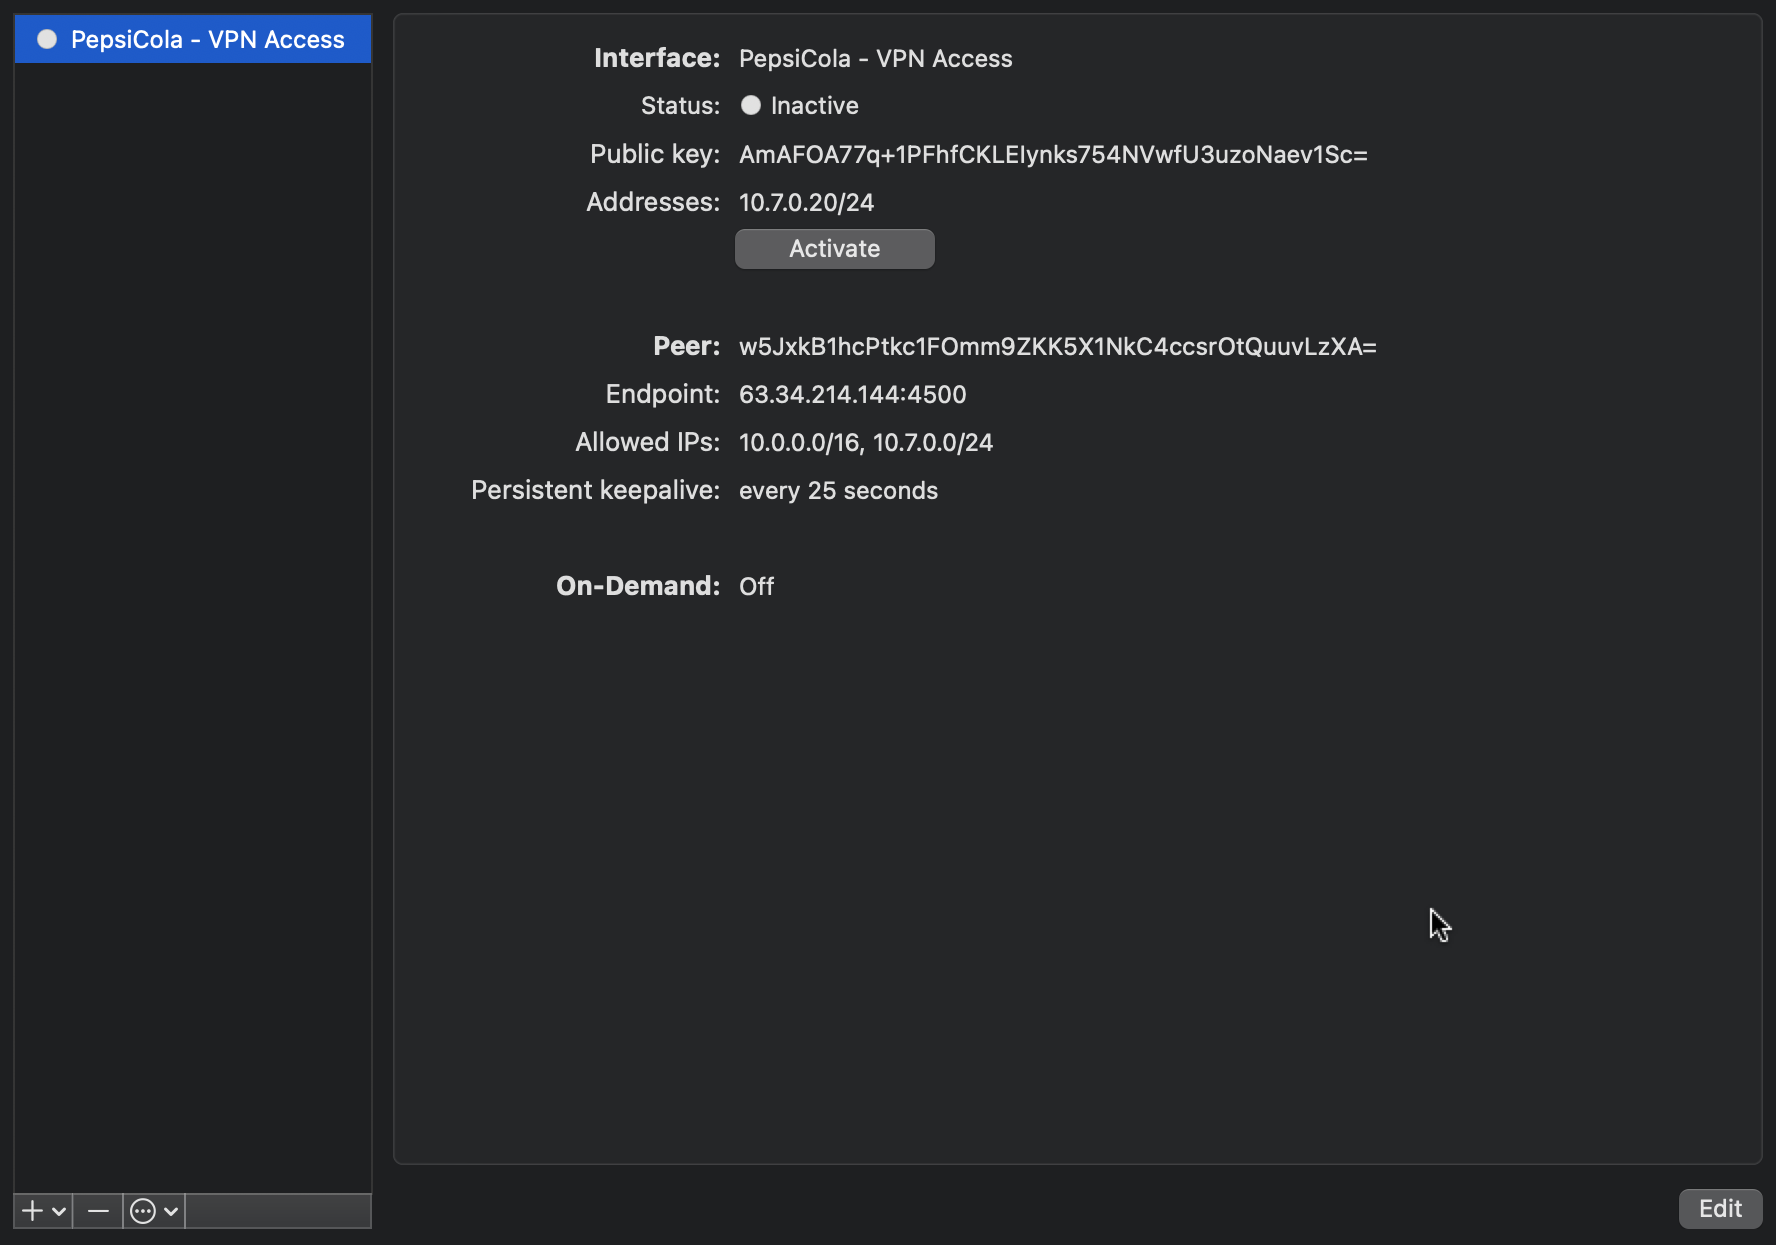
You will need to download and install a WireGuard client on your local computer. You can select and download your client from https://www.wireguard.com/install/. Once installed launch the WireGuard client and select Manage Tunnels. You should see something similar to the screen-grab below. All the following screen grabs are from Mac OS X but the Windows WireGuard client is similar.
In the bottom left-hand corner select, Add Empty Tunnel…
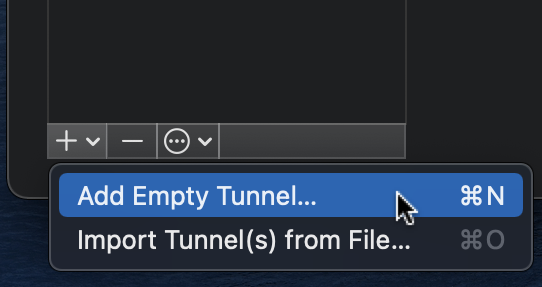
Replace everything in the window with the contents of the configuration you generated earlier with the wg-peer command and press Save.
You will now have a new entry in the list of tunnels.
To activate the tunnel press on Activate. You have successfully connected if both,
- The status is showing as Active.
- You are receiving and sending data.
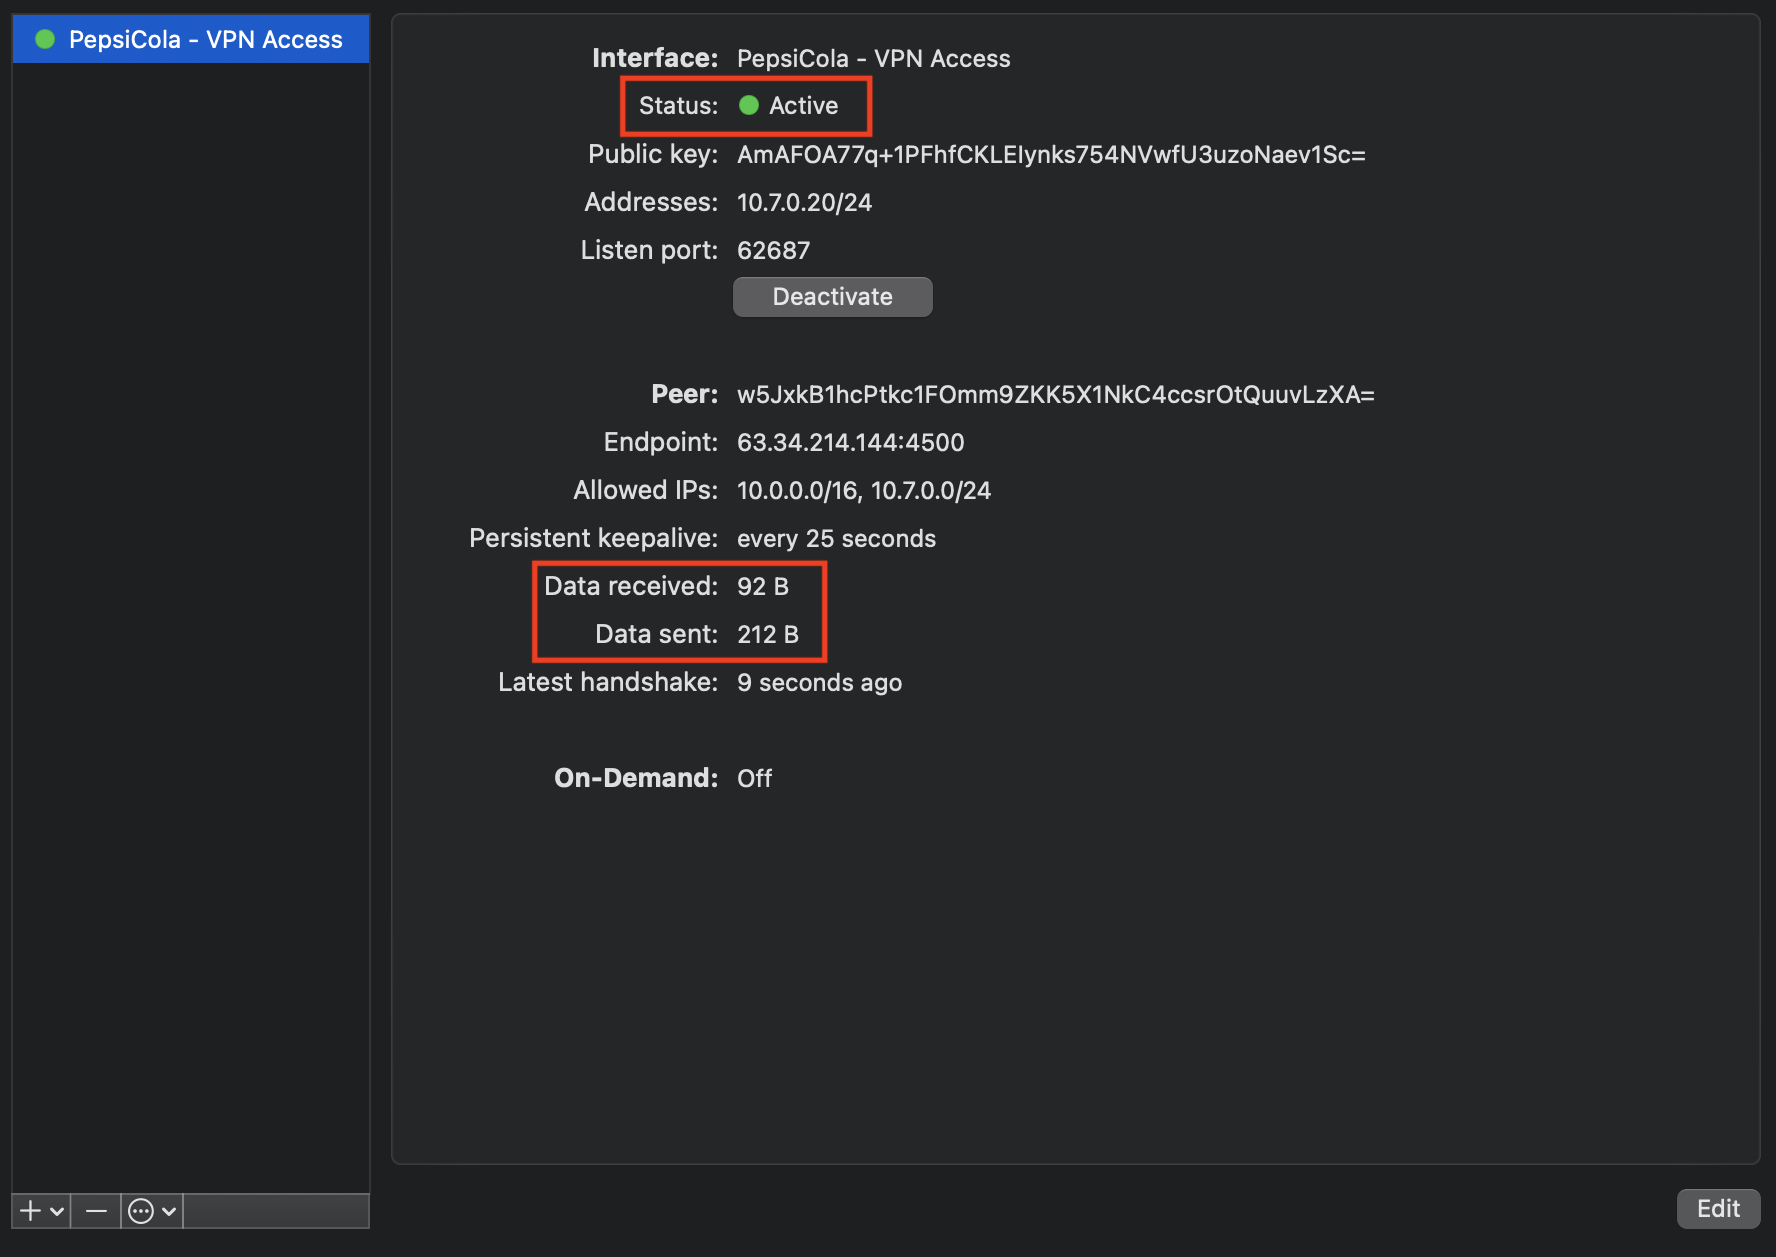
To confirm that you are connected, try pinging the private IP of a render node or storage server in your Sherpa project from your local computer.
Troubleshooting
No traffic is being passed
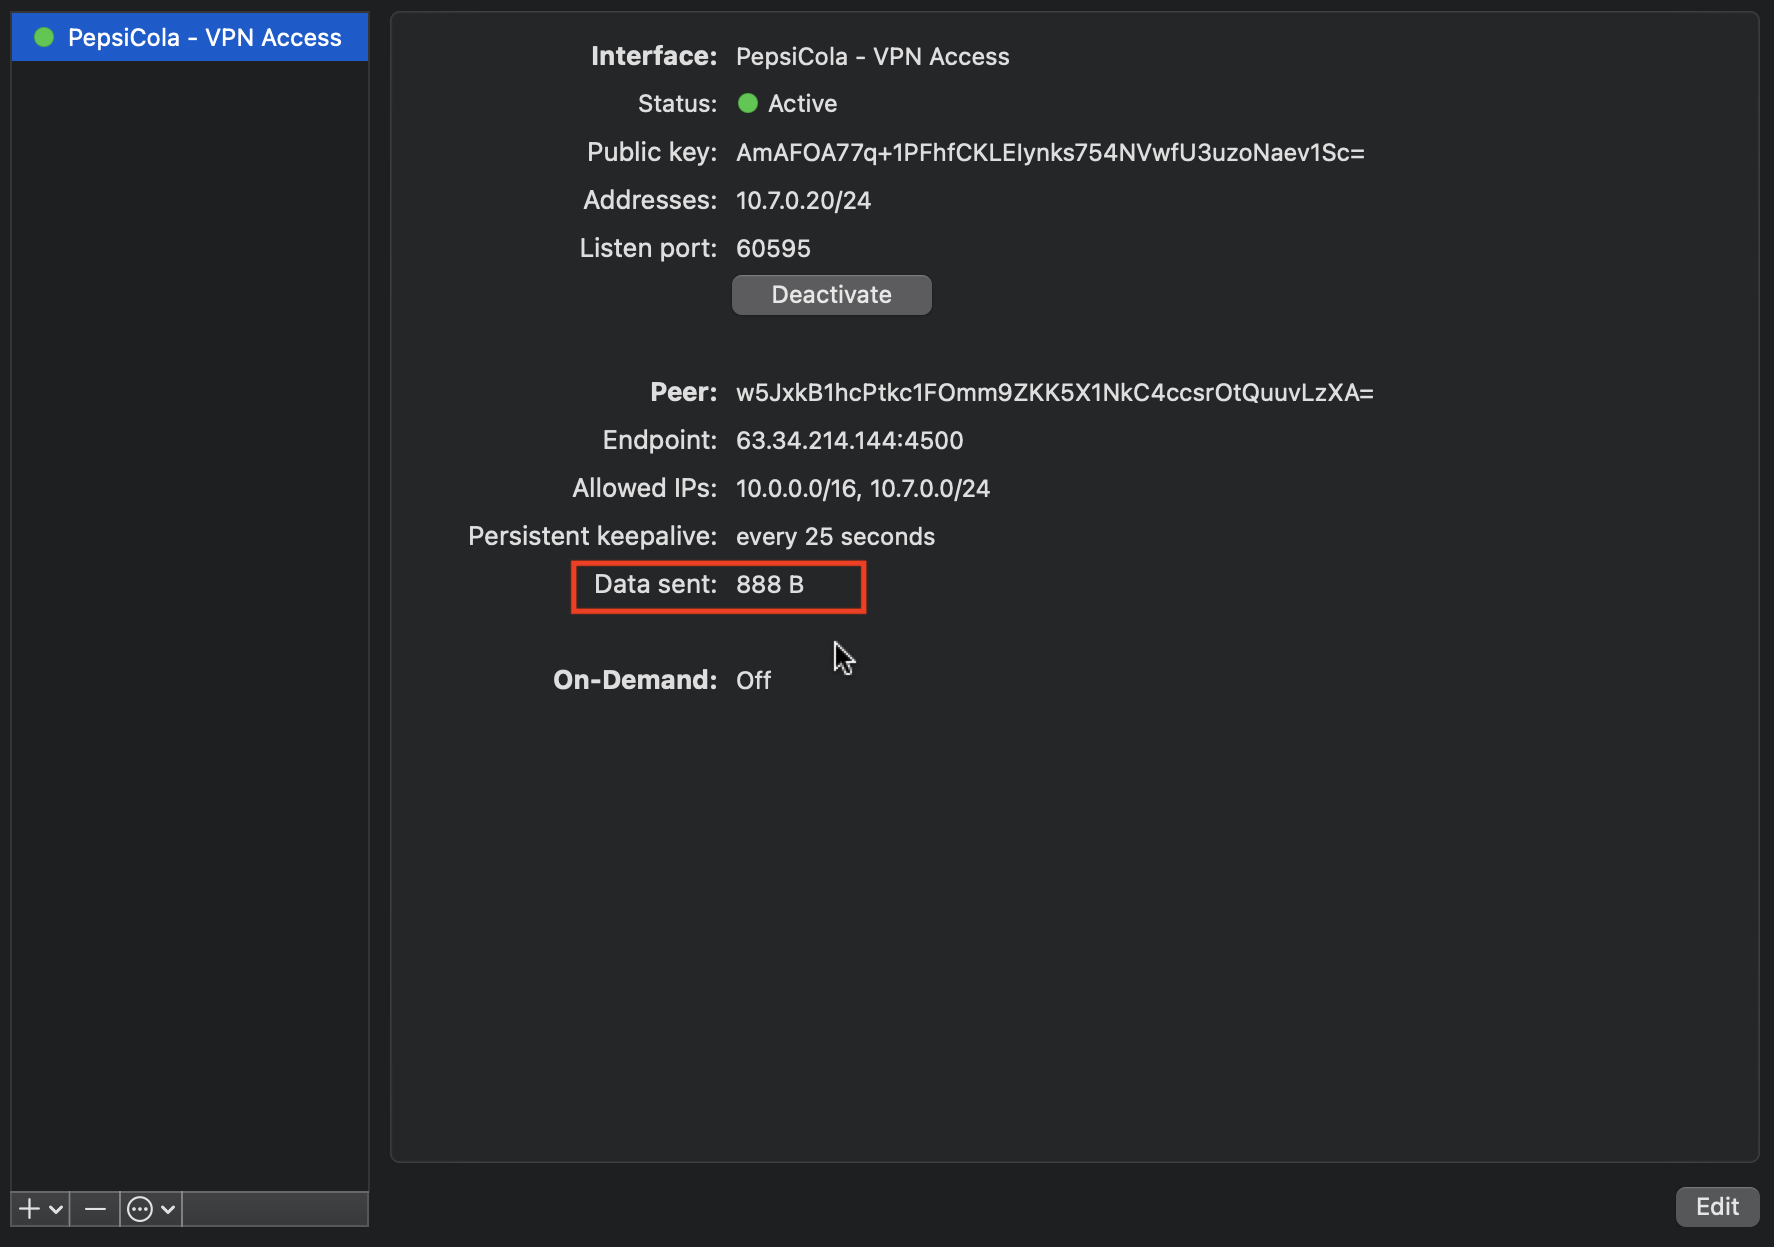
If the Remote Access VPN is not turned on in Sherpa or you have not added the user’s IP address to the allowlist or you have supplied the user with the incorrect tunnel details then the connection will fail.
Sadly the failure is not reported in the GUI. The tunnel will appear to be active. The only way you will know that it is not working correctly is that, although data is being sent, no data is being received. See screen-grab below.
Traffic is being passed but it is erratic
You must not share connection profiles between users or computers. Each user/computer needs to have their own connection profile. If two people are using the same profile then half the traffic will go to one person and half the traffic will go to the other person.
Site-To-Site VPN
You would use a site-to-site VPN to permanently connect your Sherpa project to another network. That network might be your office network. For example you may want your Sherpa servers to access your license server that is located on your office network. Configuring a site-to-site VPN can be quite complex. It is worth getting in touch with Escape Technology (support@escape-technology.com) to discuss your requirements.