Sherpa Deadline Setup
Deadline is a fully featured render manager. Full documentation can be found at the following link. https://docs.thinkboxsoftware.com/ The purpose of the documentation below is to cover configuration of Deadline in a Sherpa project.
Basic functionality
For security reasons, Sherpa restricts how different resource types in a Sherpa project are allowed to talk to each other. To make Deadline work correctly in a Sherpa project you will have to make some configuration changes.
Deadline Super User Mode
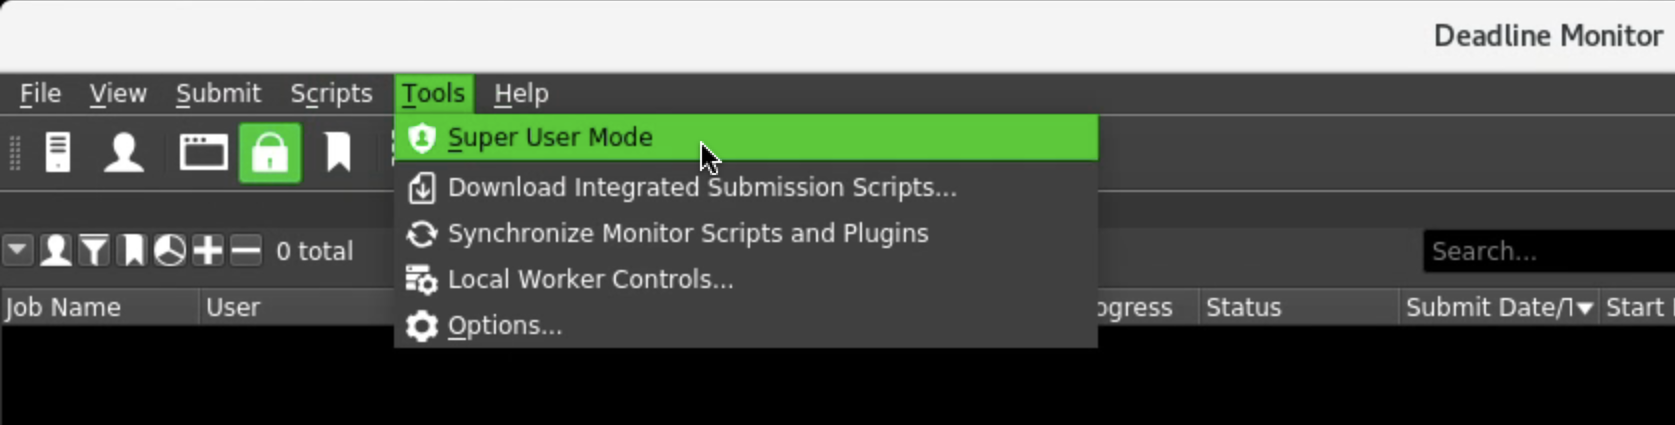
In order to make configuration changes in Deadline you need to select Tools -> Super User Mode.
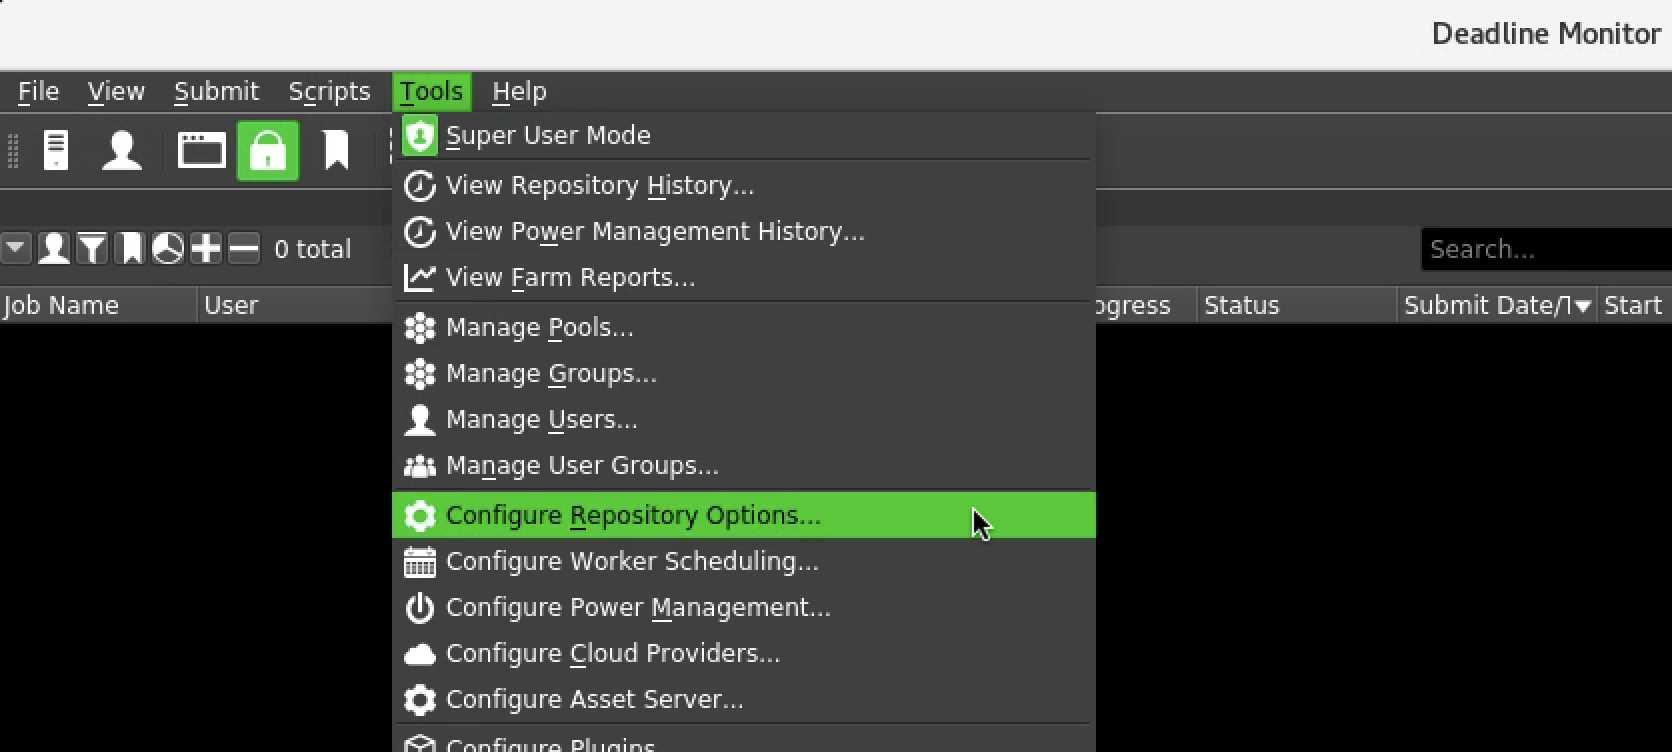
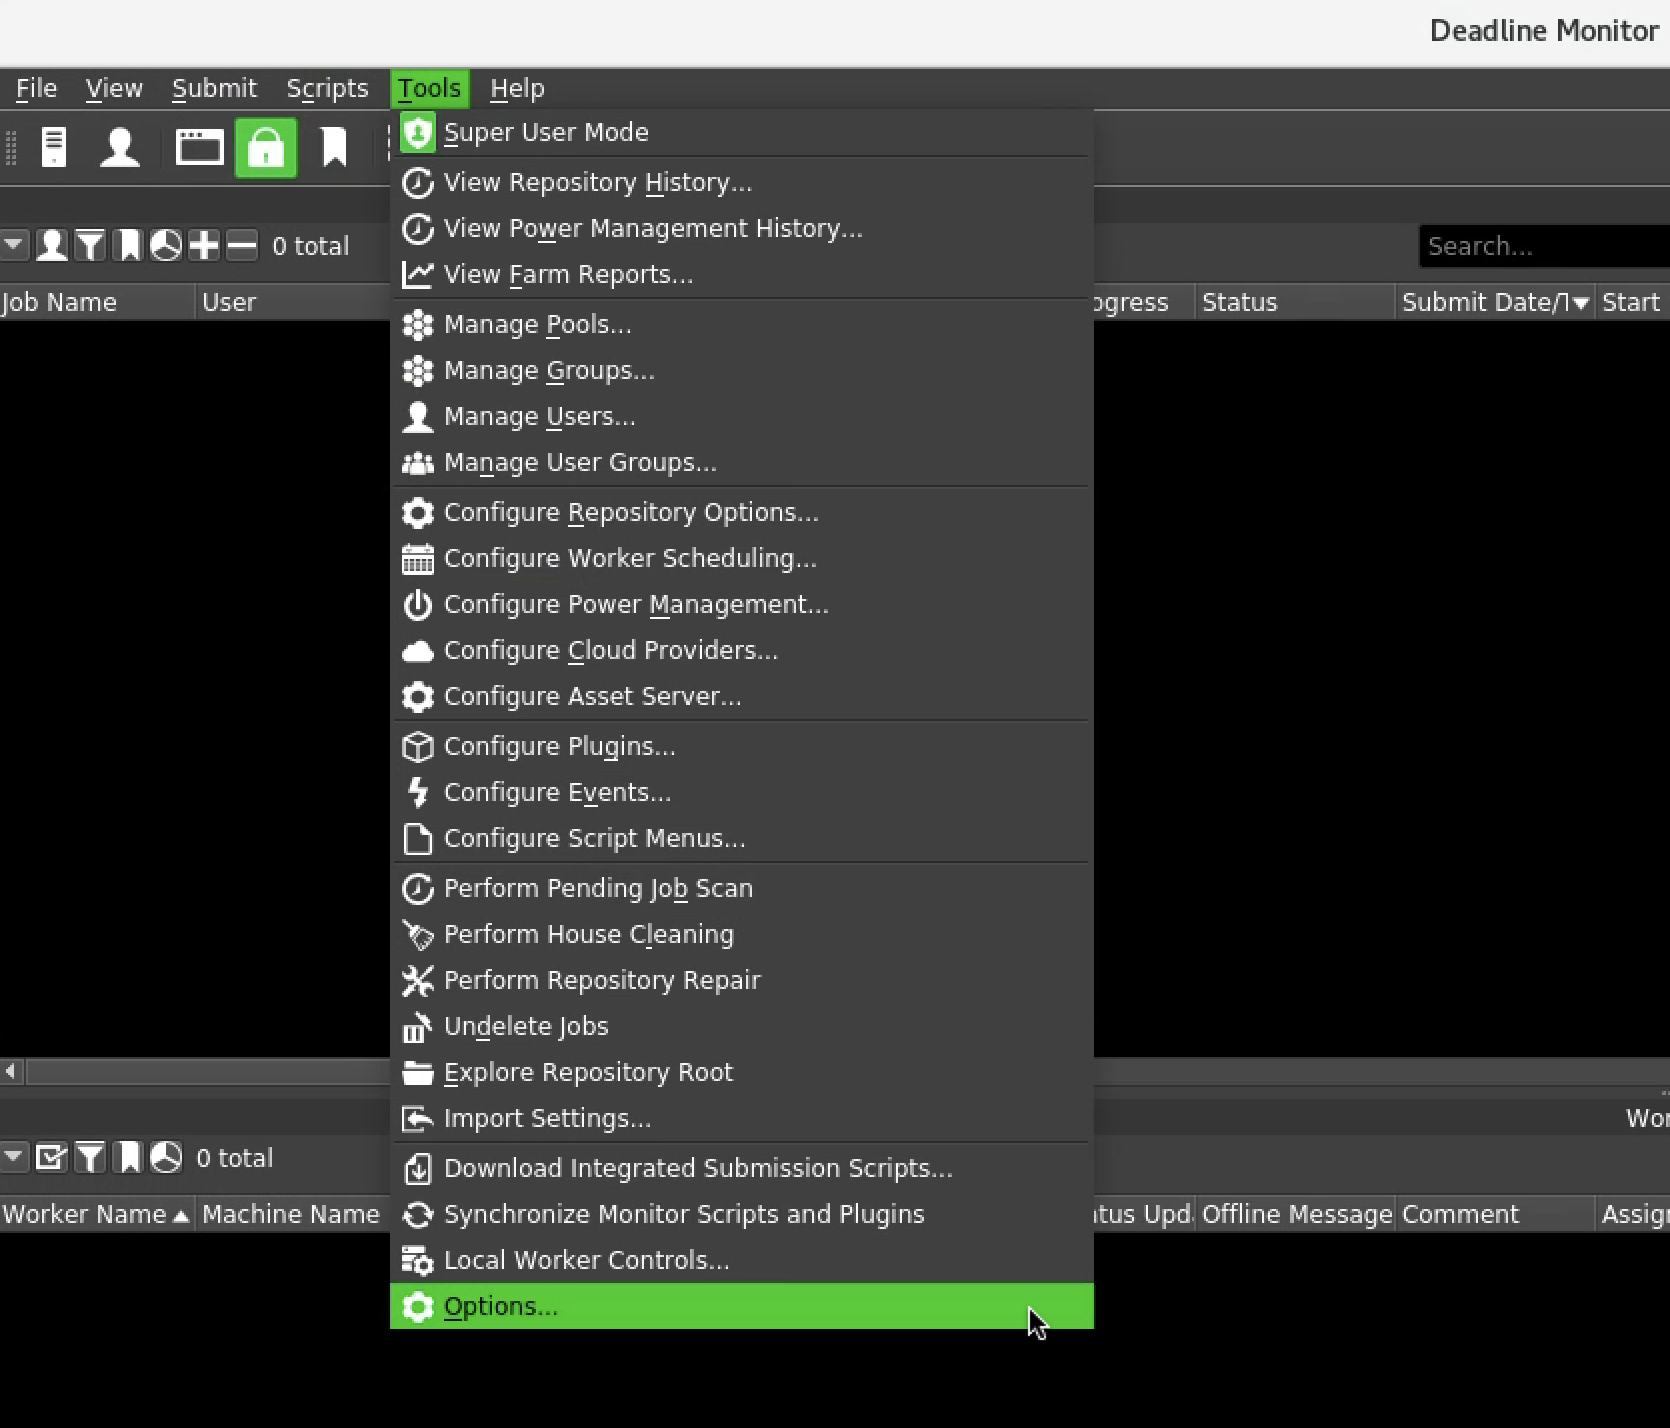
Once selected you should see many more options. Now, under the Tools menu select Configure Repository Options….
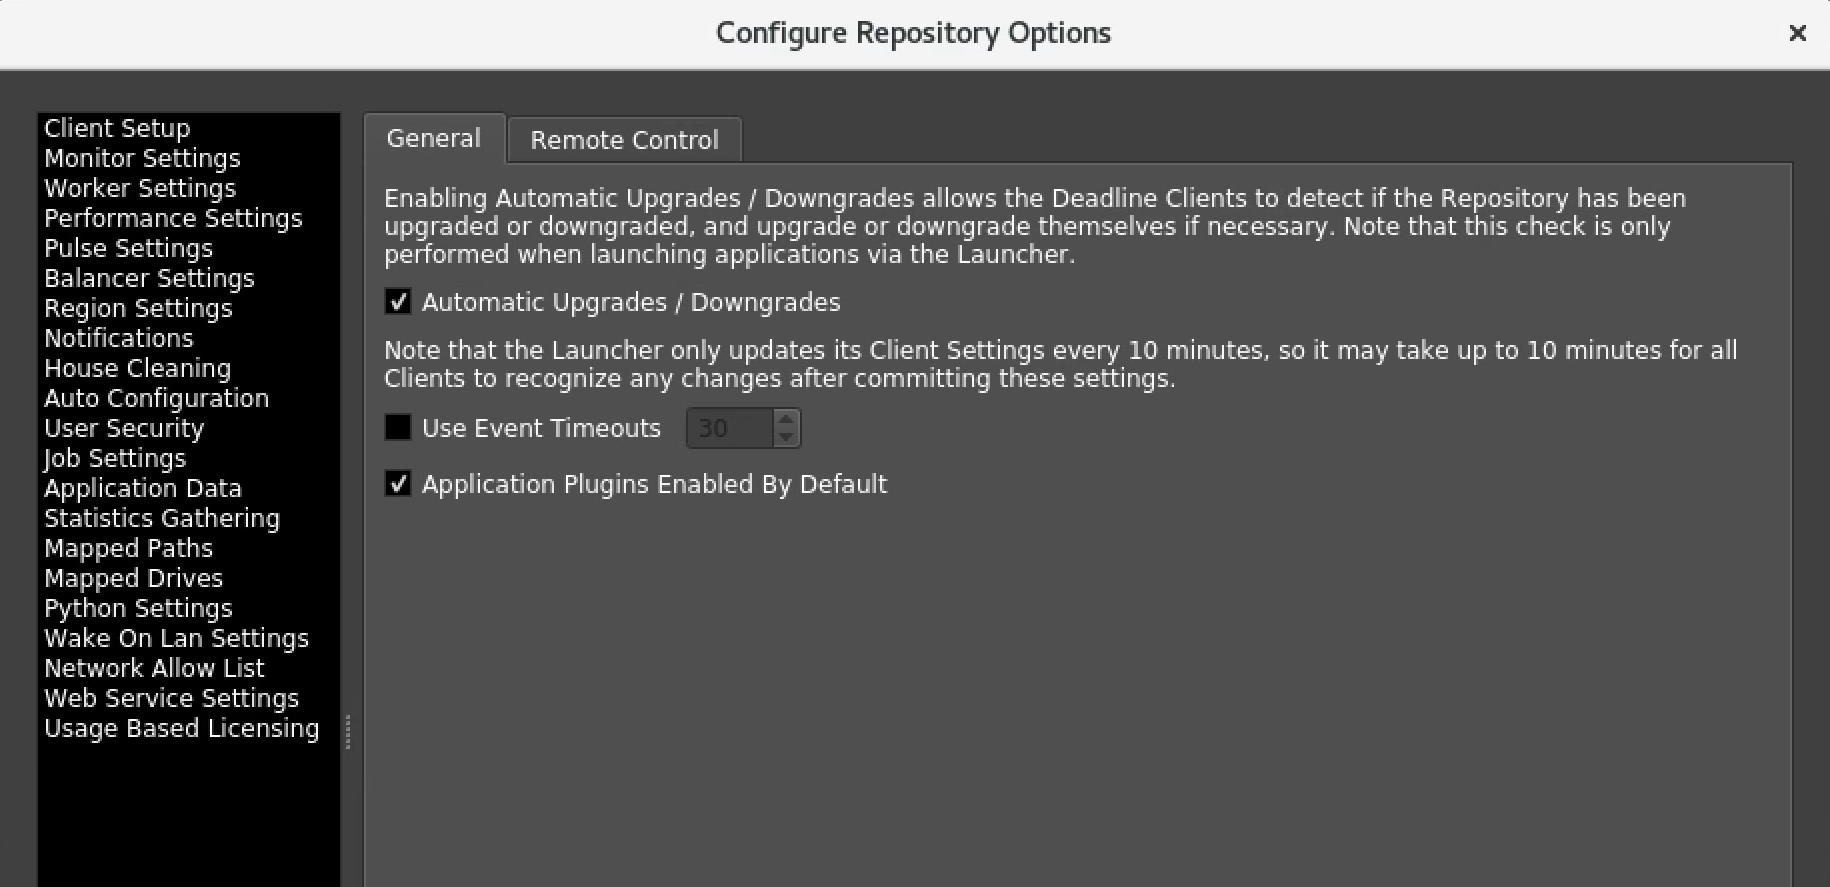
Client Setup
In the Client Setup section, under the General tab, select Automatic Upgrades / Downgrades.
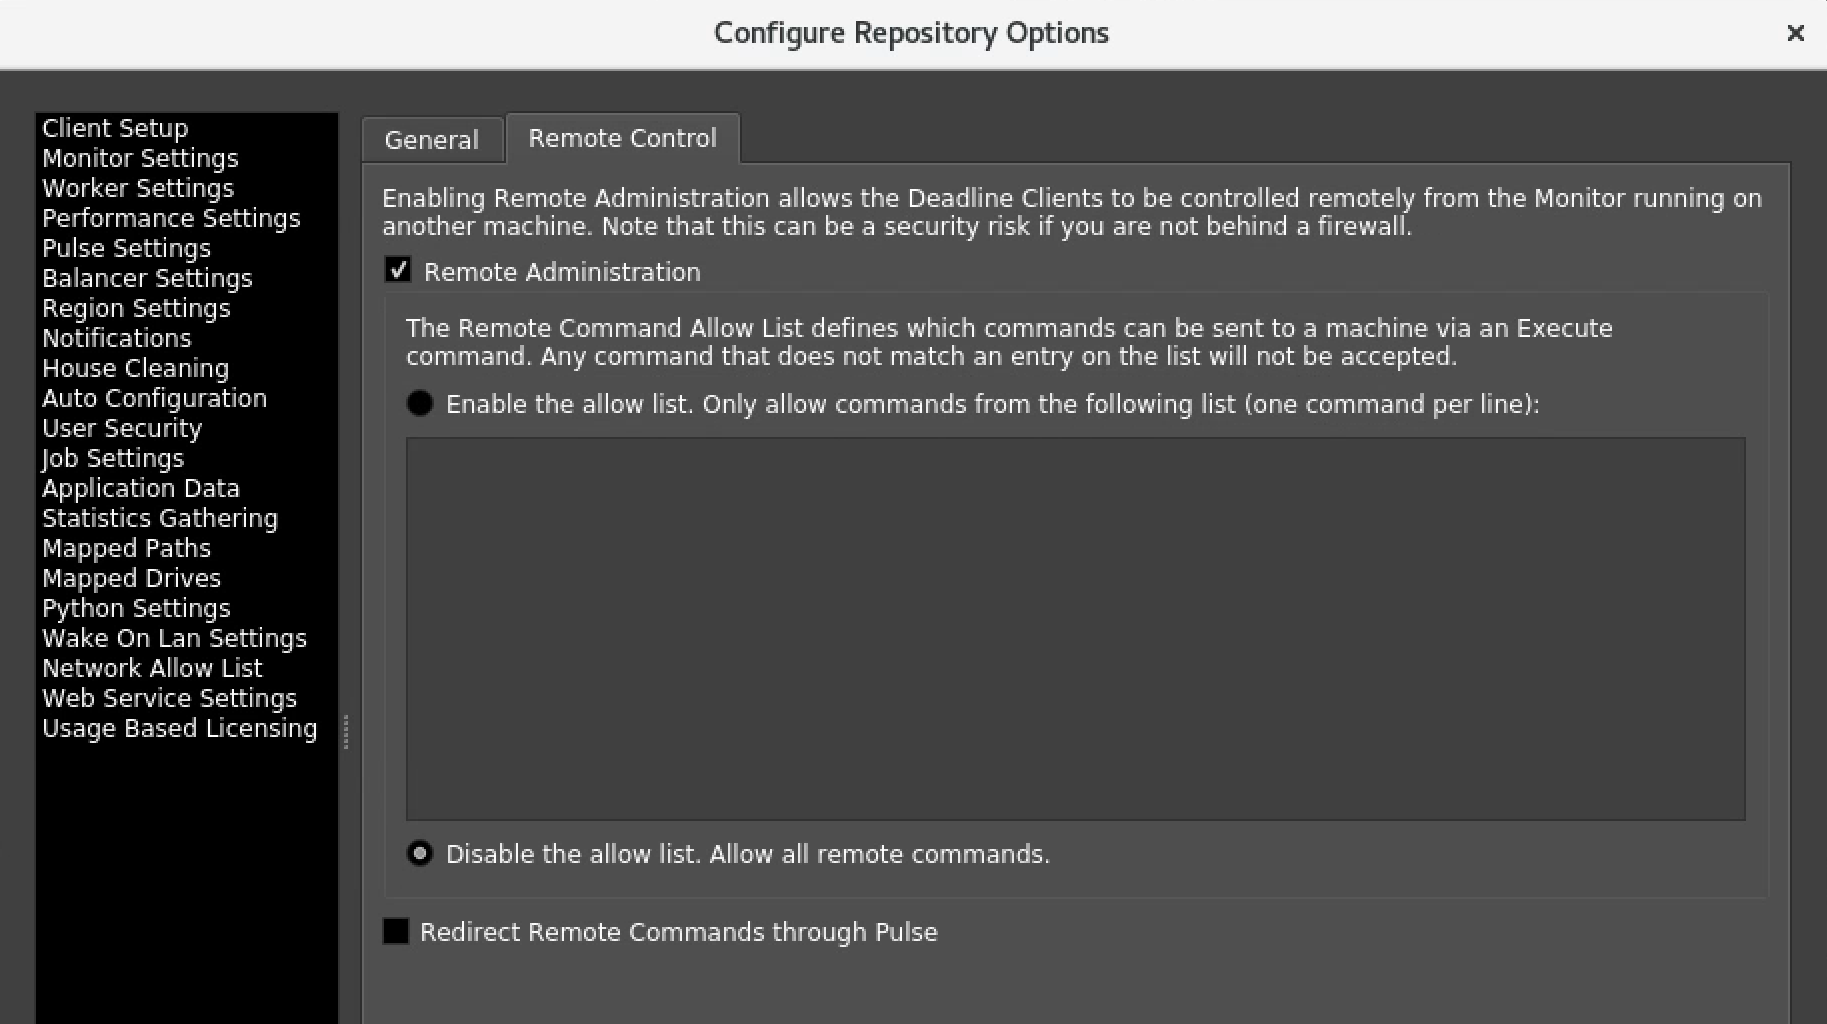
In the Client Setup section, under the Remote Control tab, select Remote Administration and Disable the allow list.
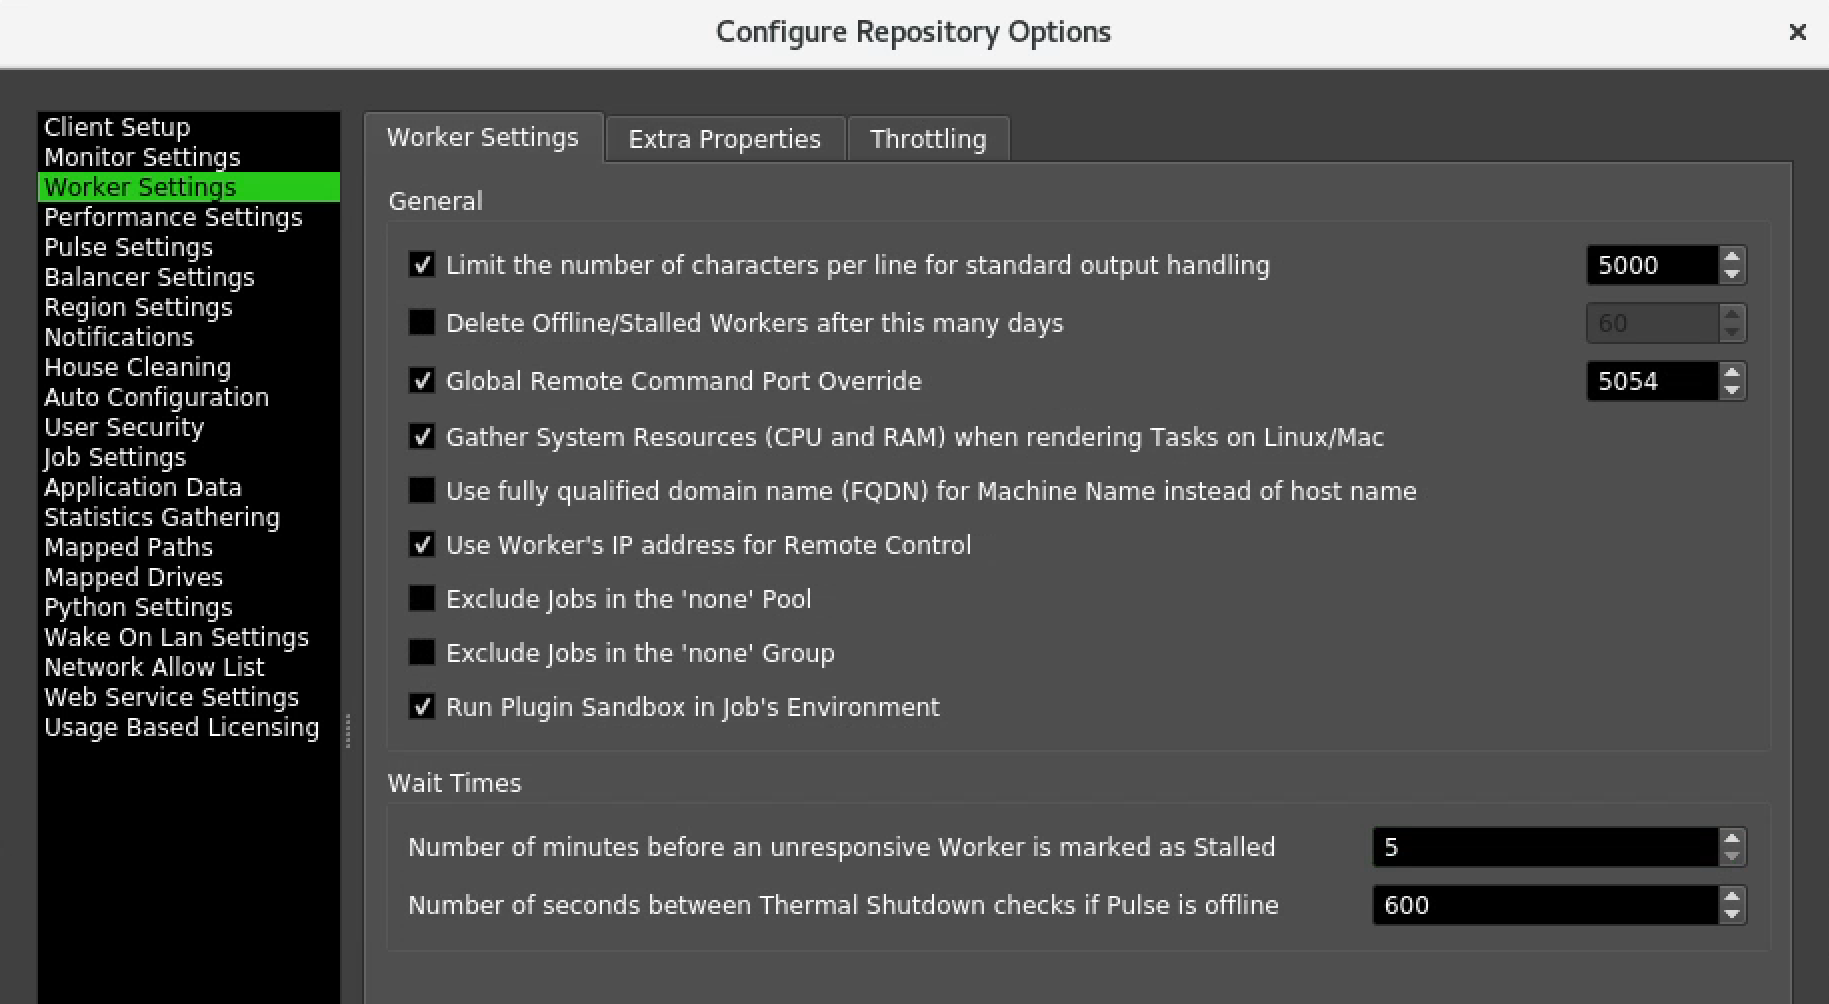
Worker Settings
Under Worker Settings, make sure that Global Remote Command Port Override, Use Worker’s IP address … and Number of minutes before … are set as indicated in the screen-grab below.
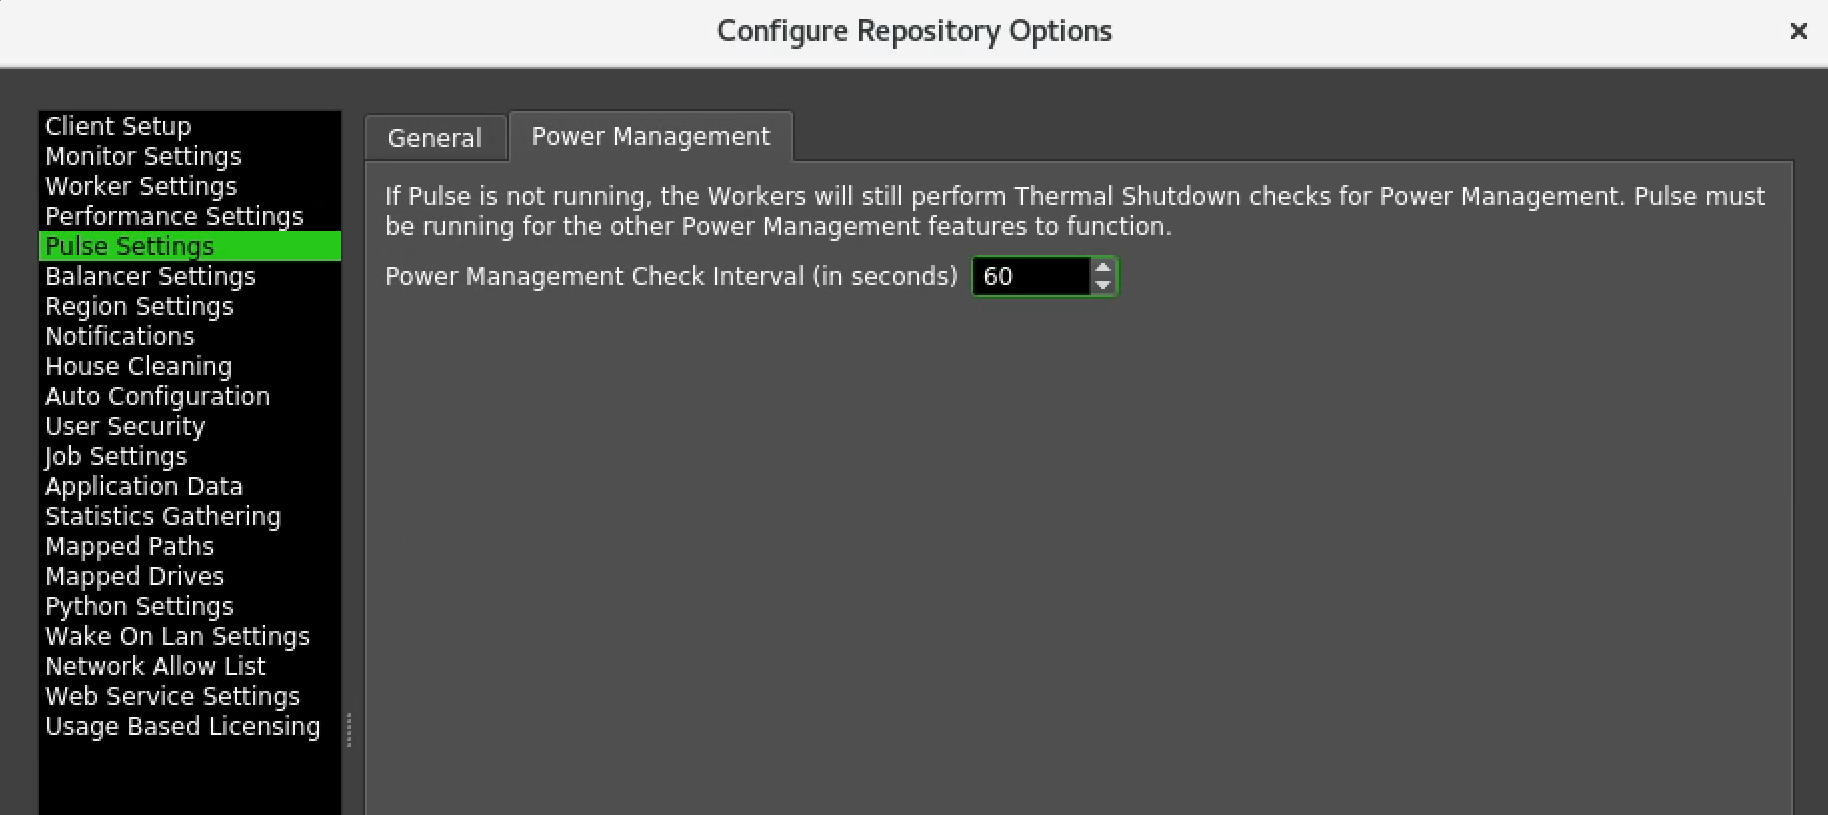
Pulse Settings
Under Pulse Settings in the General tab, make sure that Global Remote … and Use Pulse’s IP Address … are set as in the example below.

Under Pulse Settings in the Power Management tab, make sure that Power Management Check … is set to 60 as in the example below.
Options
Under Tools -> Options …
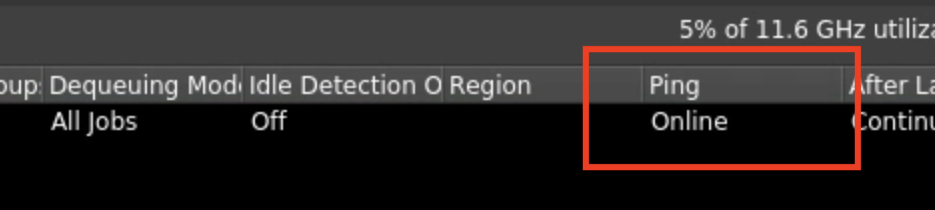
Make sure Enable Worker Pinging box is ticked.
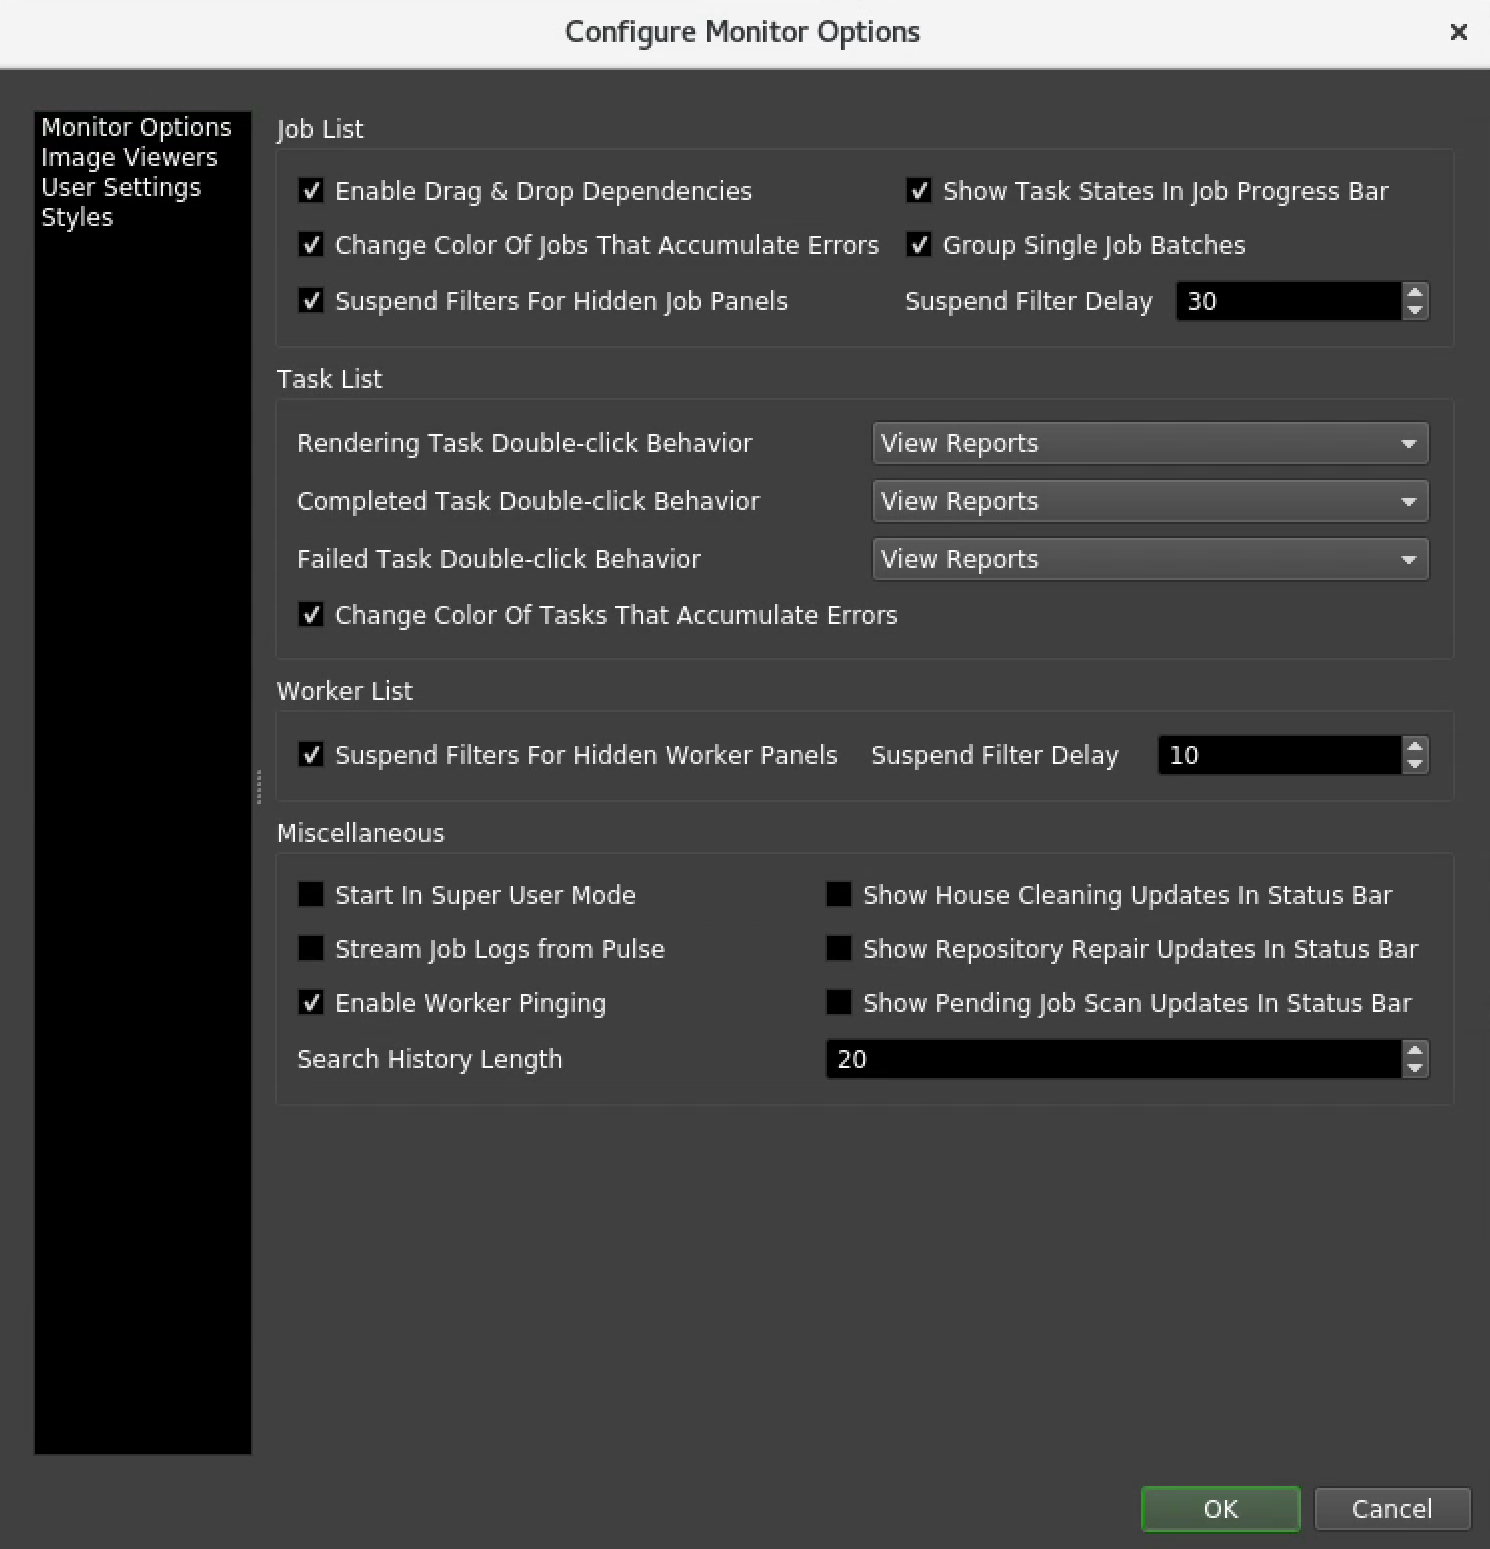
The above will let you see quickly whether a render node/worker is contactable.
Power Management
There is a Sherpa Deadline Event plugin which helps minimise your spend on render nodes by turning on existing render nodes when they are required and turning them off when they are not required.
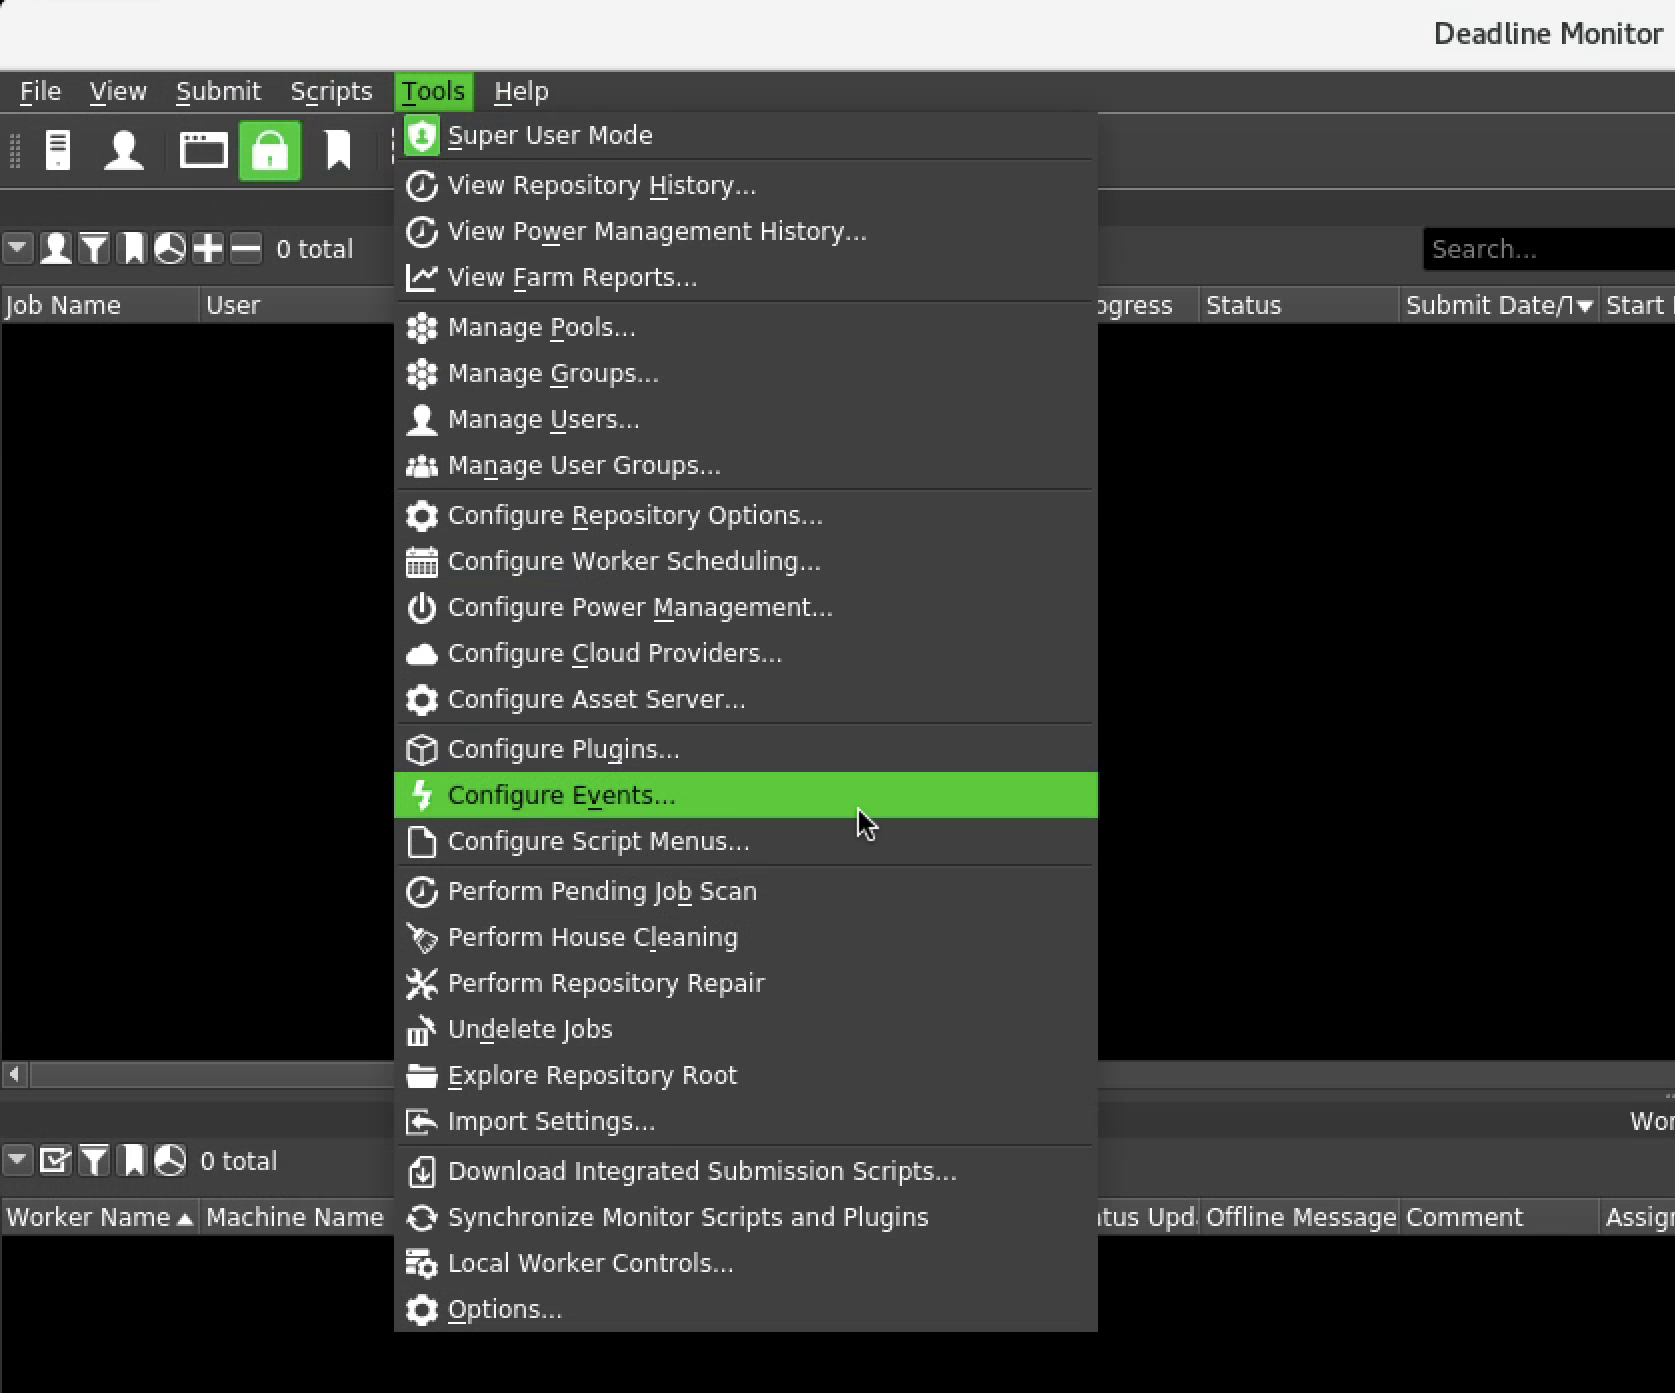
To access the Sherpa Event plugin click on Tools/Configure Events…
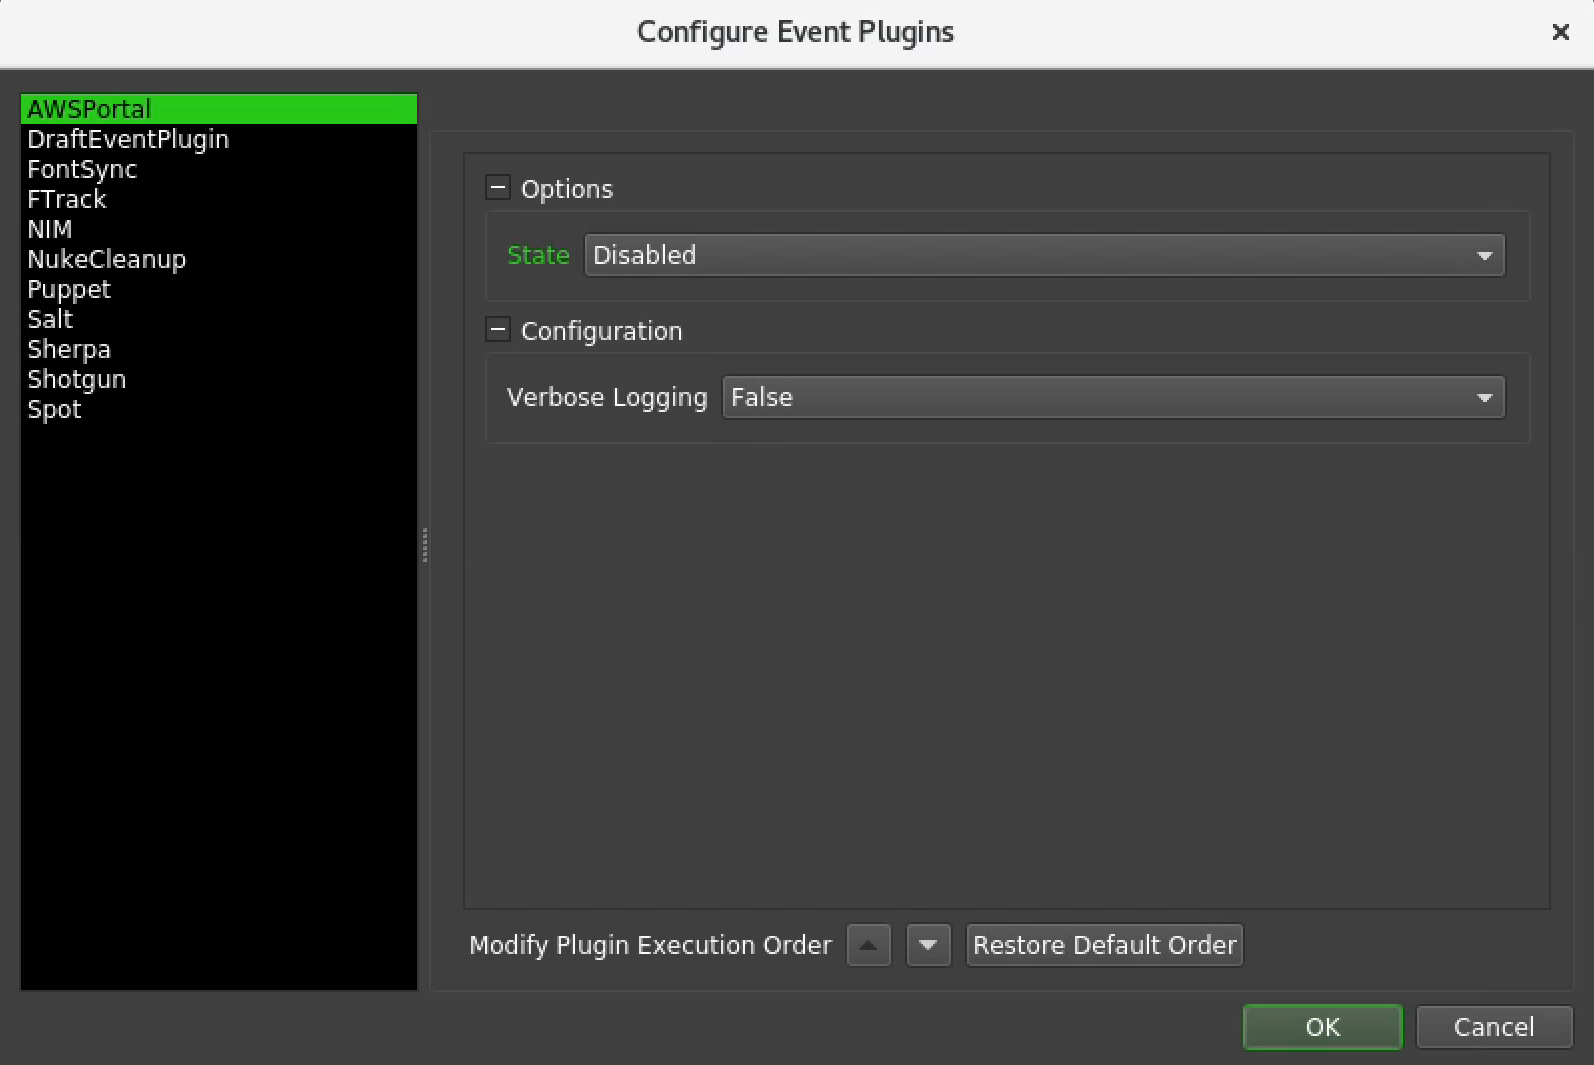
Disable AWSPortal
Disable AWS Portal by setting the State to be Disabled.
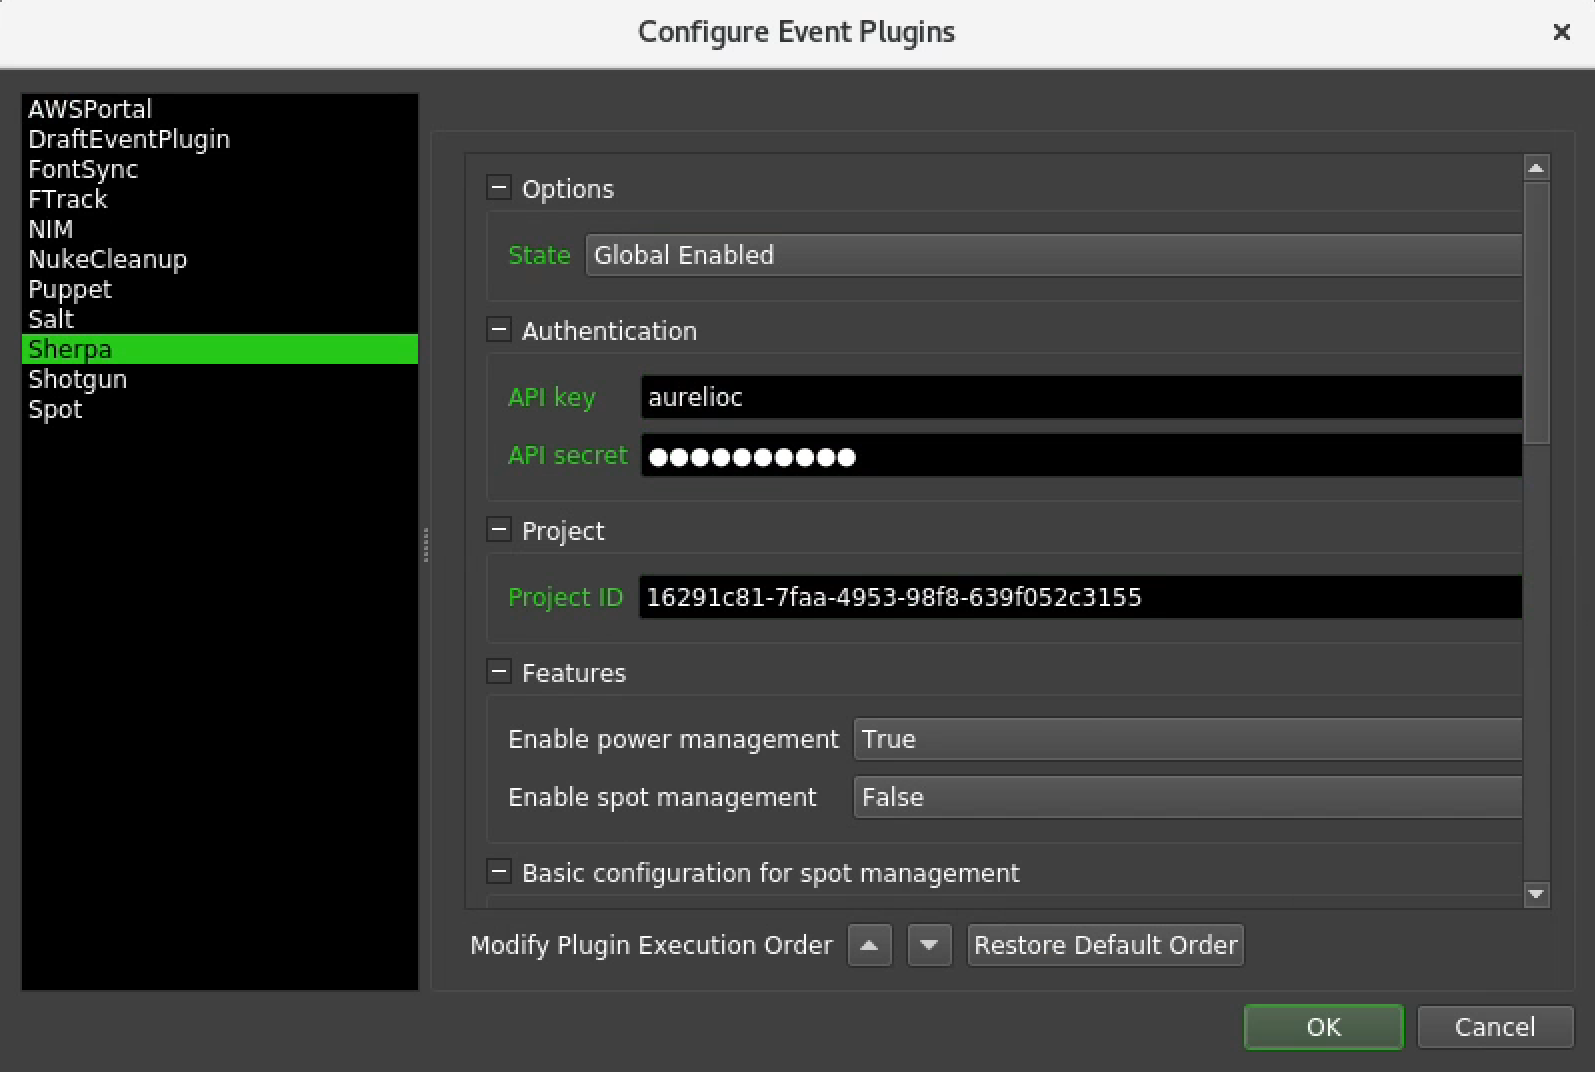
Configure Sherpa Event plugin
Make sure you have set the following correctly as per the screen-grab below.
- State: Globally Enabled
- API Key: This is your Sherpa admin username
- API secret: This is your Sherpa admin username password
- Project ID: This is the Sherpa project ID
Configure Power Management
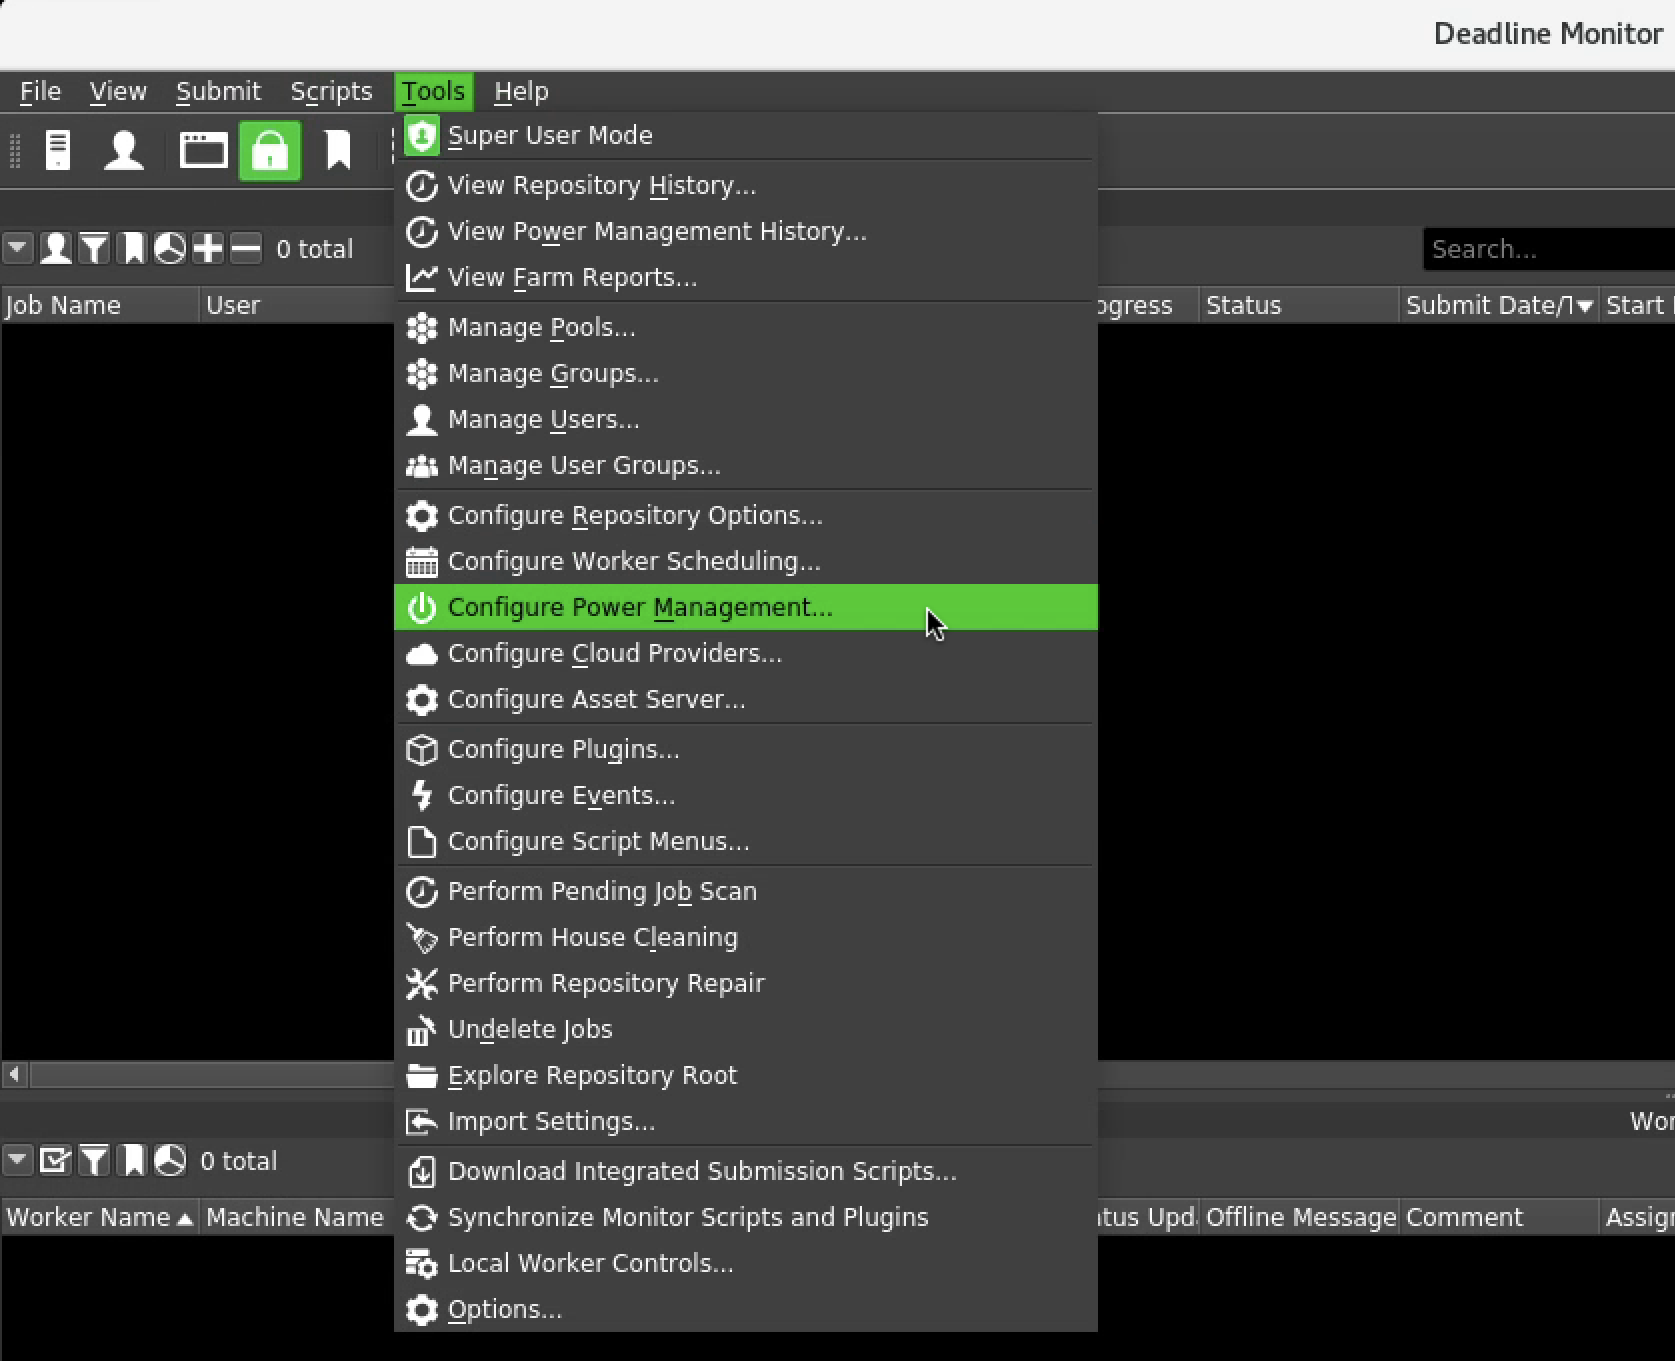
Select Tools -> Configure Power Management …
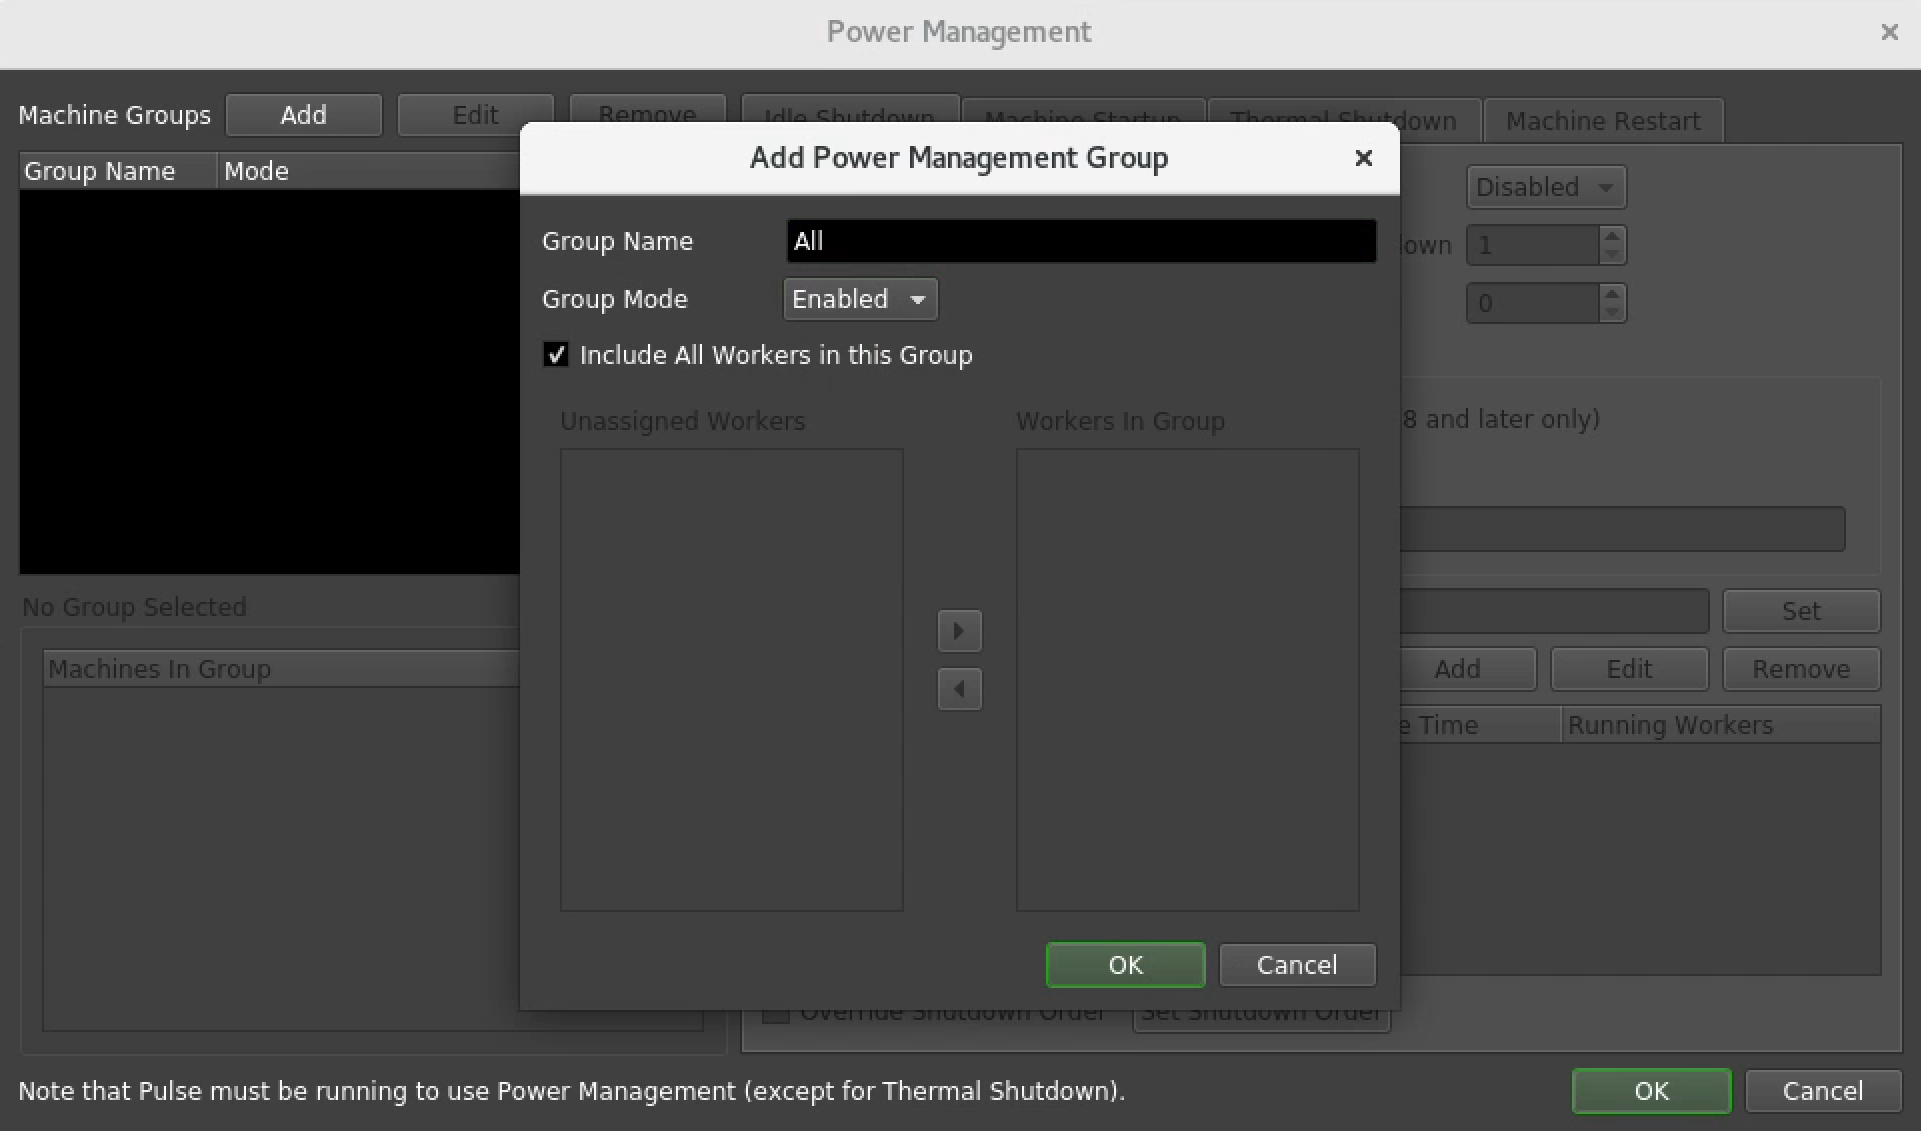
Add Power Management Group
You can list the render nodes individually but it can be easier just to specify a group that contains all the render nodes. Machine Groups -> Add
Make sure you have set the following correctly as per the screen-grab below.
- Group Name: All
- Group Mode: Enabled
- Include All Workers in this Group: Make sure this is enabled
Configure Idle Shutdown
Make sure you have set the following correctly as per the screen-grab below.
- Idle Shutdown Mode: Enabled
- Number of Minutes Before Idle Workers Will Be Shutdown: 30
- If you have a fixed number of render nodes then you can set this to something smaller like 5 minutes
- If you are building workstations in Sherpa and have this set too low, you run the risk of Deadline shutting down a workstation before it has been successfully built.
- Minimum Number of Workers to Leave Running: 0

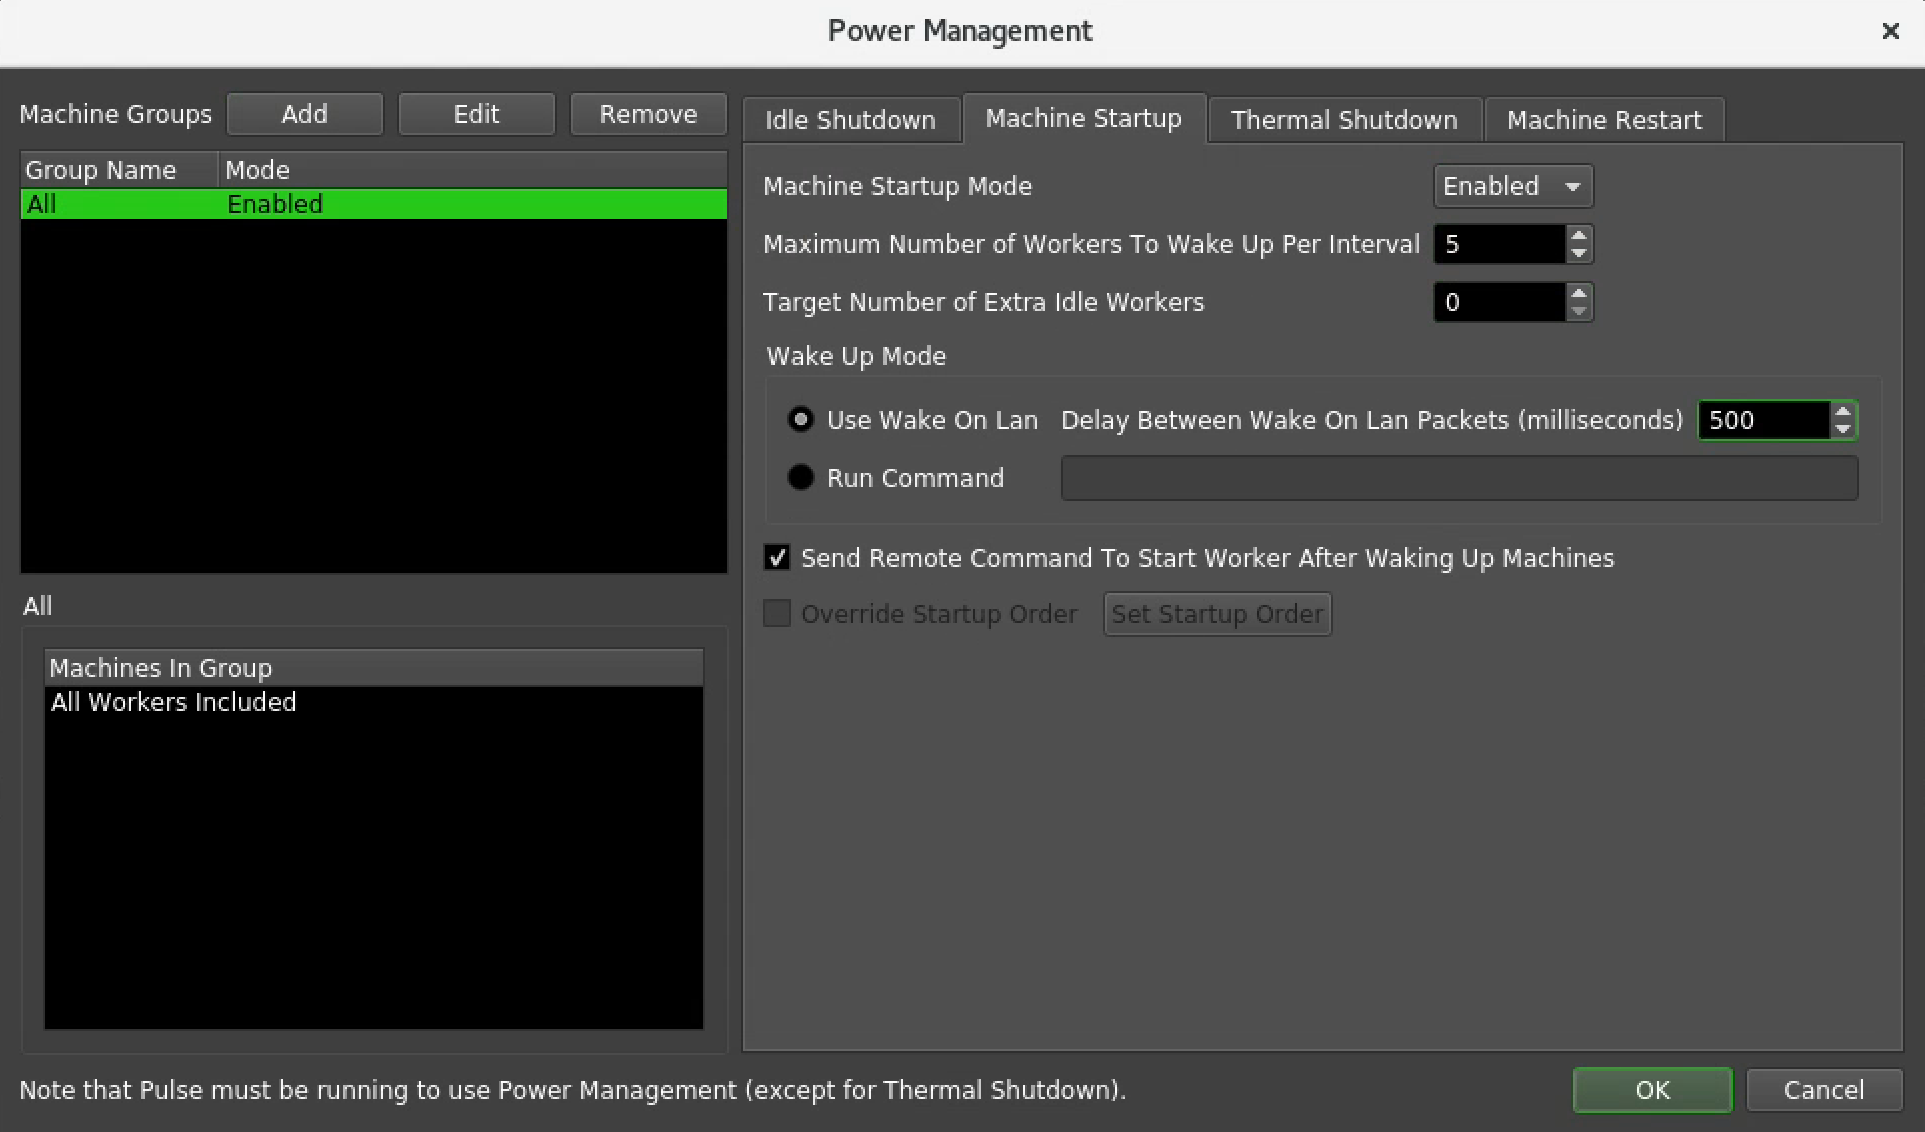
Configure Machine Startup
Make sure you have set the following correctly as per the screen-grab below.
- Machine startup Mode: Enabled
- Maximum Number of Workers to Wake Up Per Interval: 5
- Further up in this documentation we set the Interval to be 60 secs.
- Hence, if there were jobs in the Deadline queue waiting to be executed, the above settings would result in 5 existing render nodes being turned on every 60 secs.
- Target Number of Extra Idle Workers: 0
Post configuration
Configuration update
Configuration changes percolate through the system and can take up to 10 mins to take effect. The safest way to make sure that your configuration changes have taken effect is to stop the Deadline server, wait a couple of minutes and then start it up again. Use the following procedure.
- Shut down all the render nodes in Sherpa
- In the Deadline Monitor GUI
- Select all the Workers
- Right-click and select Mark Worker as Offline
- Right Click and select Delete Workers
- In Sherpa, shut down the Render Manager and wait a couple of minutes
- When the Render Manager is off the Deadline Monitor GUI will become unresponsive
- In Sherpa, turn on the Render Manager
- Wait for the Deadline Monitor GUI to become responsive again
- Turn on all the render nodes in Sherpa
Idle Shutdown in action
If you successfully configured power management then your system should behave as illustrated below.
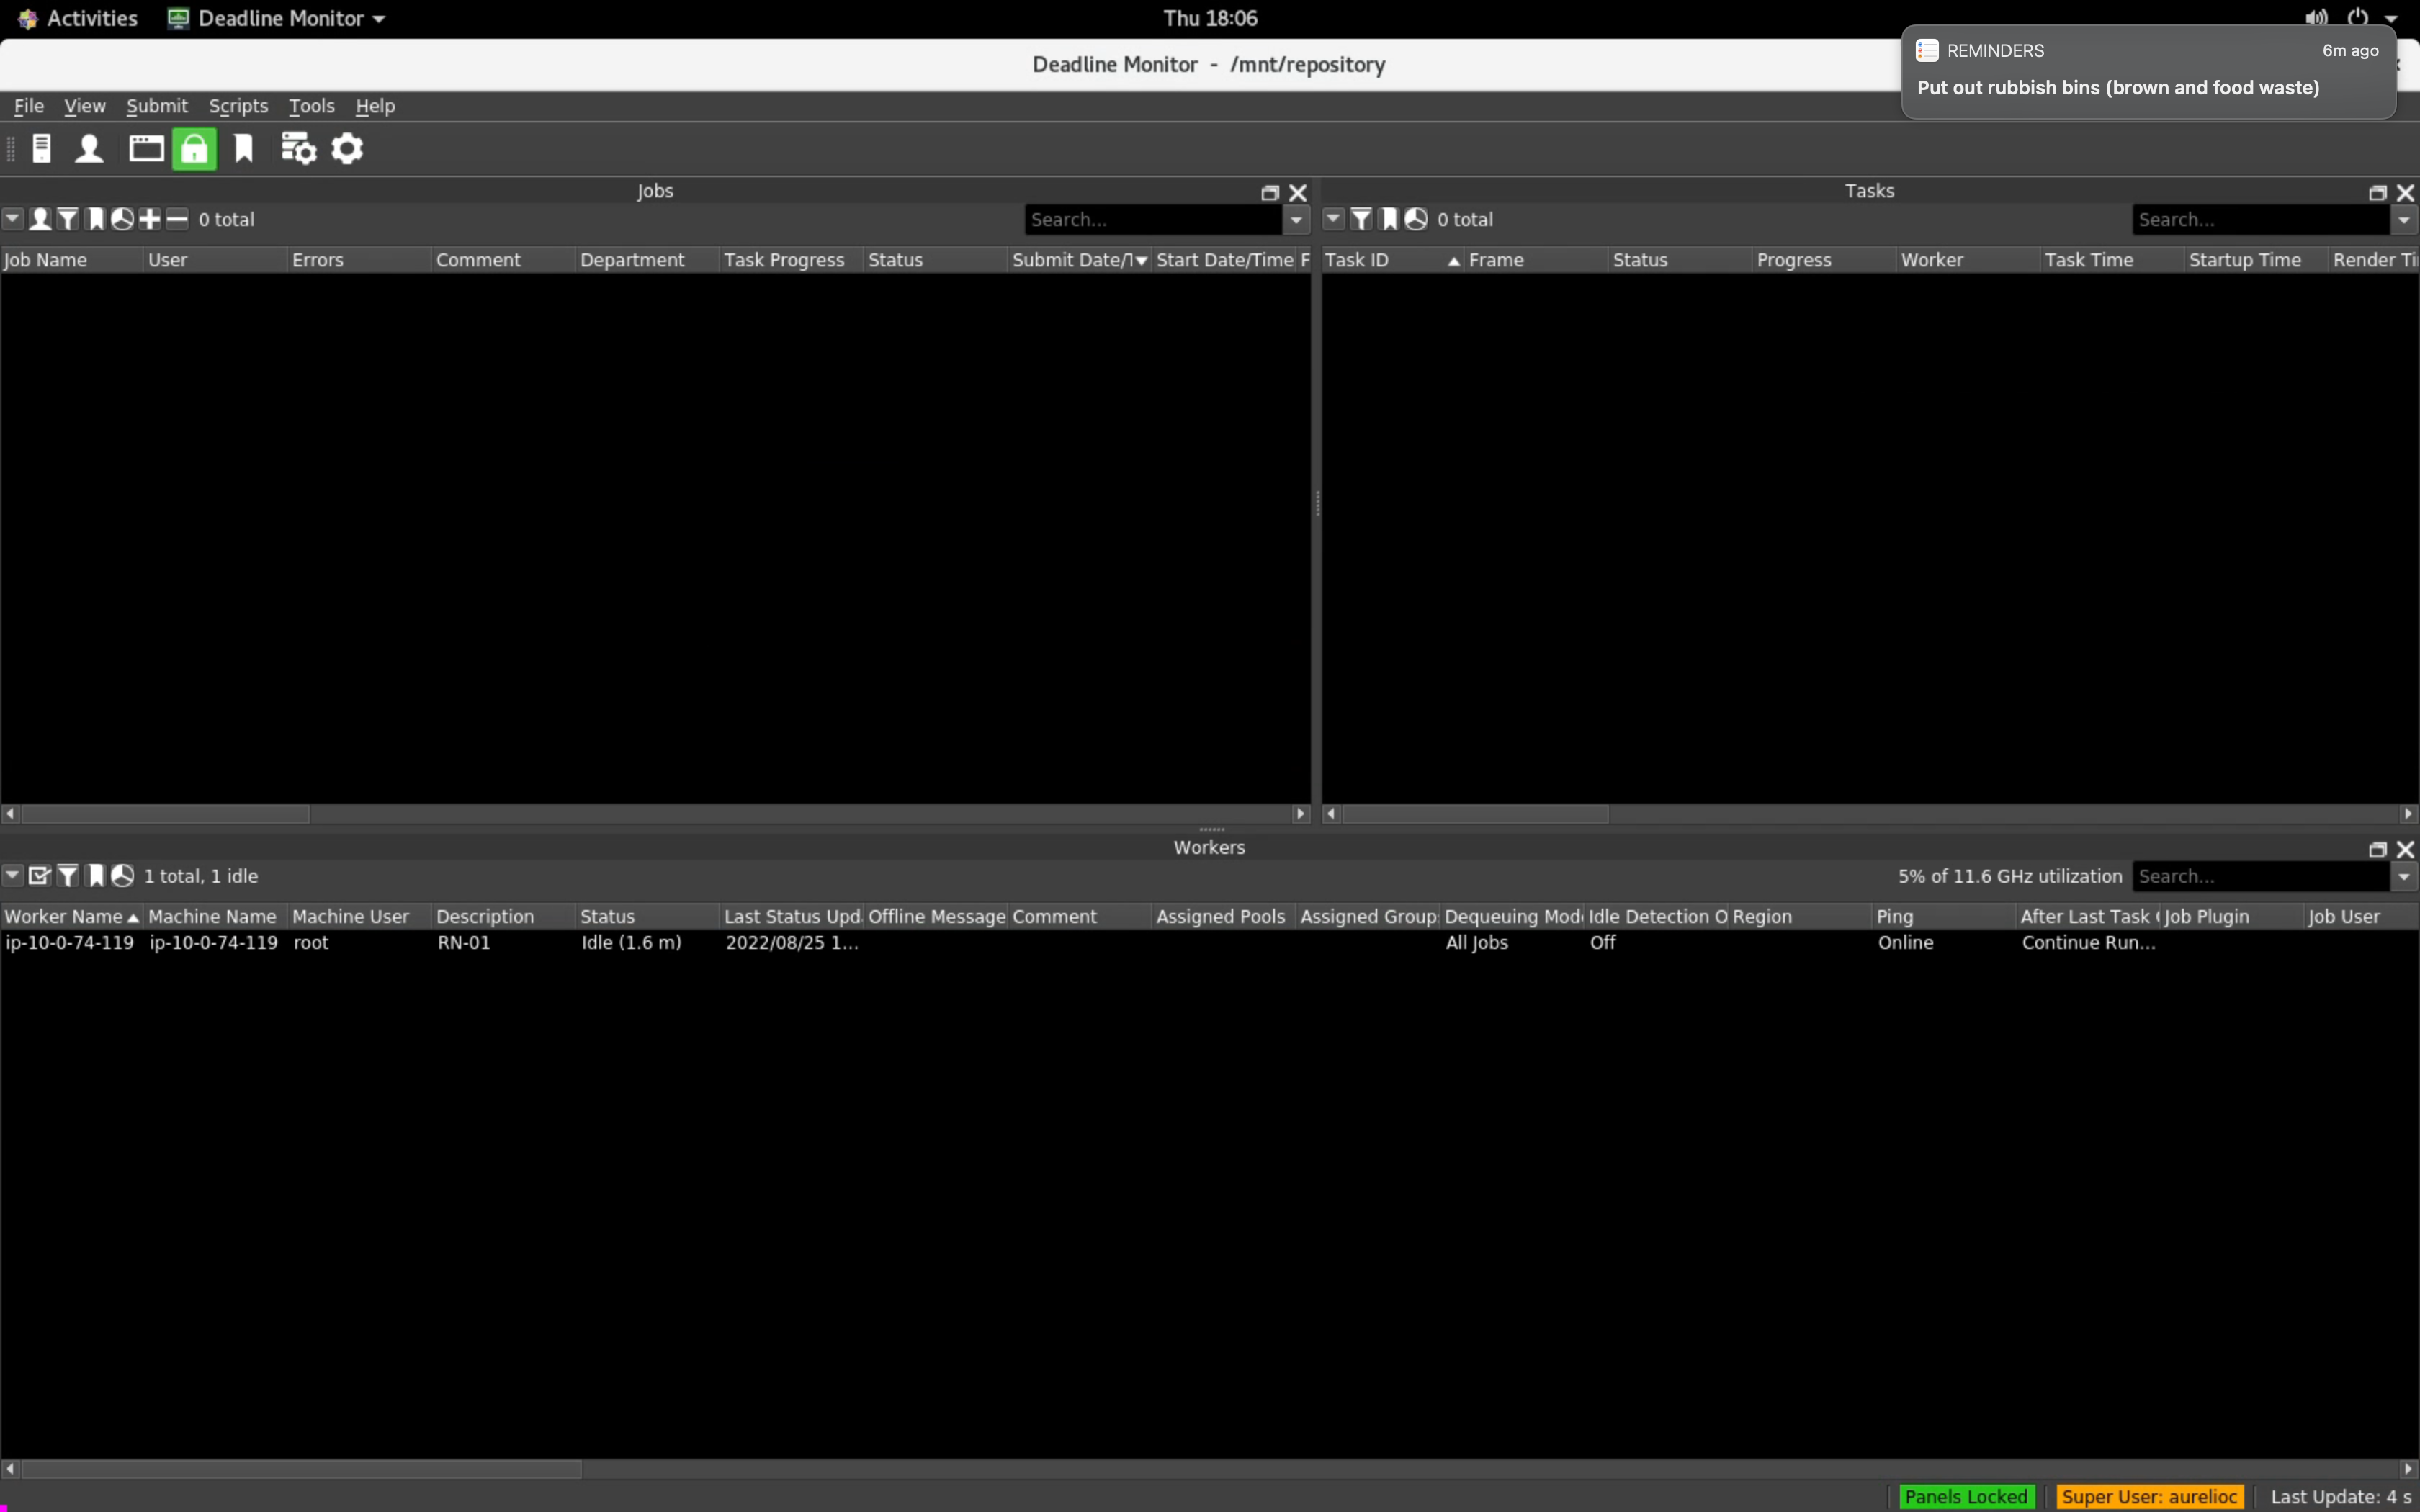
Zooming in on some of the important detail from the screen-grab above …
A. The render node is on-line and pingable.
B. The node has successfully checked in with the Sherpa Event plugin and its Sherpa name appears in the description field in the Deadline monitor worker view.
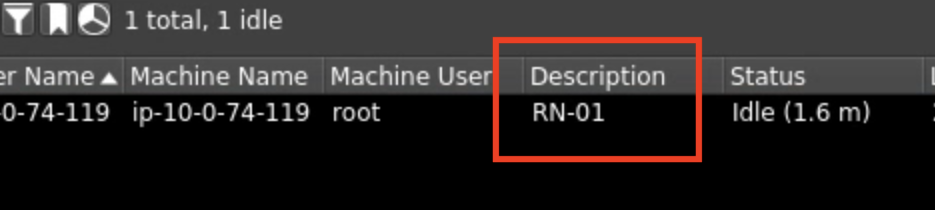
Note: If you do not see the name of the render node in this column then you have probably mistyped something when running through the Configure Sherpa Event plugin section earlier in this document.
C. The render node has been idle for 1.6 minutes.
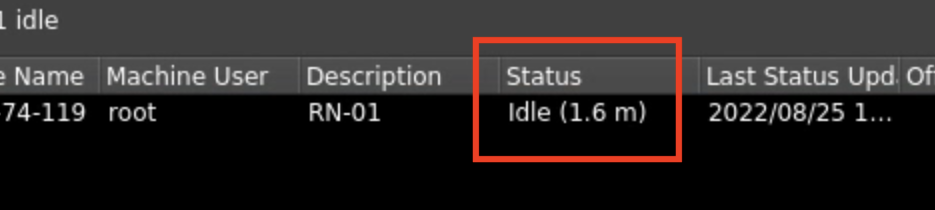
In the example below I have set the Idle Shutdown time to be 2 minutes.

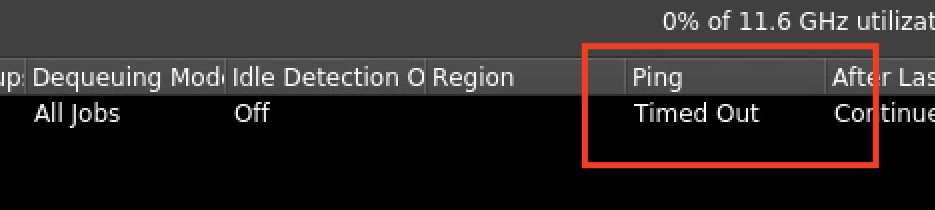
Hence after 2.5 minutes the render node has been switched off and is now being reported as Timed Out.
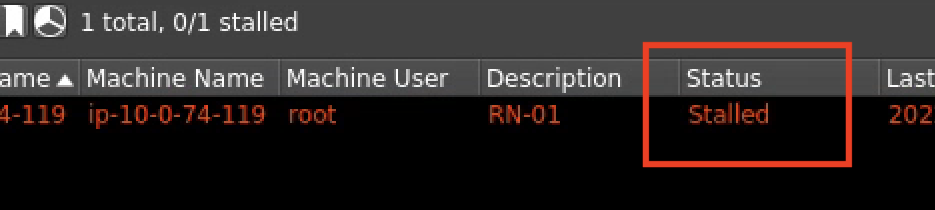
During the configuration process we set the Number of minutes before an unresponsive Worker is marked as Stalled to 5 mins.
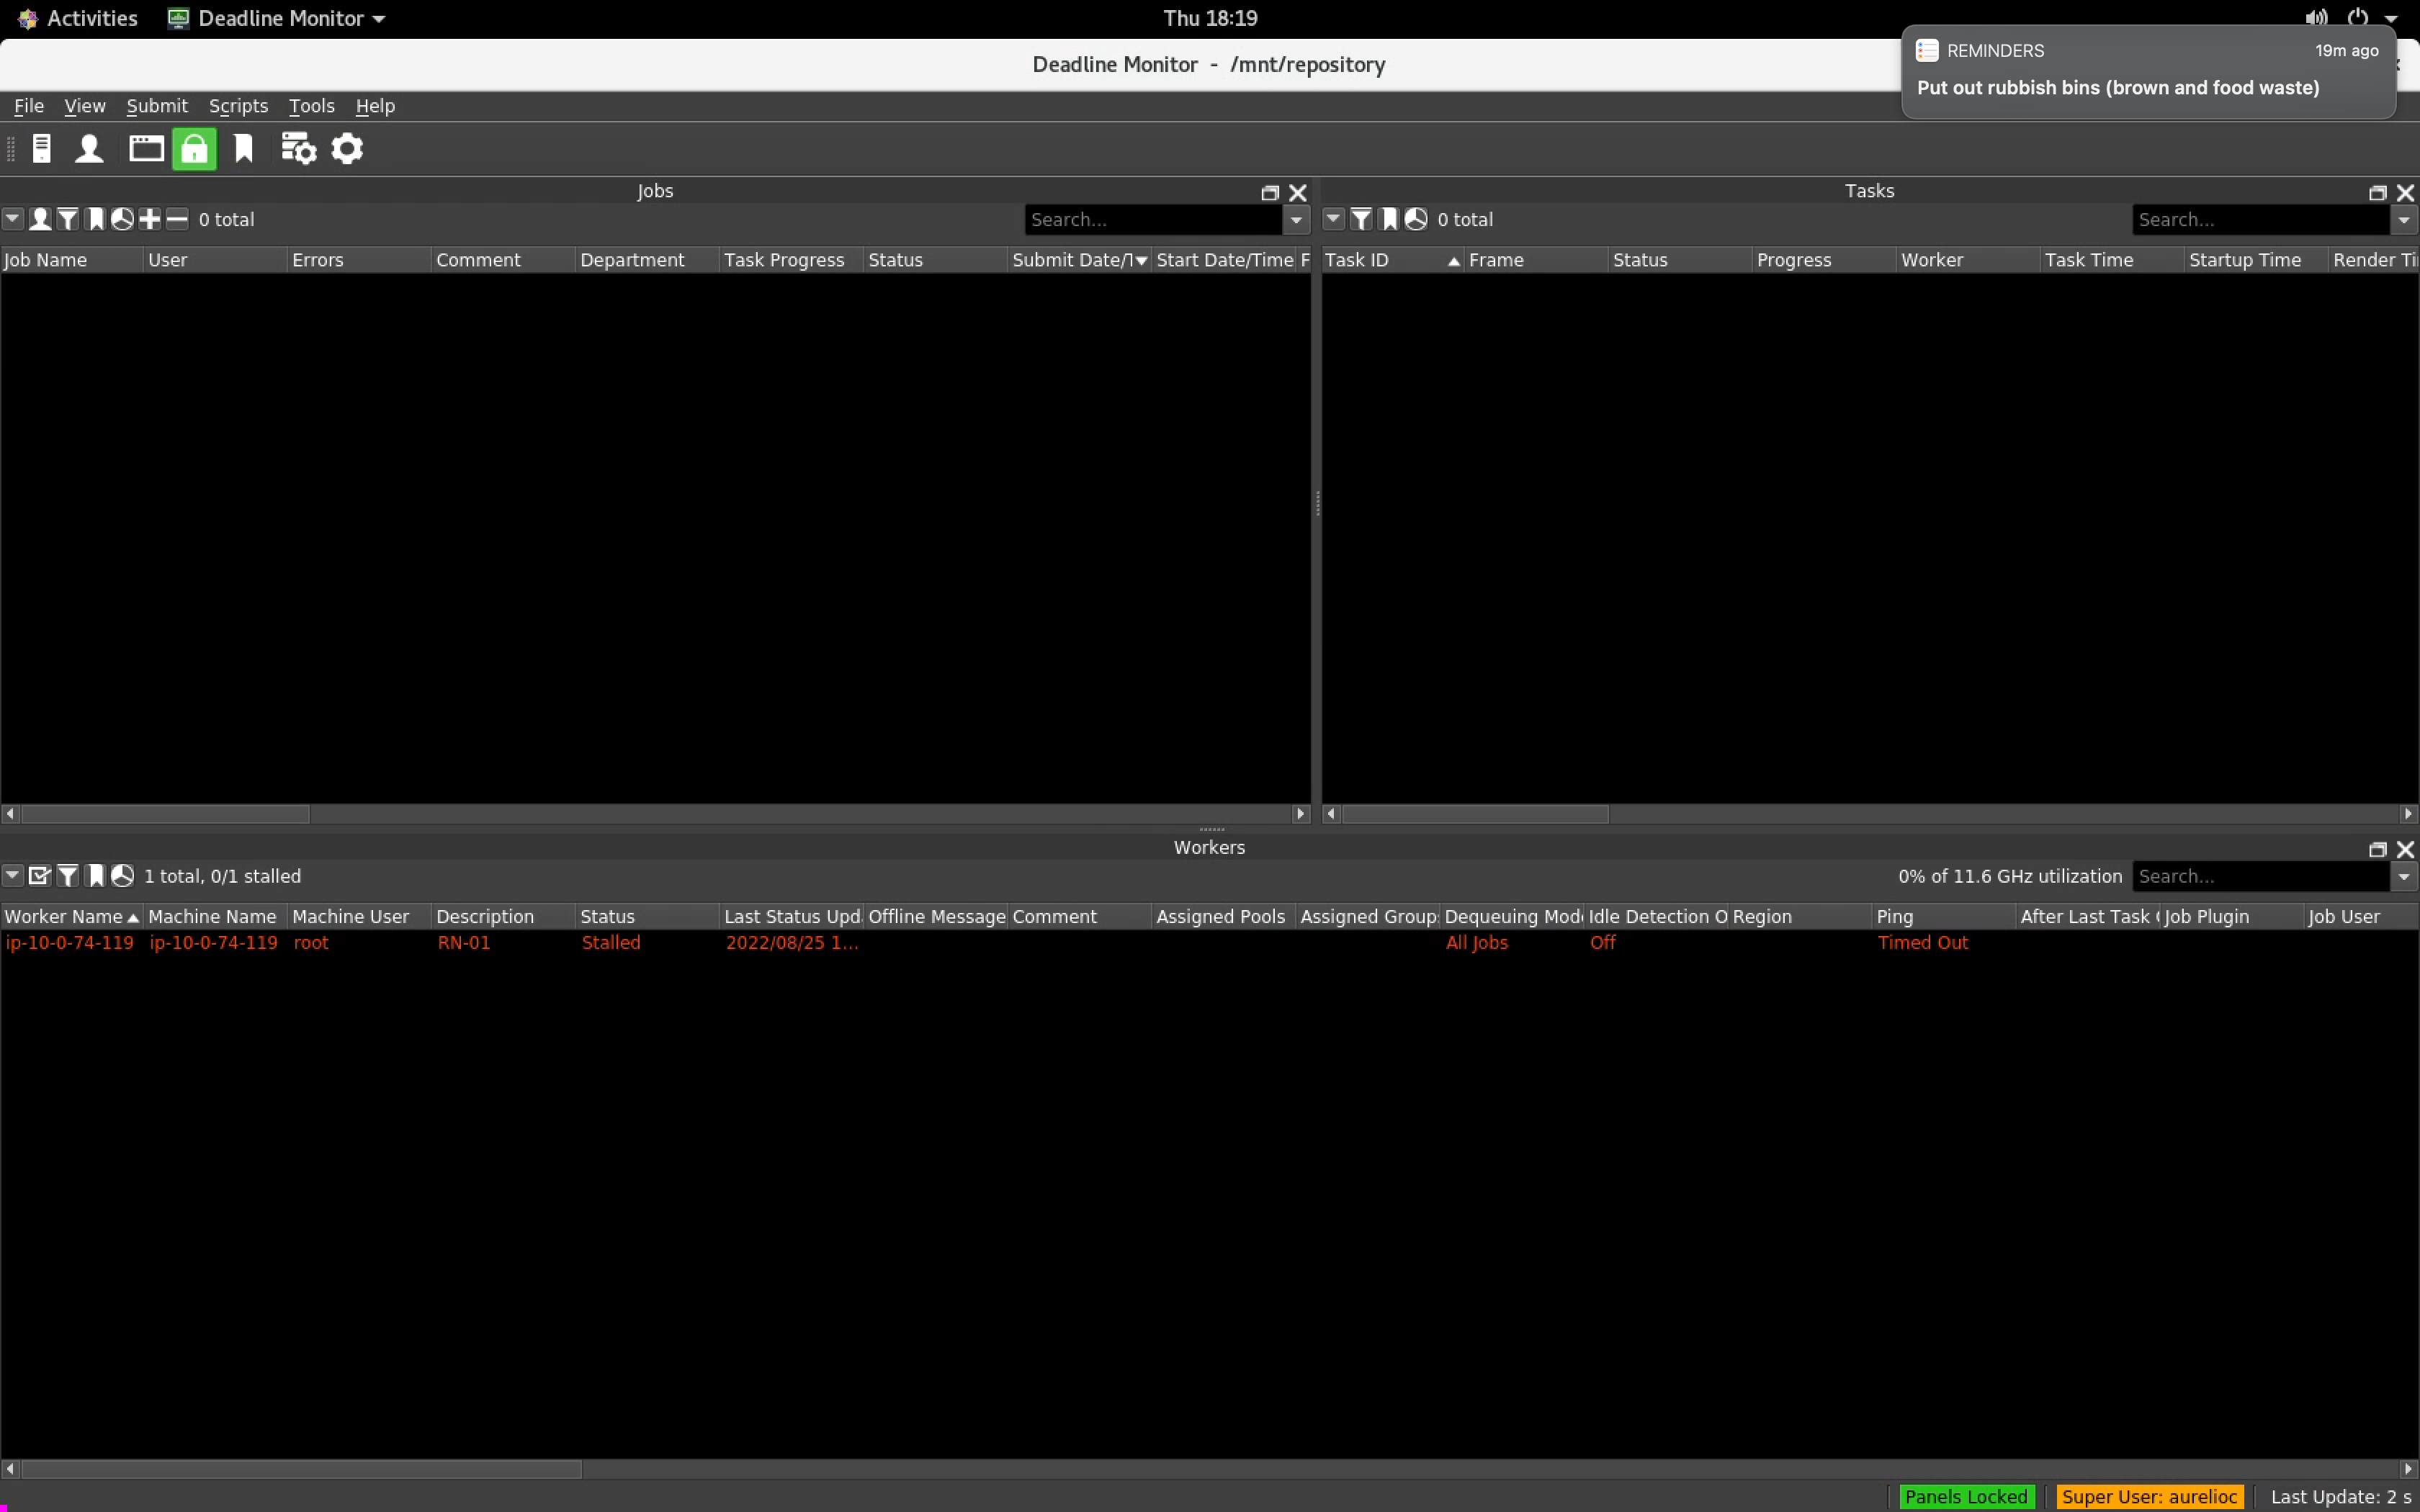
So 5 minutes later the render node turns red and gets marked as Stalled (or Offline).
If your list of Workers gets messy, you can delete any stalled Workers from the list. When you turn the render nodes on again in Sherpa they will check in with Deadline and the Sherpa Event plugin and they will re-appear in the list of Workers in Deadline Monitor.